
The journey from a home baker’s wish for a larger oven to the active acquisition of specialized equipment marks a significant turning point in the pursuit of baking excellence. For many dedicated enthusiasts, the desire to produce more loaves at once, transitioning from hobbyist quantities to something approaching professional output, inevitably leads to a reevaluation of their tools. This transition is not merely about accommodating larger dough quantities; it’s a strategic move to enhance efficiency, allowing bakers to dedicate more focus to the nuanced aspects of their craft, such as flavor development, precise fermentation control, dough handling techniques, and artistic shaping. The Rofco bread oven has emerged as a natural and increasingly popular progression for those looking to scale up their home baking operations.
This guide delves into the specifics of the Rofco oven, a Belgian-engineered brick oven designed with the serious home baker in mind. It aims to provide a comprehensive resource for individuals who have either reached this critical juncture in their baking evolution or are considering it. Whether the motivation is to supply bread for large gatherings, explore the potential of a nano or micro-bakery, or simply to increase home production, understanding the capabilities and operational nuances of a Rofco oven is paramount. This article will outline the essential tools, optimal temperatures, baking times, and other crucial tips gleaned from practical experience, offering a roadmap for both prospective and current Rofco users.
Understanding the Rofco Bread Oven: A Professional Tool for the Home
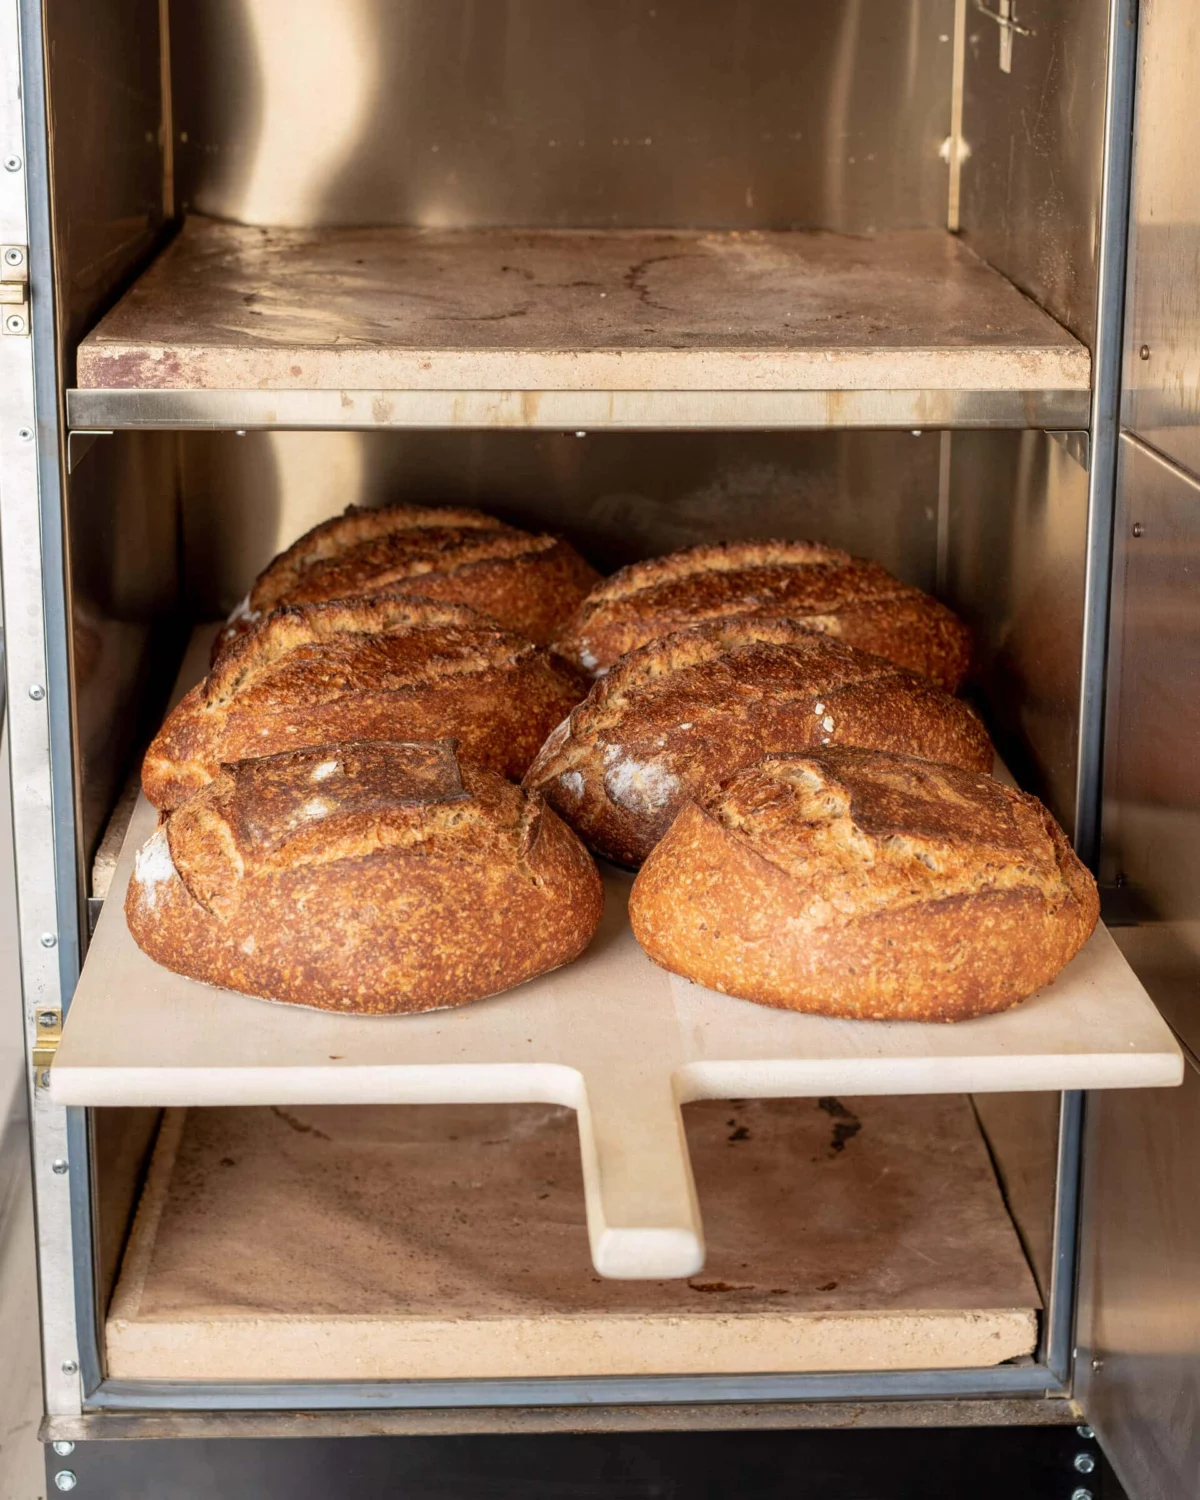
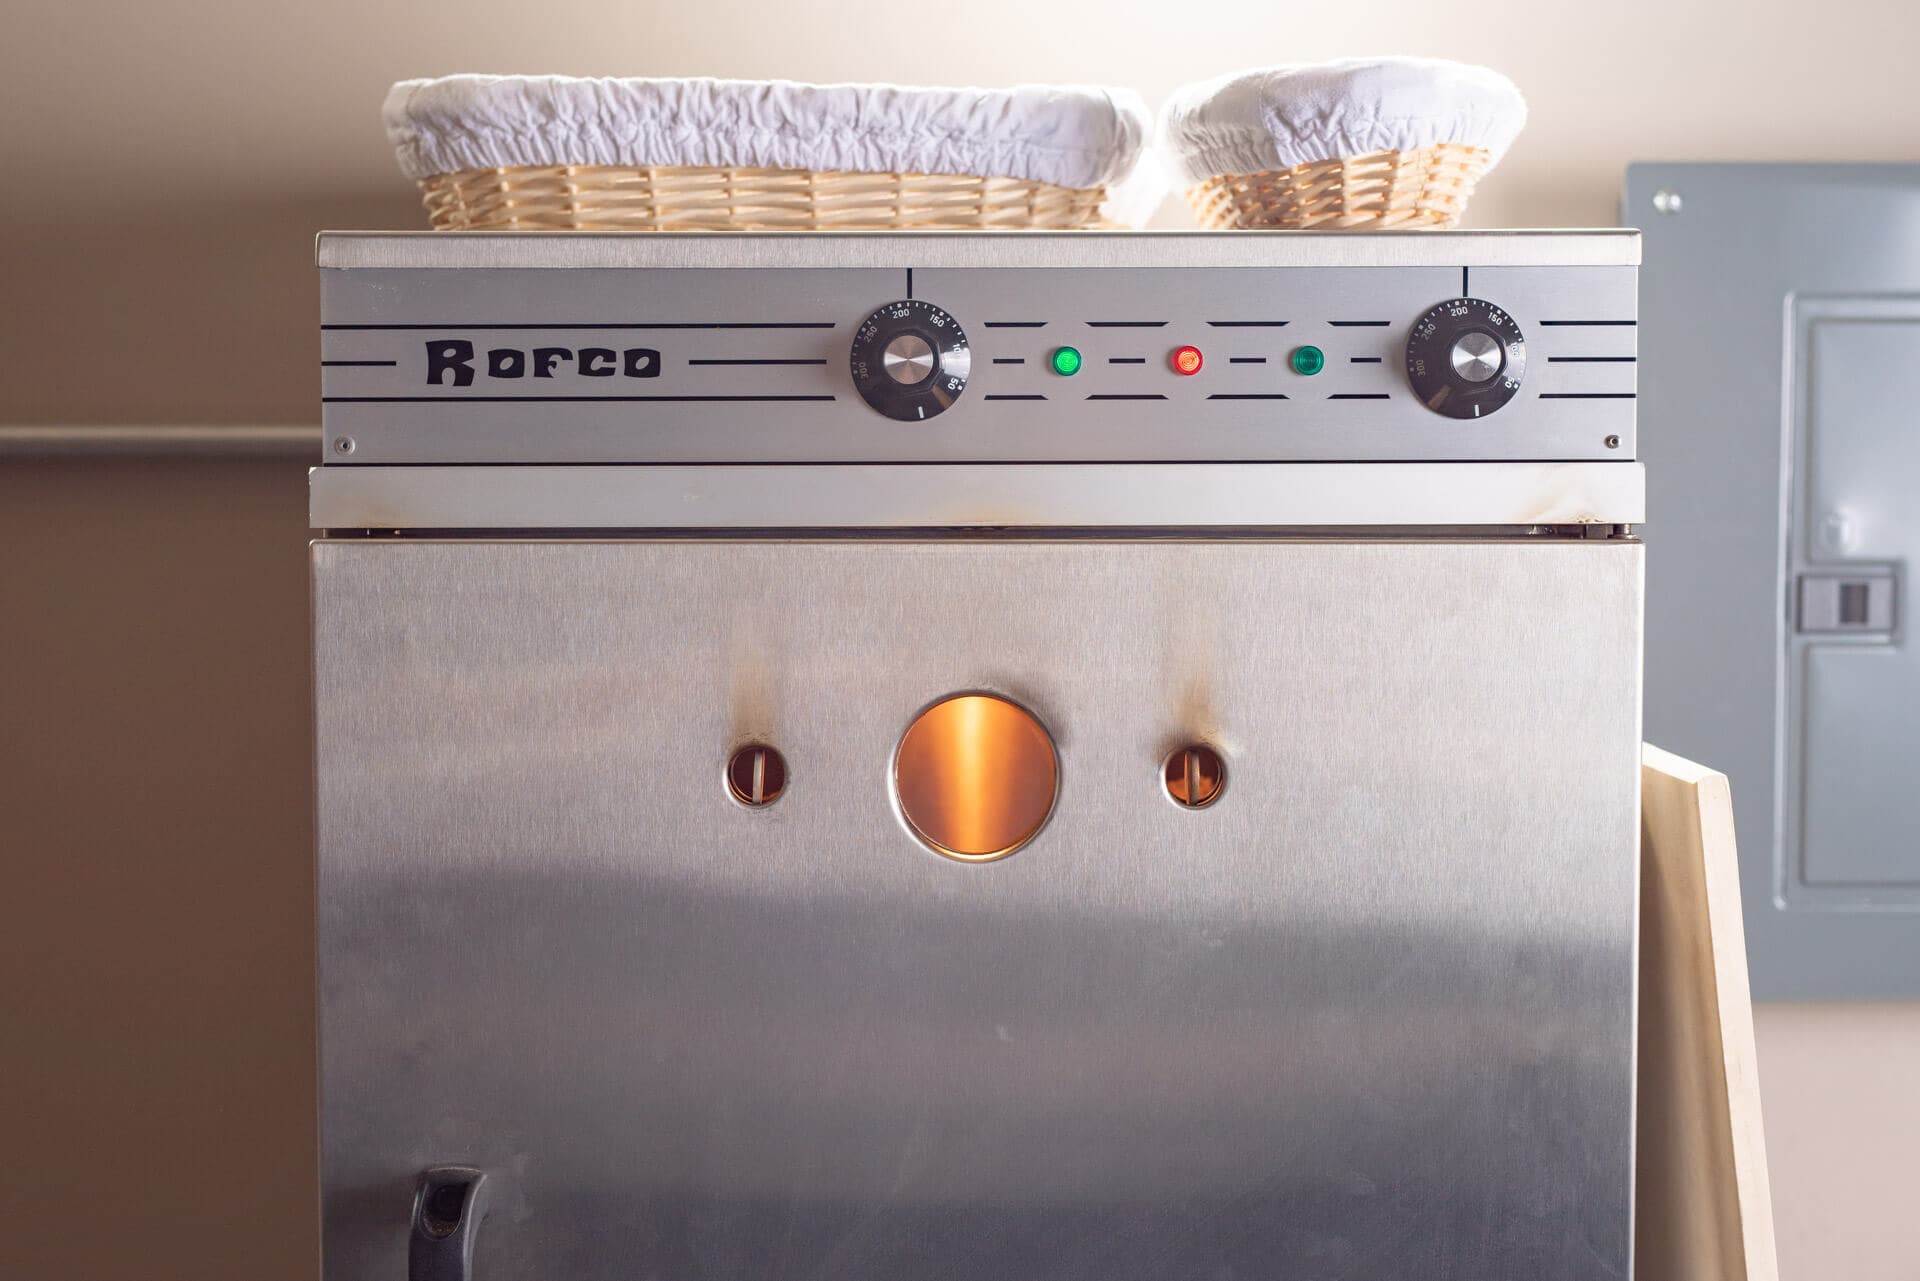
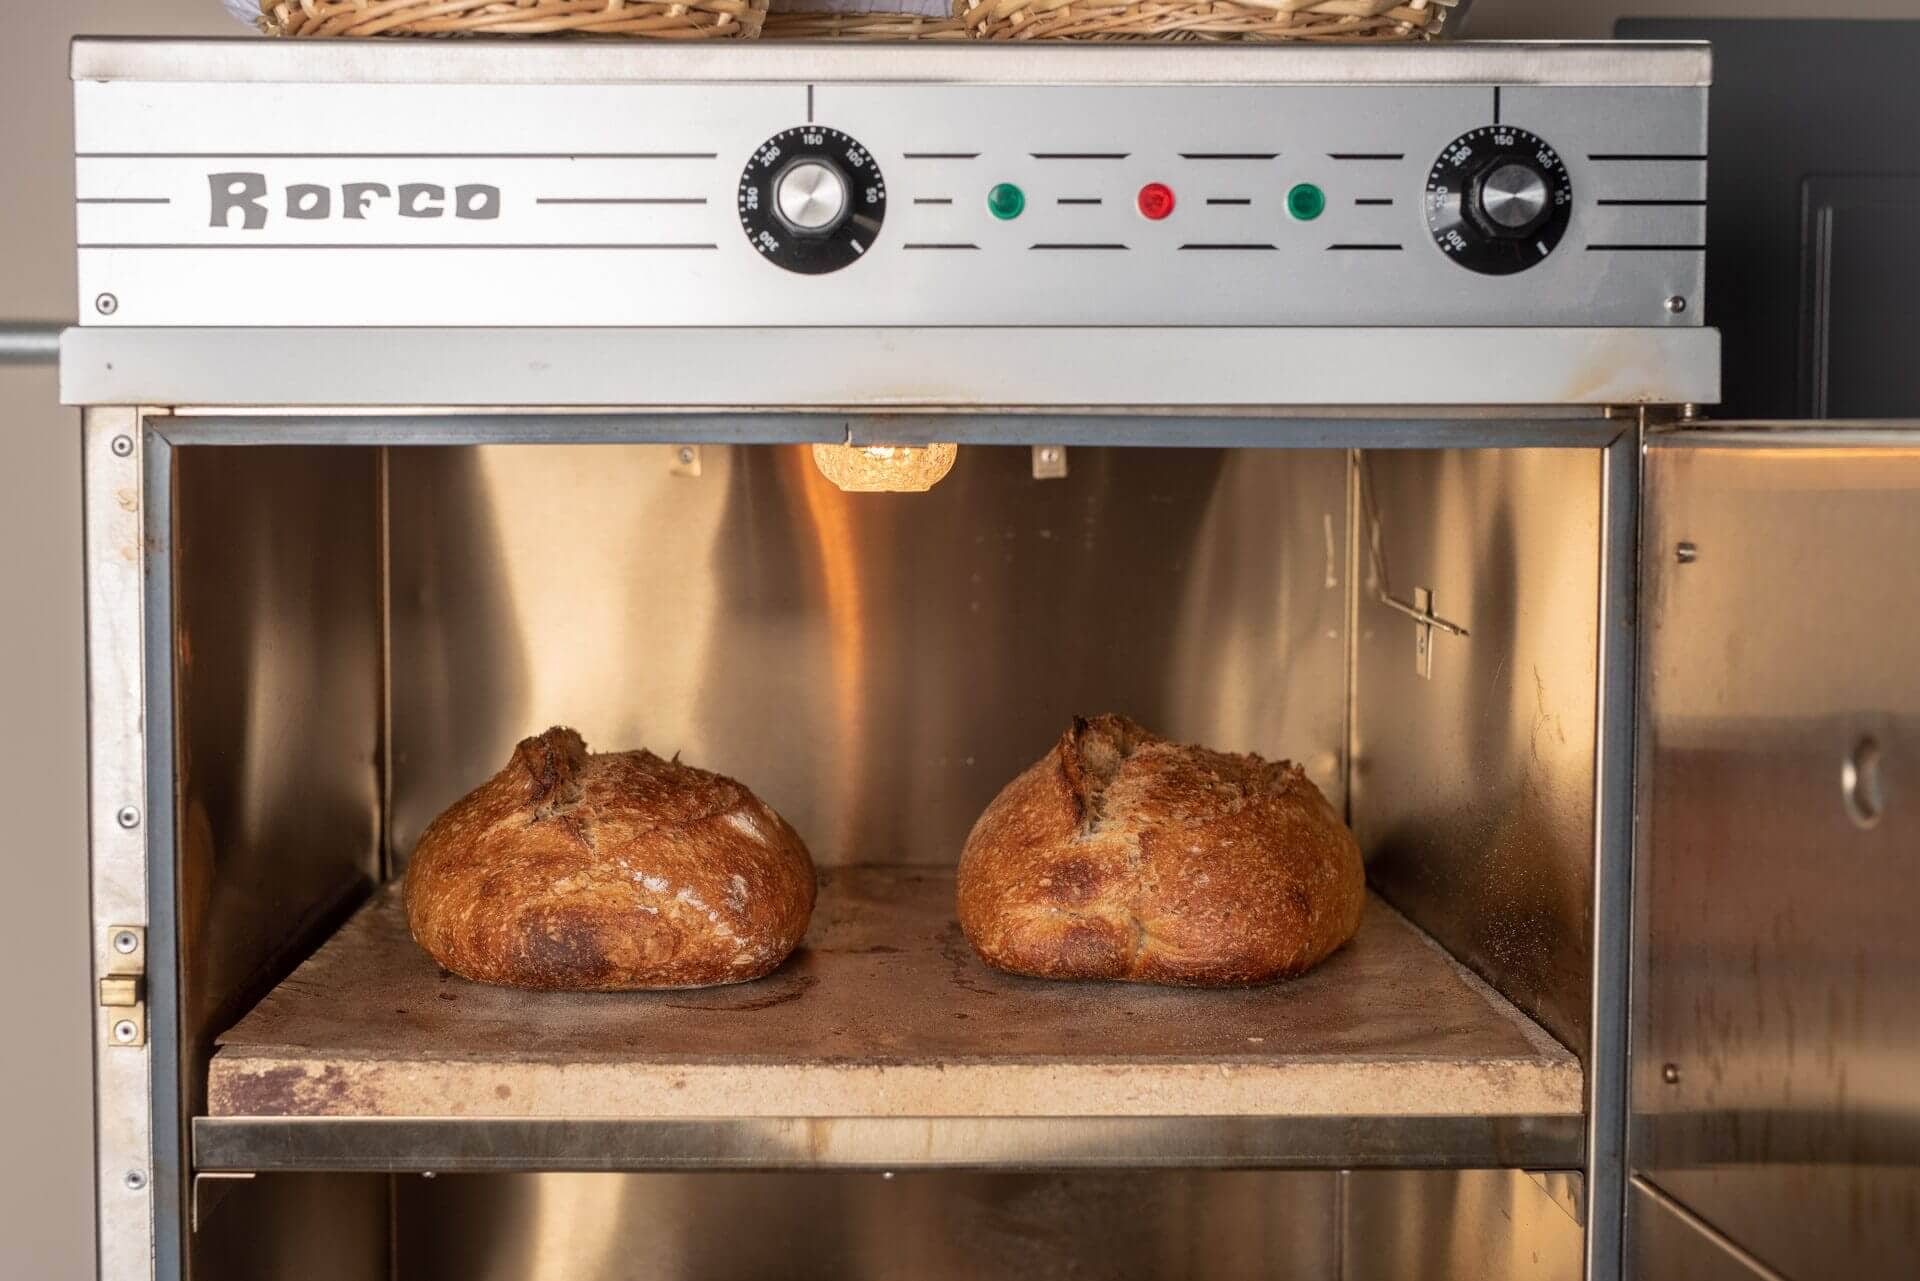
At its core, a Rofco oven is a meticulously crafted Belgian brick oven engineered specifically for baking bread. Available in various configurations, the model under examination here is the Rofco B40, the largest offering, featuring three expansive square baking decks. Its design prioritizes robust, no-nonsense construction with a fully sealed oven chamber. A key characteristic is its minimal external heat radiation, a significant advantage for home kitchens where space and safety are primary concerns. Unlike many industrial ovens, the Rofco’s exterior remains cool enough to be positioned close to walls or other appliances.
The oven’s three chamotte deck stones, each measuring a substantial 1-3/8 inches thick, are designed for exceptional heat retention. Once the oven reaches its preheating temperature, these stones maintain a consistent thermal environment, even during the process of loading dough, a critical factor for achieving optimal oven spring and crust development. This thermal stability means the Rofco can facilitate multiple consecutive bakes with minimal downtime for reheating, making it highly efficient for producing larger batches of bread.
The Rofco B40 operates on standard 220V AC single-phase power, utilizing a 6-20P cord plug and a 6-20R receptacle, commonly found in modern homes for high-demand appliances. For installation, it’s advisable to consult an electrician to ensure a dedicated circuit and appropriate receptacle are in place, mitigating any potential electrical load issues.
Operational Capacity and Versatility:
While the Rofco B40 is a considerable step up from standard home ovens, its capacity is substantial yet manageable for a home setting. The author frequently bakes batches of 4-6 loaves, a significant increase from the 1-2 loaves typical of a home oven. This capacity is also well-suited for larger events, festivals, and parties. Its reputation as a "bare-bones workhorse" underscores its reliability and effectiveness in meeting the demands of consistent, high-quality bread production.
The author notes purchasing their Rofco oven from Pleasant Hill Grain, a retailer known for its exceptional customer service and support. While a discount was received, the insights and recommendations provided in this guide are entirely independent and based on personal experience.
Recommendation:
The endorsement for the Rofco bread oven is unequivocal. It is lauded as a "fantastic little (though not all that little) oven" for anyone seeking to move beyond the limitations of conventional home ovens. Its straightforward design, ease of repair, and consistent baking performance make it an outstanding choice for both passionate home bakers and those venturing into professional bread production.
Optimizing Dough Placement for Even Baking
A crucial aspect of maximizing the Rofco B40’s potential lies in the strategic placement of dough on its decks. This process can be likened to a game of spatial optimization, akin to real-life Tetris, where the goal is to fit the maximum number of loaves without them touching, ensuring uniform heat exposure and baking. While some bakers have refined this to an art form for very large-scale production, the following outlines common and effective dough arrangements for home baking scenarios.
The Rofco B40 decks measure approximately 18.9 inches by 18.9 inches. The diagrams below represent typical layouts for batard (oval) and boule (round) shapes. The top edge of each depicted square signifies the back of the oven, while the bottom edge represents the front, adjacent to the door.
- Configuration 1 (Left): Two 900g batards per deck. This is the author’s most frequently used arrangement, offering ample space for oven spring and crust development for each loaf.
- Configuration 2 (Center): Two 800g boules per deck. This configuration is also effective, providing sufficient room for round loaves to expand.
- Configuration 3 (Right): Four 700g loaves per deck. This arrangement pushes the capacity of the deck, requiring careful attention to spacing and potentially slightly smaller loaf sizes to ensure adequate airflow and even baking.
Utilizing Baking Trays:
The Rofco ovens are typically supplied with square steel trays. These are highly versatile and can accommodate smaller items such as buns, rolls, and even large square pizzas. Using these trays is particularly beneficial when baking items other than traditional bread loaves, as they simplify the transfer of multiple small items into the oven and contain any potential spills or leaks.
The Art of Steaming in the Rofco Oven
Steam is a critical component in achieving optimal bread crust development and oven spring. During the initial stages of baking, steam keeps the dough’s surface moist, allowing it to expand fully before the crust sets. While the Rofco’s sealed oven chamber is an advantage for retaining steam, it lacks the integrated steam injection systems found in some professional ovens. However, several effective manual methods can be employed to introduce the necessary steam.
Recommended Reading: For a more in-depth understanding of the principles of steaming in home ovens, refer to guides on "How to Steam a Home Oven for Bread Baking."
High-Pressure Sprayer Method
The author’s preferred method for steaming involves a commercial-grade pressure sprayer. This tool, when set to its finest mist setting, can efficiently introduce a significant amount of steam into the oven.

Process:
- Preparation: Fill the sprayer with water and set the nozzle to the finest mist. Ensure the oven is preheated and the dough is ready for loading.
- Loading and Steaming: Starting with the bottom deck, spray generously around the deck for approximately 10-12 seconds. Repeat this process for the middle and top decks.
- Caution: When steaming the top deck, avoid spraying directly onto the oven’s internal light fixture, as the glass can crack due to thermal shock.
- Second Application: Before fully closing the oven door, give each deck a second light spray.
- Venting: To vent the steam, carefully open the oven door slightly, allowing the initial rush of steam to escape. Once the intense steam dissipates, close the door and open the oven’s two front vents by tilting them to their open position.
Steam Pod Method
Rofco ovens offer optional rectangular steam pods. These long steel boxes are placed on the sides of each deck and preheated with the oven. To generate steam, water or ice cubes are poured into these preheated pods, and the oven door is immediately closed.
Pros and Cons: The steam pods are effective at creating a substantial amount of steam. However, they occupy valuable deck space, which can be a limitation when trying to maximize the number of loaves baked. The author periodically uses these pods for testing but generally prefers the sprayer method due to the space constraints. Once the water has evaporated, venting is achieved by opening the circular vents on the oven door.
The Rofco Baking Process: A Step-by-Step Guide
The baking process in a Rofco oven is continually refined through experimentation with times, temperatures, and procedural adjustments. While different dough formulas may necessitate variations, the following represents a reliable, go-to process for most recipes.
Oven Controls: The Rofco features two primary control knobs: the left knob regulates the top heating element, and the right knob controls the bottom heating element. Indicator lights on the left and right illuminate when their respective heating elements are active.
Preheating:

- Ensure the oven is empty. Crucially, remove any silicone baking mats or other materials that should not be exposed to prolonged high heat during the preheating phase.
- Set both the left and right control knobs to 240°C (approximately 464°F).
- Preheat for a minimum of 1.5 hours. This extended preheating period is essential to ensure the thick deck stones are thoroughly saturated with heat, providing a stable baking environment.
Loading the Dough:
- Preparation: Place a pizza peel on a clean surface adjacent to the oven. Lay one silicone baking sheet on the peel. Arrange the remaining silicone sheets in an assembly line nearby.
- Dough Transfer: Gently turn out the proofed dough onto the silicone sheets. Score each loaf as desired.
- Loading Sequence: Begin by sliding the silicone sheet with dough from the peel into the oven. Retrieve the peel and use it to slide the next silicone sheet onto the peel. Continue this process, loading the oven efficiently.
Baking Schedule:
The following table outlines a typical baking schedule for bread in a Rofco oven. It’s important to note that these are guidelines, and adjustments may be necessary based on the specific dough and desired crust characteristics.
| Step | Action | Temperature | Duration |
|---|---|---|---|
| 1 | Preheat oven (door closed, vents closed) | 240°C (464°F) | 1 hour 30 min |
| 2 | Bake with steam (after loading dough) | 150°C (302°F) | 20 minutes |
| 3 | Vent steam (briefly open door, open vents) and continue baking | 220°C (428°F) | 10 minutes |
| 4 | Continue baking (reshuffle loaves for even browning if necessary) | 150°C (302°F) | 20-30 minutes |
Post-Bake:
- Once the loaves are fully baked, use the peel to carefully remove them and the silicone sheets from the oven.
- Transfer the loaves to wire racks to cool completely.
- Turn off the oven or reheat it to 240°C if planning to bake additional batches. Close the oven door.
Essential Tools for Rofco Oven Baking
Investing in the right accessories can significantly enhance the Rofco baking experience.
Commercial-Grade Sprayer for Steam
For bakers who opt for the sprayer method, a high-quality, commercial-grade sprayer is indispensable. The author specifically recommends the Electric Spray Bottle, noting its compact size and ability to deliver a substantial, fine mist with the touch of a button. This is a significant upgrade from traditional hand-pump sprayers, offering greater efficiency and control.
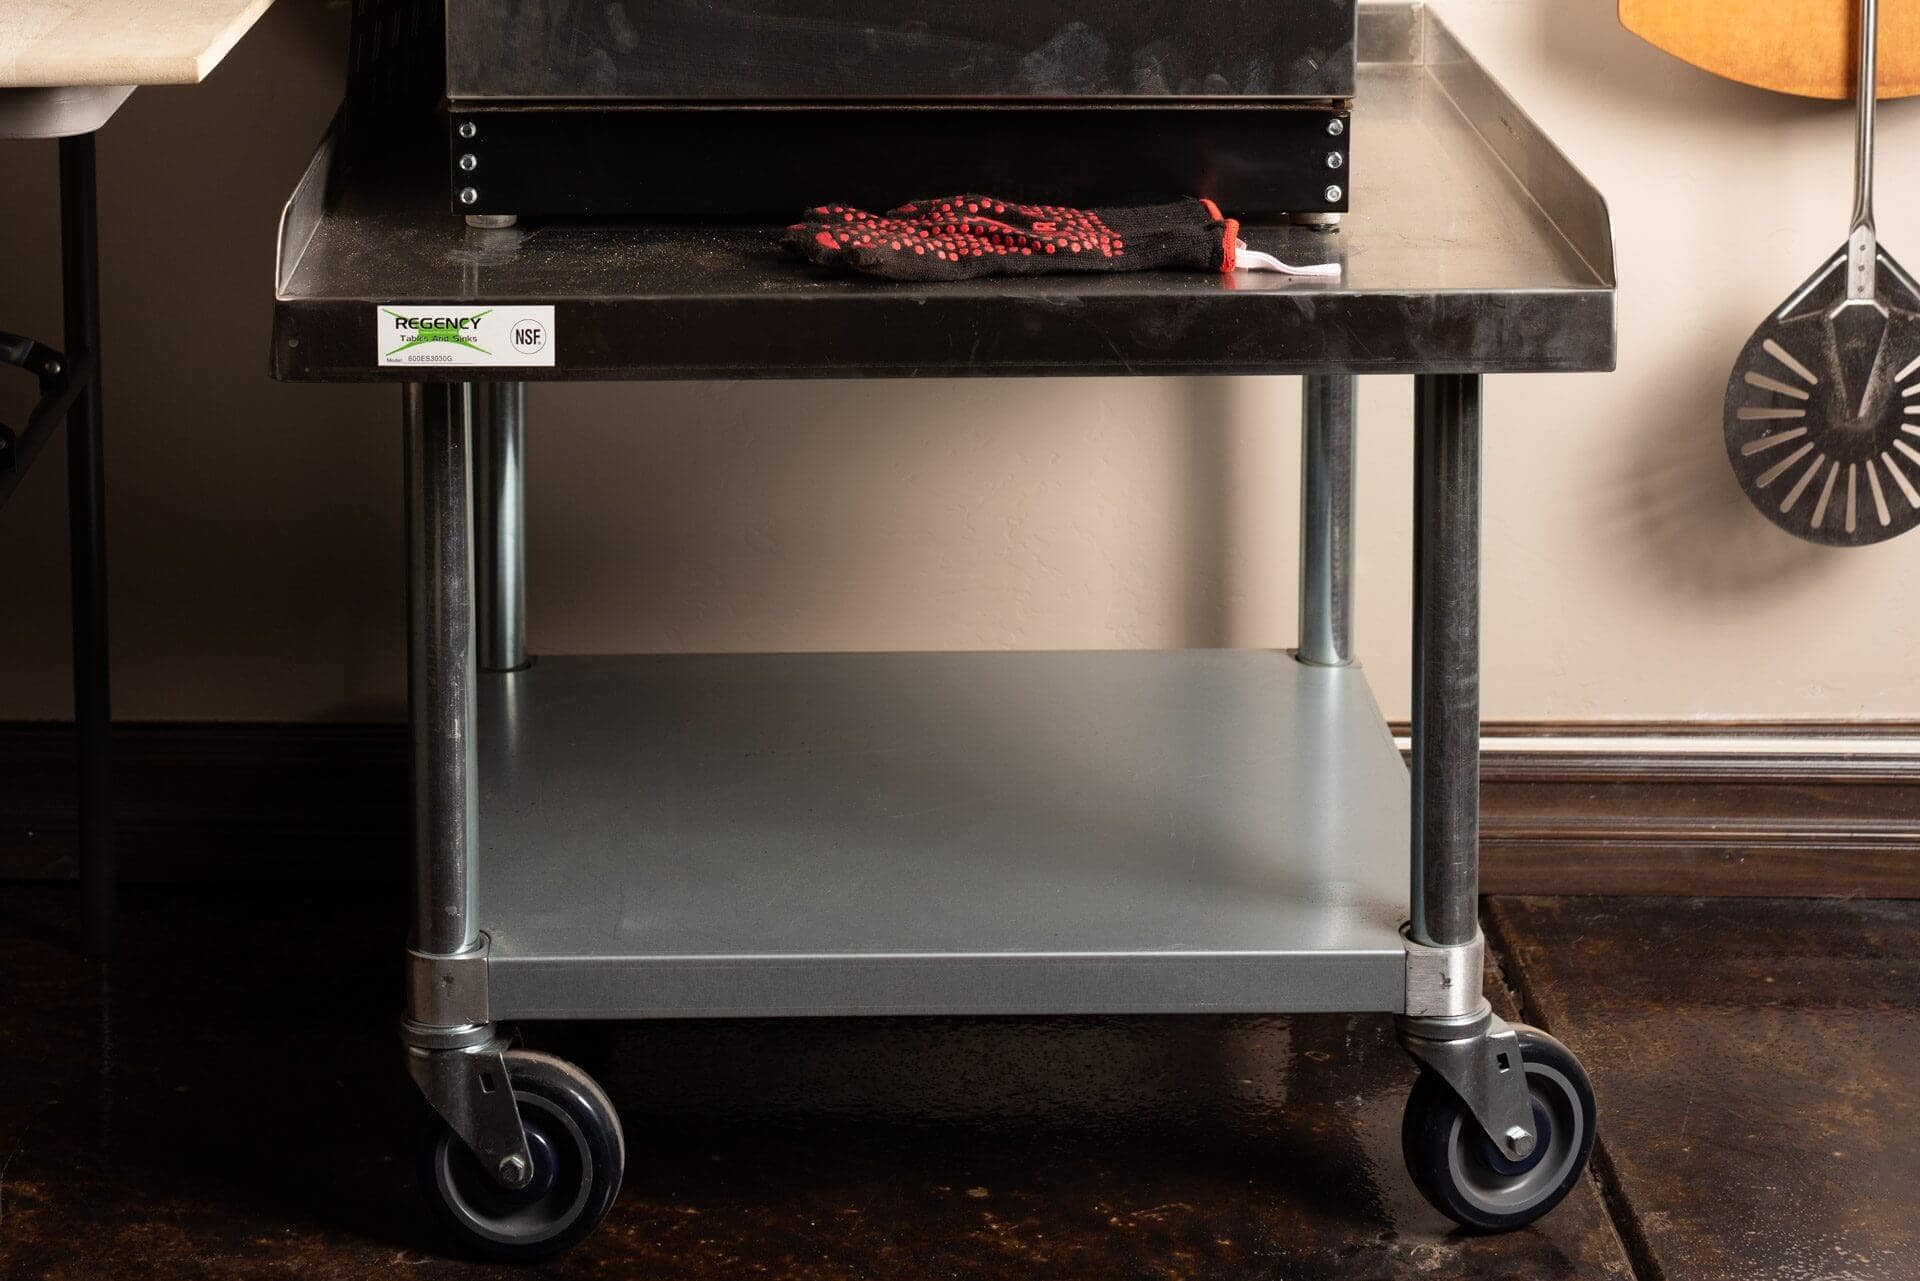
Oven Equipment Stand
Elevating the Rofco oven can greatly improve ergonomics for loading and unloading. The author utilizes a custom-cut stainless steel equipment stand, specifically mentioning the Regency 30" x 30" 16-Gauge Stainless Steel Equipment Stand. By having the legs custom-cut to 18 inches, the oven is positioned at a comfortable working height. While casters can add mobility, they may slightly impact the stand’s overall rigidity. For maximum stability, opting for fixed legs without casters is recommended.
Large Wooden Peel
A large, high-quality pizza peel is a vital tool for safely and efficiently transferring dough into and out of the Rofco oven. The author found that while the included steel trays were functional, they were cumbersome. A wooden pizza peel, specifically an American Metalcraft 18" x 29.5" peel with an 18" width, proved to be an ideal fit for the Rofco B40’s 18.9-inch wide decks. Its size, lightness, and durability make it exceptionally well-suited for this purpose. The process involves placing the silicone sheet with scored dough onto the peel and then sliding the sheet into the oven.
Advanced Tips and Tricks for Rofco Oven Users
Beyond the fundamental operational procedures, several advanced tips can further optimize the Rofco baking experience.
Drying Proofing Baskets (Bannetons)
After unloading dough onto silicone sheets, the Rofco oven can be utilized to quickly dry proofing baskets. Placing damp bannetons in the still-warm oven after a bake expedites the drying process, preventing mold formation and ensuring they are ready for their next use.
Post-Baking Considerations and Next Steps
Transitioning to a new piece of baking equipment like the Rofco oven often involves a slight learning curve. It is advisable to begin with a straightforward sourdough recipe and practice it consistently until a mastery of the new process is achieved. For those considering purchasing a Rofco oven, Pleasant Hill Grain is highly recommended for their excellent service.
For bakers looking to further professionalize their operations, exploring complementary equipment is the next logical step. This includes high-capacity dough mixers such as the Famag spiral dough mixer, suitable for large batches, or the Ooni Halo Pro Spiral Mixer for smaller test batches. For those requiring even greater baking volume, larger ovens like the RackMaster 2020 Bread Oven, featuring expanded deck sizes, are also available.

The Rofco bread oven represents a significant investment for the dedicated home baker, offering a pathway to increased production and refined baking quality. By understanding its capabilities, mastering its operational nuances, and utilizing appropriate tools and techniques, bakers can unlock its full potential and elevate their bread-making endeavors.