
The journey from a home baker’s wish for a larger oven to the active pursuit of specialized equipment is a natural progression for those deeply immersed in the art of bread making. This evolution is often driven by an escalating ambition to produce larger quantities, a desire for greater efficiency, and a relentless pursuit of nuanced flavors and textures. For many home bakers, this path eventually leads to considering professional-grade tools, and for an increasing number, the Rofco bread oven has emerged as a pivotal piece of equipment. This guide delves into the capabilities and operational intricacies of the Rofco oven, offering insights for both prospective buyers and seasoned users aiming to refine their bread-baking processes.
The Genesis of a Baking Upgrade
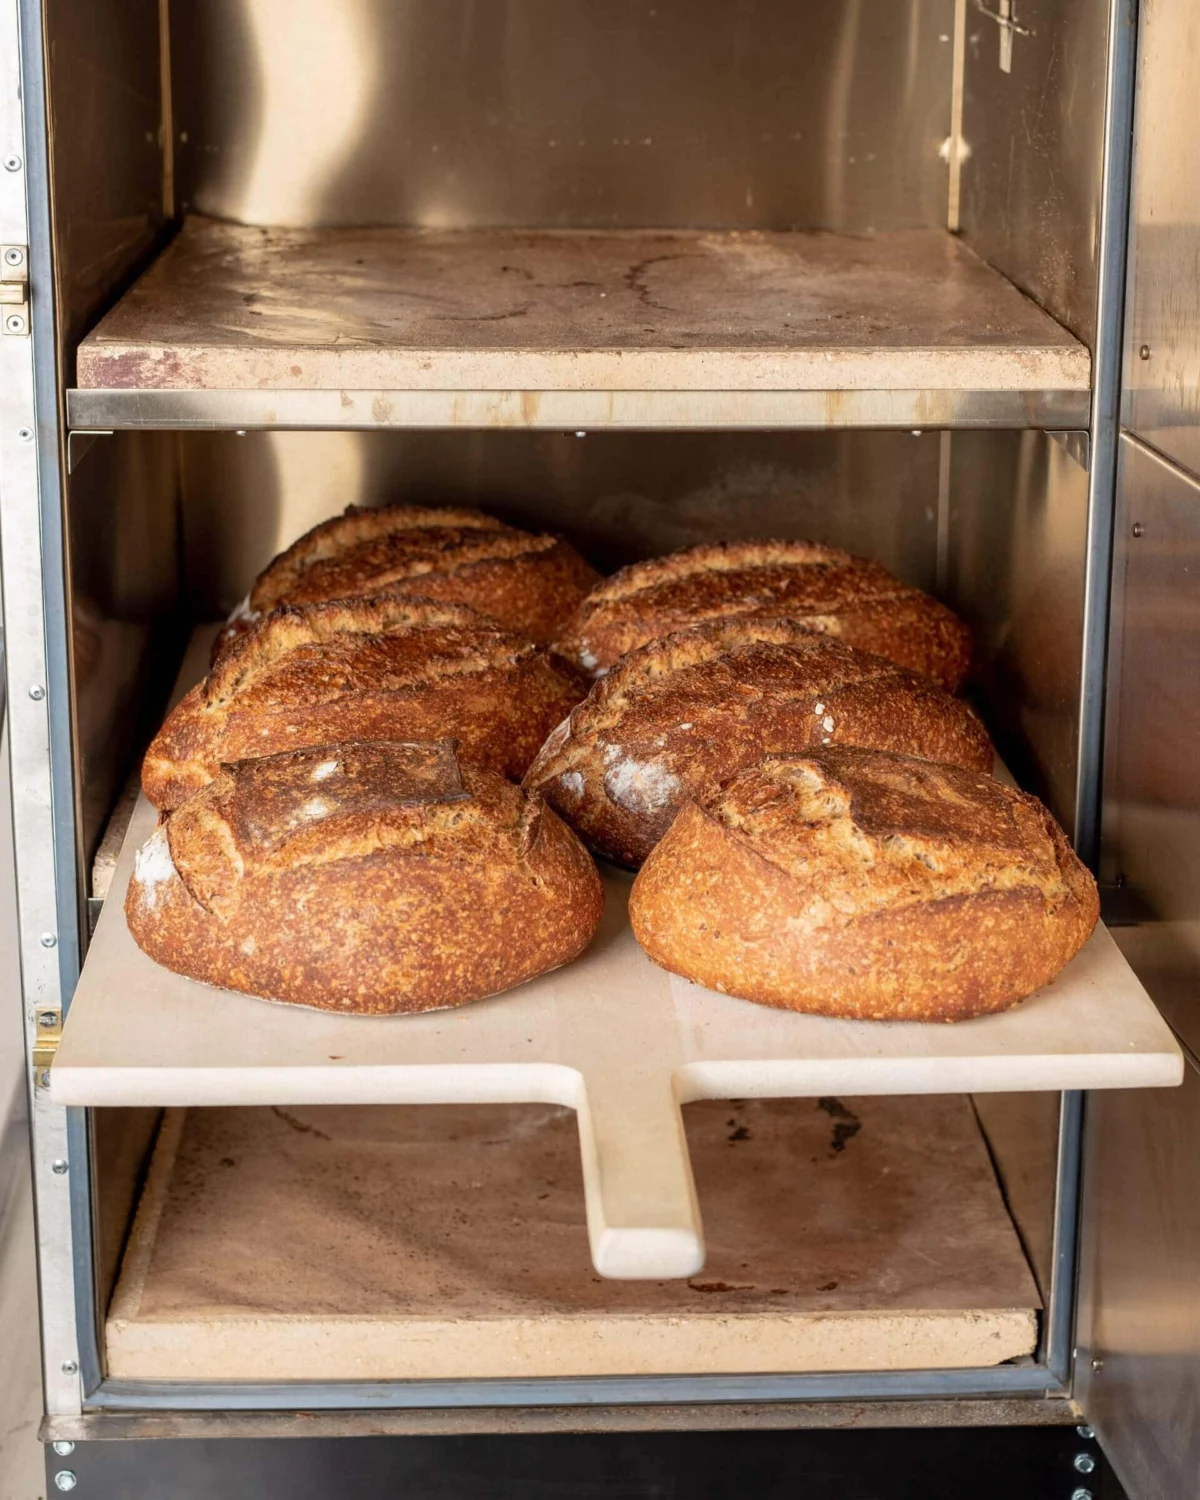
The transition to a dedicated bread oven like the Rofco is rarely a spontaneous decision. It typically stems from a growing passion for baking that outgrows the limitations of a standard home kitchen appliance. When the dream shifts from easily accommodating six loaves to actively seeking the means to achieve this, it signals a significant step in a baker’s development. The ability to handle larger dough quantities efficiently unlocks new possibilities, allowing bakers to dedicate more time and focus to the finer aspects of their craft: perfecting flavor profiles, optimizing fermentation, refining dough handling techniques, and mastering shaping methods. The Rofco oven, with its robust design and specialized function, represents a logical leap for bakers on this trajectory.
For some, this scaling up is a gradual, almost imperceptible shift fueled by an ever-deepening obsession with baking. Others may find themselves at this juncture with more defined goals, such as transitioning to a nano or micro-bakery, or establishing a presence at local farmers’ markets. Regardless of the specific catalyst for expanding their baking operations, understanding the tools, temperatures, timings, and techniques involved in using a Rofco oven is crucial. This guide aims to consolidate this essential information, serving as a comprehensive resource for bakers navigating this exciting phase of their culinary journey.
Understanding the Rofco Bread Oven
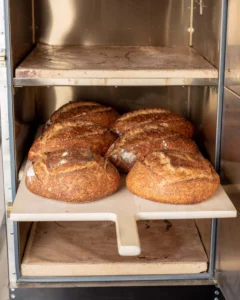
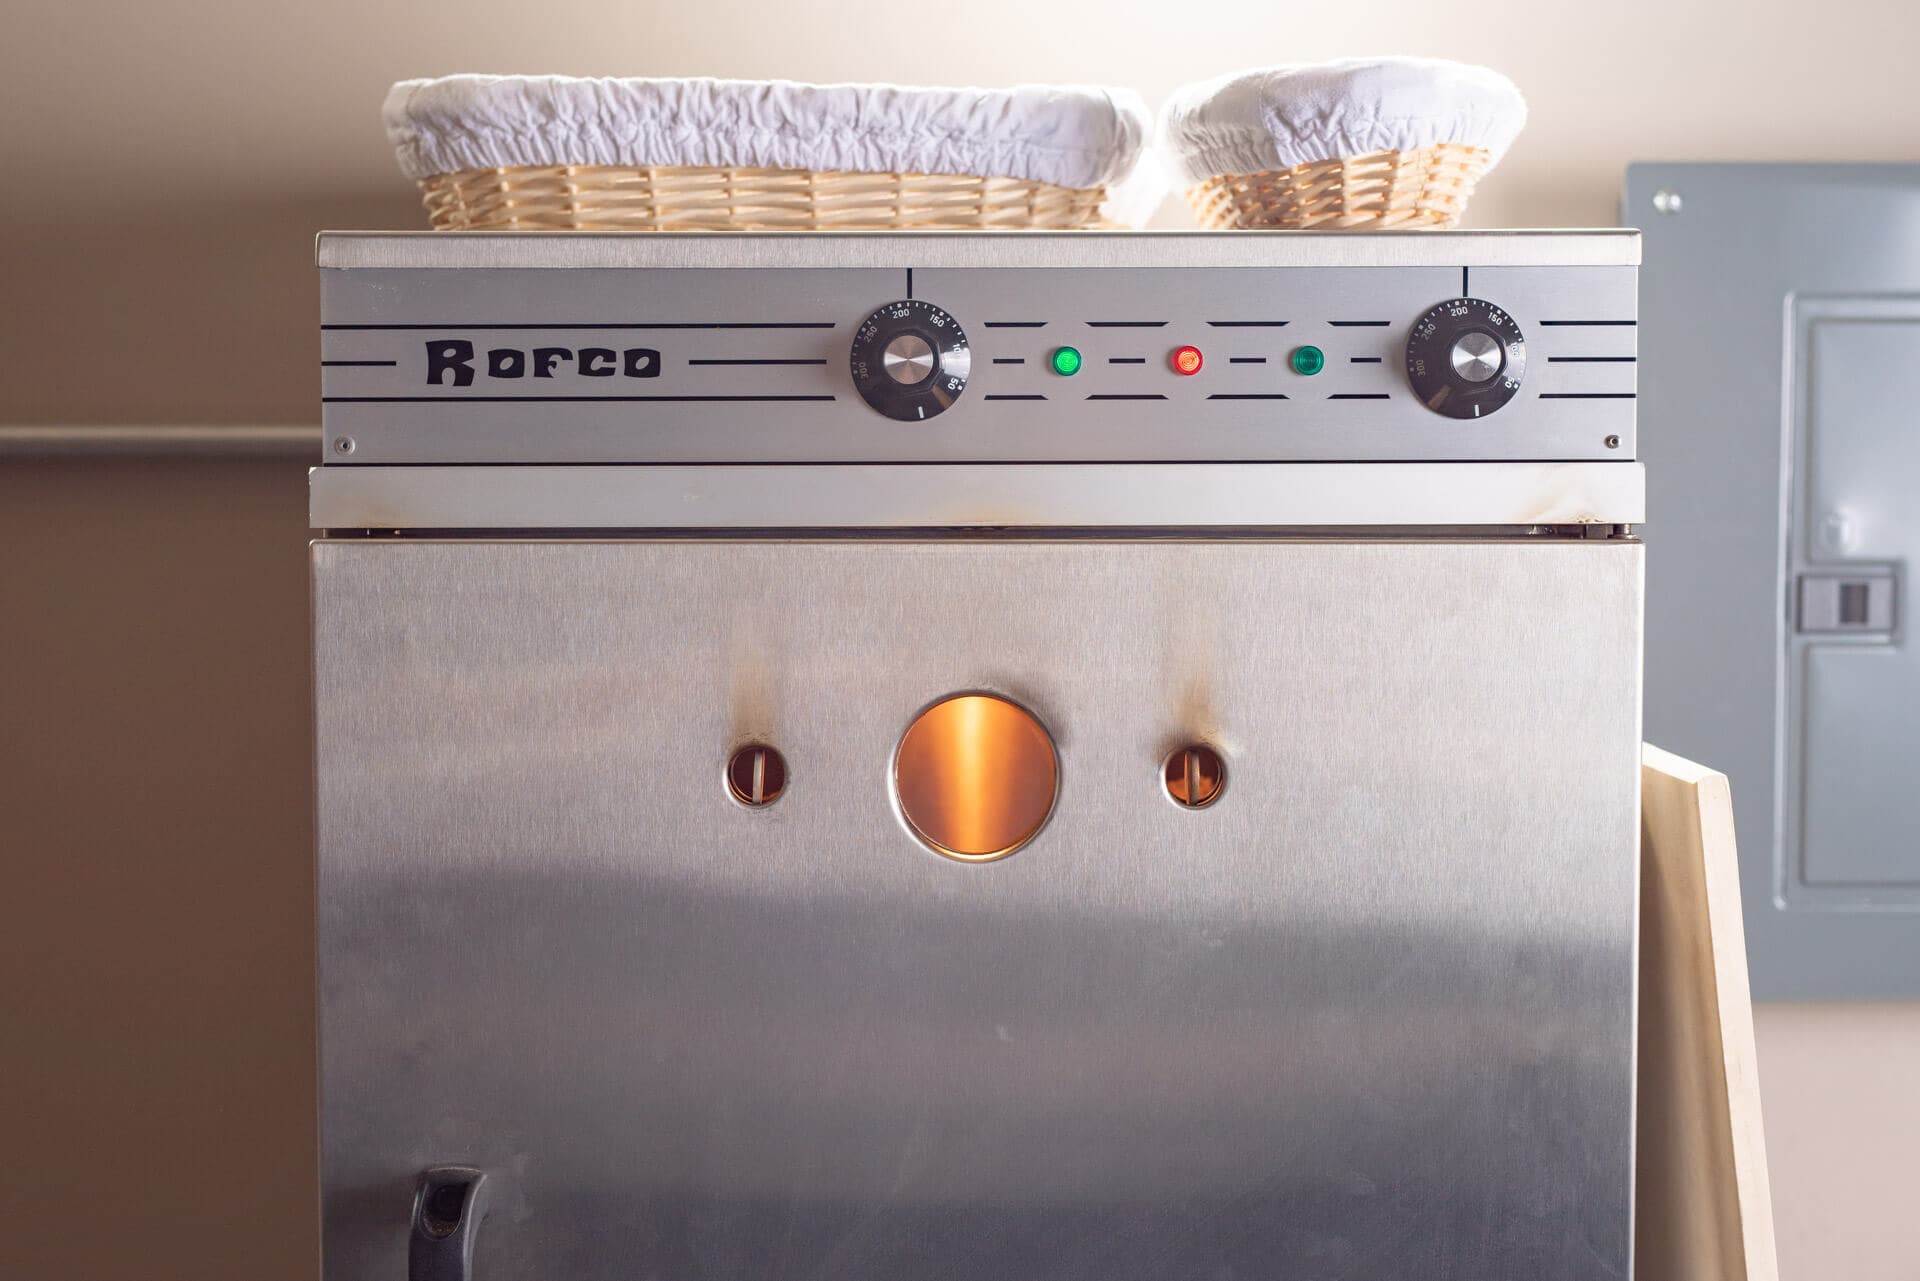
The Rofco is a Belgian-manufactured brick oven specifically engineered for the art of bread baking. Available in various configurations, the model commonly employed by dedicated home bakers and small-scale operations is the Rofco B40, distinguished by its three spacious, square baking decks. This oven is characterized by its unpretentious, durable construction and a fully enclosed baking chamber. A key advantage is its minimal external heat radiation, allowing for flexible placement in a kitchen environment without excessive heat buildup in the surrounding area.
Each of the three baking decks is lined with 1-3/8-inch thick chamotte stones, also known as refractory bricks. These stones possess a remarkable capacity for heat retention. Once the oven is preheated, the stones maintain a consistent temperature even when the door is opened for loading, a critical factor in achieving optimal oven spring. The Rofco’s exceptional heat retention also makes it highly efficient for consecutive baking sessions, requiring only brief recovery periods between batches to return to the desired temperature.
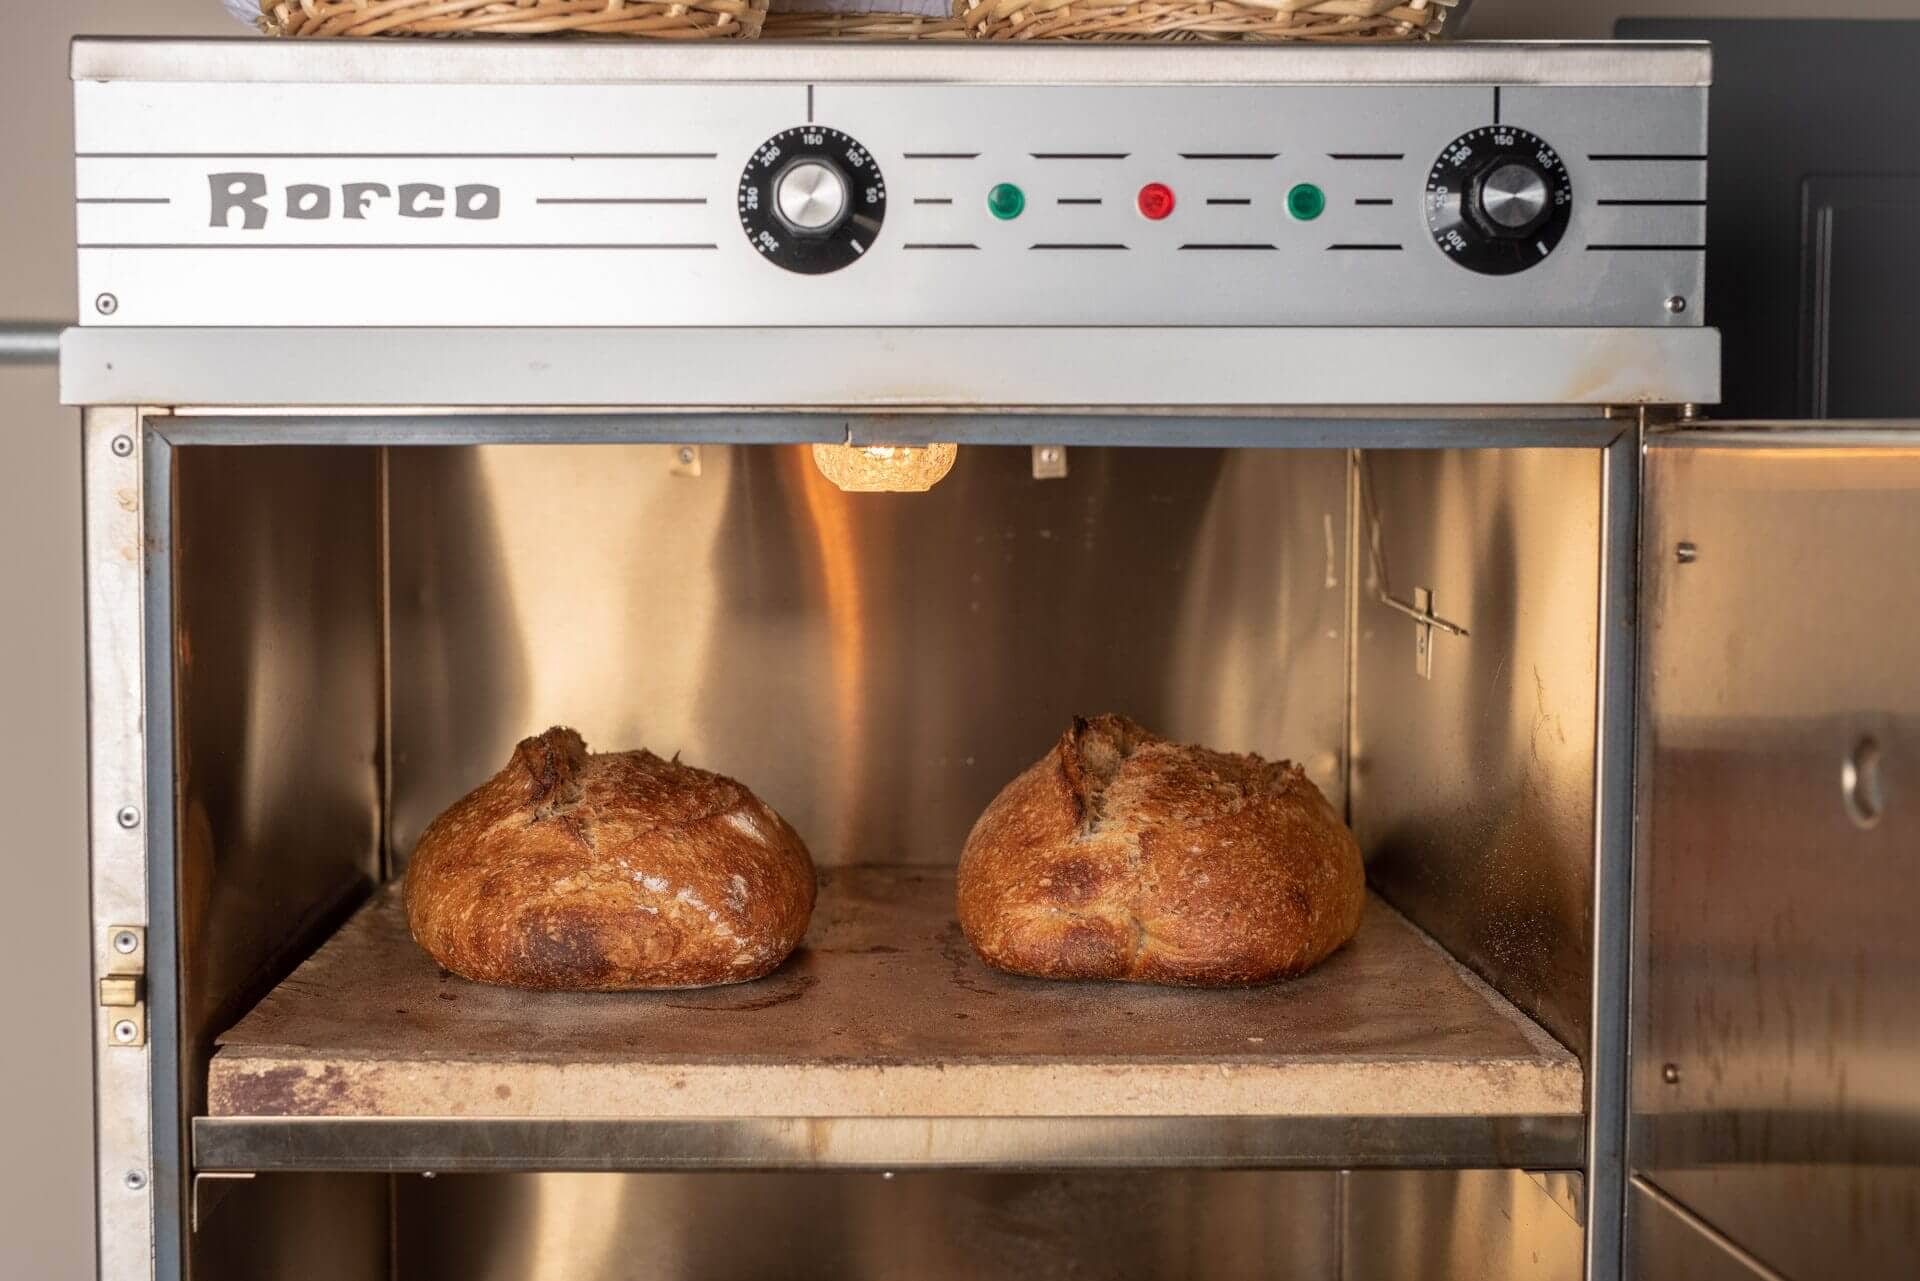
The Rofco oven operates on a standard 220V AC single-phase power supply, a common electrical requirement found in most North American homes. For installation, it is advisable to have a qualified electrician ensure the appropriate receptacle and breaker are in place to safely accommodate the oven’s power needs.
While the Rofco is well-suited for large-scale baking events, festivals, and gatherings, its practical utility extends to more frequent use for baking batches of 4-6 loaves. Its design emphasizes functionality and reliability, making it a dependable workhorse for bakers who demand consistent performance.
A Personal Endorsement and Essential Considerations
To unequivocally address a common query: yes, the Rofco bread oven comes highly recommended. It stands out as an exceptional piece of equipment for anyone looking to move beyond the limitations of baking just a couple of loaves at a time in a conventional home oven. Its straightforward design, ease of maintenance, and consistent baking performance make it a valuable asset for both passionate home bakers and emerging professional bakers.

The Rofco B40, the largest model, features three square baking decks, each measuring approximately 18.9 inches by 18.9 inches. This generous surface area allows for efficient loading of multiple loaves. The oven’s construction is robust, designed for longevity and ease of repair, with readily available replacement parts.
Optimizing Dough Placement for Even Baking
A fundamental aspect of utilizing a multi-deck oven like the Rofco is the strategic placement of dough to maximize baking capacity while ensuring even heat distribution and preventing loaves from touching. This can be likened to a spatial puzzle, where the goal is to fit as much dough as possible without compromising baking quality. While some bakers have honed this skill to an art form, understanding common configurations is key.
The typical arrangements for the Rofco B40 often involve:
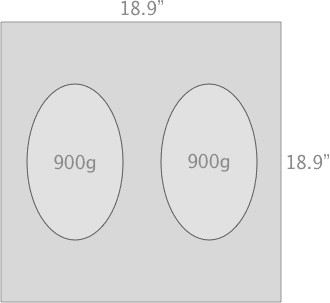
- Two 900g batard loaves per deck: This is a common and manageable setup for home bakers, allowing ample space between loaves for proper expansion and browning.
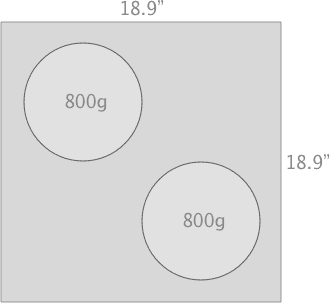
- Two 800g boule loaves per deck: Similar to the batard configuration, this arrangement provides sufficient space for round loaves.
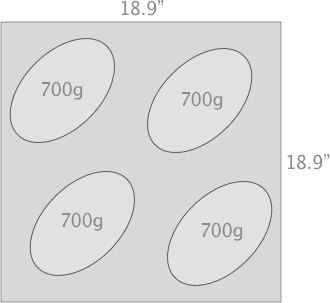
- Four 700g loaves per deck: This configuration maximizes the number of loaves per deck, suitable for bakers who need to produce a higher volume.
It is important to note that the dimensions of the baking decks (18.9" x 18.9") provide a substantial area. The diagrams illustrating these placements indicate that the top edge of each deck representation corresponds to the back of the oven, while the bottom edge represents the front, where the door is located.
Beyond loaves, the Rofco can also accommodate smaller items such as rolls, buns, and even large pizzas. For these, the included square steel trays are particularly useful. These trays facilitate the transfer of multiple small items into the oven and help contain any spills or debris, making cleanup more manageable.
The Critical Role of Steam in Rofco Baking
As with any high-quality bread baking process, generating adequate steam during the initial stages of baking is paramount for achieving optimal oven spring and a desirable crust. The Rofco oven’s sealed chamber is advantageous in this regard, as it effectively traps steam. However, unlike some professional ovens with integrated steam injection systems, the Rofco requires manual methods for introducing steam.
High-Pressure Sprayer Method
A highly effective and widely adopted method for steaming the Rofco oven involves using a commercial-grade pressure sprayer. The key is to set the sprayer to emit a fine mist. Before loading the dough, the oven is preheated. Once at temperature, the sprayer, filled with water and pressurized, is used to mist each deck thoroughly. The process involves spraying each of the three decks for approximately 10-12 seconds, ensuring a generous amount of moisture is introduced into the oven environment. Care should be taken to avoid spraying directly onto the oven’s light fixture, as the glass can crack from thermal shock. After the initial misting, a second pass with the sprayer just before closing the door helps to further saturate the oven with steam.
To release the steam, the oven door is carefully opened (allowing steam to dissipate before peering inside), then briefly closed before tilting the two circular vents on the door to their open position. This controlled venting allows excess steam to escape, facilitating the crust-forming process.
Steam Pods
Rofco offers optional steam pods, which are rectangular steel boxes designed to be preheated within the oven. When steam is desired, water or ice cubes are poured into these pods. The resulting steam generation is effective, but the pods occupy valuable deck space, which can be a constraint for bakers aiming to maximize loaf capacity. While they can produce significant steam, many bakers, including the author, find the pressure sprayer method more practical due to its space-saving advantage.
The Rofco Baking Process: A Step-by-Step Guide
The Rofco oven utilizes two primary heating elements, controlled by separate knobs. The left knob regulates the top heating element, and the right knob controls the bottom element. Indicator lights illuminate to signify when each element is active.
Preheating:
The oven is preheated with both dials set to 240°C (482°F). A crucial step is to ensure the oven is empty and any silicone baking mats are removed before preheating. The recommended preheating duration is approximately 1.5 hours to ensure the chamotte stones are thoroughly saturated with heat.
Loading the Dough:
Once preheated, the process of loading the dough typically involves preparing the loaves on silicone mats. A wooden pizza peel is often used as a stable platform. The dough is transferred from proofing baskets to the silicone mats, scored, and then carefully slid into the oven using the peel. This process is repeated for each deck.

Baking Stages:
The baking process is generally divided into distinct stages to optimize crust development and crumb structure:
- Preheat Oven (Door Closed, Vents Closed): 240°C for 1 hour 30 minutes.
- Bake with Steam: Temperature reduced to 150°C (302°F) for 20 minutes.
- Vent Steam and Bake: The door is briefly opened to release steam, and the vents are opened. The temperature is increased to 220°C (428°F) for 10 minutes.
- Final Bake: The temperature is reduced again to 150°C (302°F) for an additional 20-30 minutes, or until the loaves are fully baked. During this stage, loaves may be reshuffled for even browning if necessary.
Cooling:
Upon completion of baking, the loaves are removed from the oven using the peel and placed on wire racks to cool. The oven is then either turned off or reheated for subsequent batches.
Essential Tools for Rofco Baking
Several tools significantly enhance the Rofco baking experience:

Commercial-Grade Sprayer
For those opting out of steam pods, a high-quality electric spray bottle, such as the Electric Spray Bottle, is invaluable. These devices can deliver a consistent and fine mist with the simple press of a button, offering a more efficient steaming solution compared to manual pump sprayers.
Oven Equipment Stand
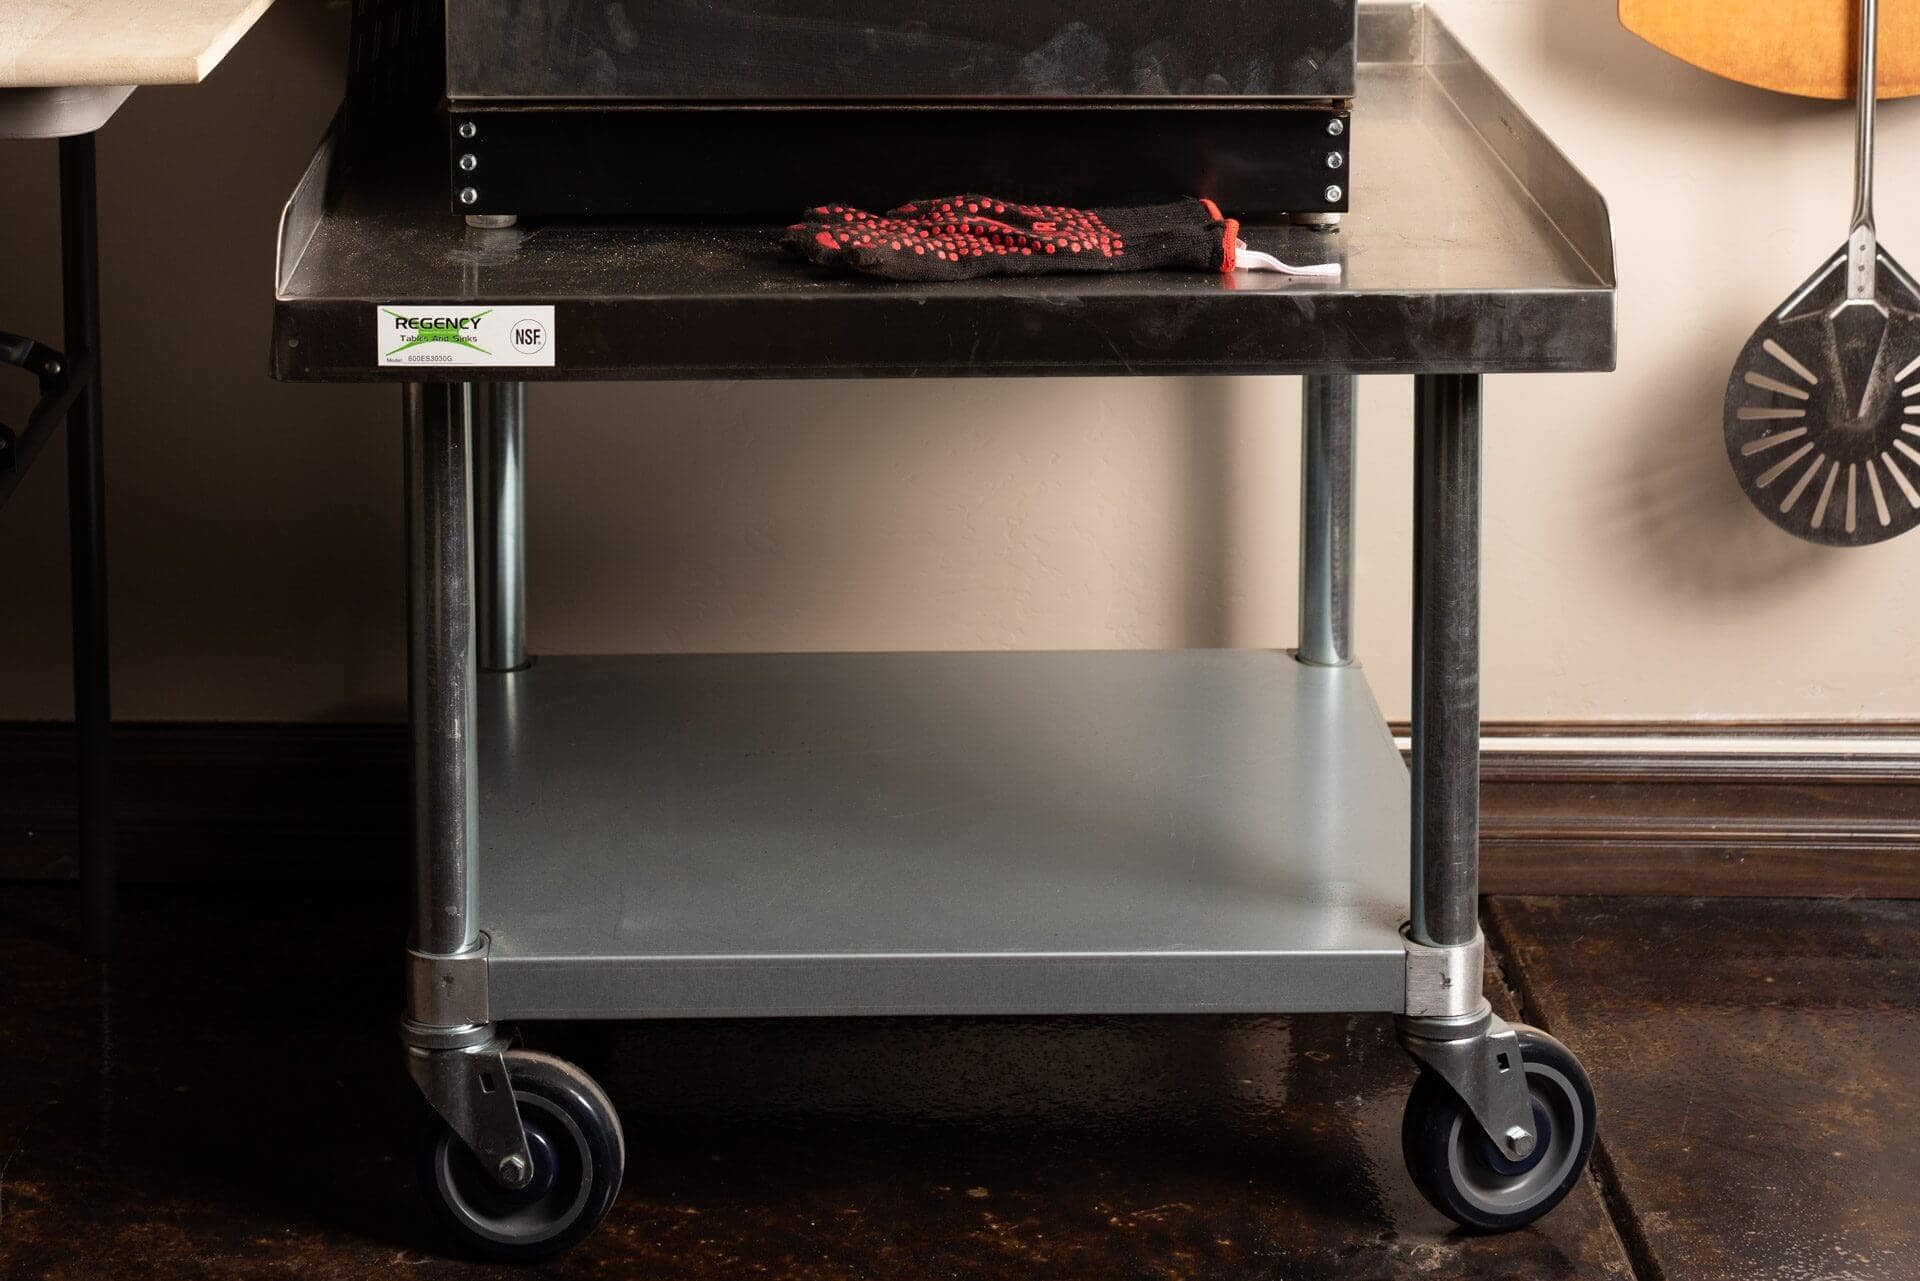
Elevating the Rofco oven is often desirable for ergonomic reasons. Custom-made stainless steel equipment stands, such as those available from WebstaurantStore, can be modified to the precise height required. The Regency 30" x 30" 16-Gauge Stand, with its sturdy construction, provides a stable platform. Adding locking casters can offer mobility, though it’s important to ensure the stand’s overall rigidity.
Large Wooden Peel
A large wooden pizza peel, ideally close to the width of the Rofco’s baking decks (approximately 18 inches wide), is essential for loading and unloading loaves. The American Metalcraft 18" x 29 1/2" peel is a recommended choice due to its size, lightweight construction, and durability. Its width closely matches the Rofco B40’s deck dimensions, facilitating smooth transfer of dough on silicone mats.
Tips and Tricks for Enhanced Baking
Drying Proofing Baskets
A practical post-baking application for the Rofco is drying proofing baskets (bannetons). After removing the baked loaves, the warm oven can be used to quickly dry damp liners or canvas from the bannetons. This speeds up the drying process, allowing for immediate storage and preventing the formation of mold.
The Road Ahead: Continuous Improvement
As with any significant change in baking equipment, a period of adjustment is to be expected when transitioning to a Rofco oven. It is advisable to select a straightforward sourdough recipe and practice it consistently until the nuances of the new oven are fully understood. For those seeking to acquire a Rofco oven, reputable suppliers like Pleasant Hill Grain offer excellent customer service and support.
For bakers looking to further enhance their professional baking capabilities, exploring complementary equipment such as the Famag spiral dough mixer for large batch mixing or the Ooni Halo Pro Spiral Mixer for smaller batches and test runs can be beneficial. Additionally, for those requiring even larger baking capacities, larger ovens like the RackMaster 2020 Bread Oven offer expanded deck space and throughput.

Mastering the Rofco oven is a rewarding endeavor that can elevate a home baker’s capabilities to near-professional levels. With practice, attention to detail, and the right tools, the pursuit of perfectly baked bread becomes an achievable and consistent reality.