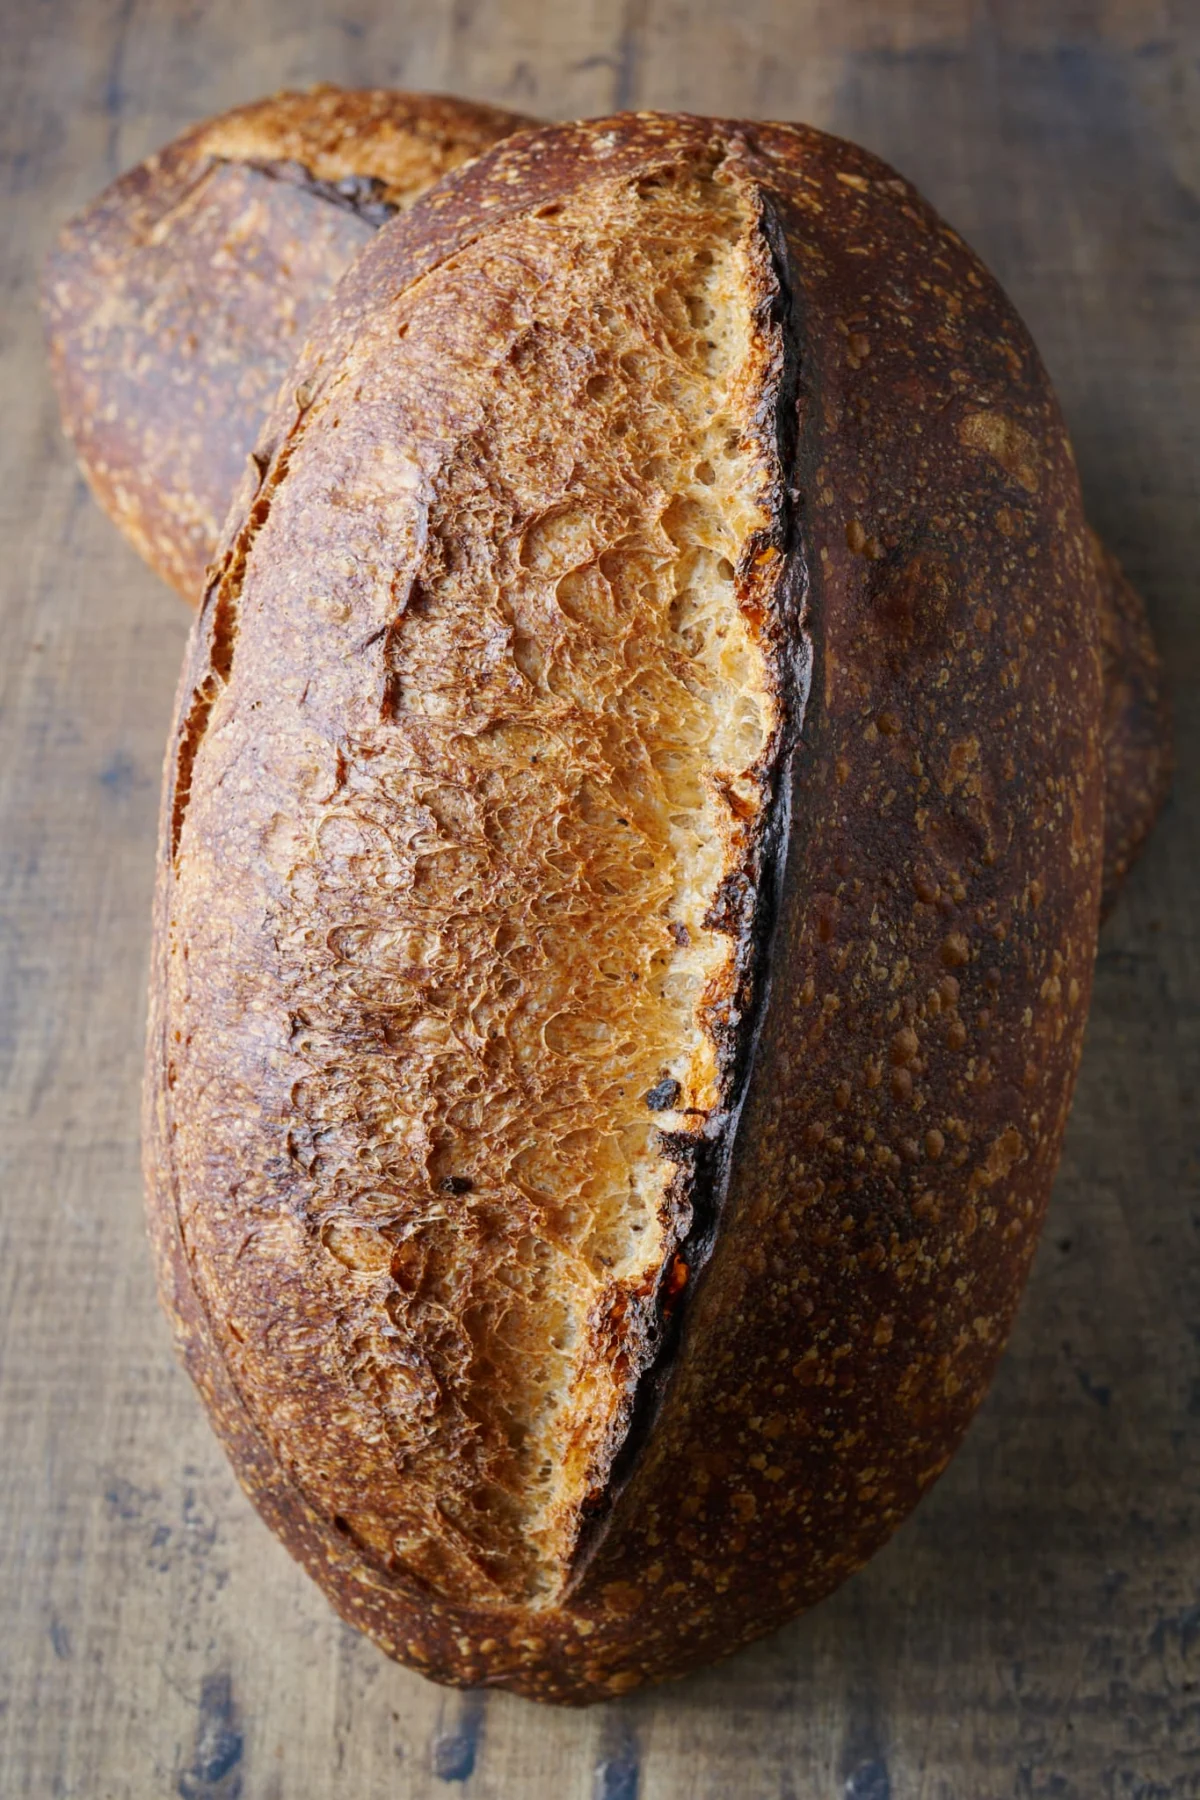

What defines an exceptional loaf of sourdough bread? For many, the journey begins with the senses. Is it the alluring aroma, a testament to the complex fermentation process that transforms humble flour and water into something extraordinary? Perhaps it’s the visual appeal: the deep, burnished crust that crackles invitingly, a testament to precise baking, or a meticulously executed score that blooms perfectly in the heat of the oven. Some are drawn to the subtle rounded edges, a whisper of skillful shaping by hands that understand the dough’s potential. Yet, for a significant segment of bread enthusiasts, the ultimate prize lies within – the captivating allure of an open crumb.
This guide delves into the intricate science and art behind achieving that coveted open crumb in sourdough, exploring the factors that contribute to its formation, the common pitfalls to avoid, and the subtle nuances that elevate a good loaf to a truly remarkable one. While flavor remains the paramount consideration for seasoned bakers, the visual and textural appeal of an open crumb is undeniable. It’s not merely about aesthetics; an open crumb is a tangible indicator of a well-fermented, properly developed, and expertly handled dough.
The Multifaceted Appeal of an Open Crumb
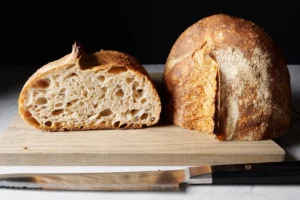
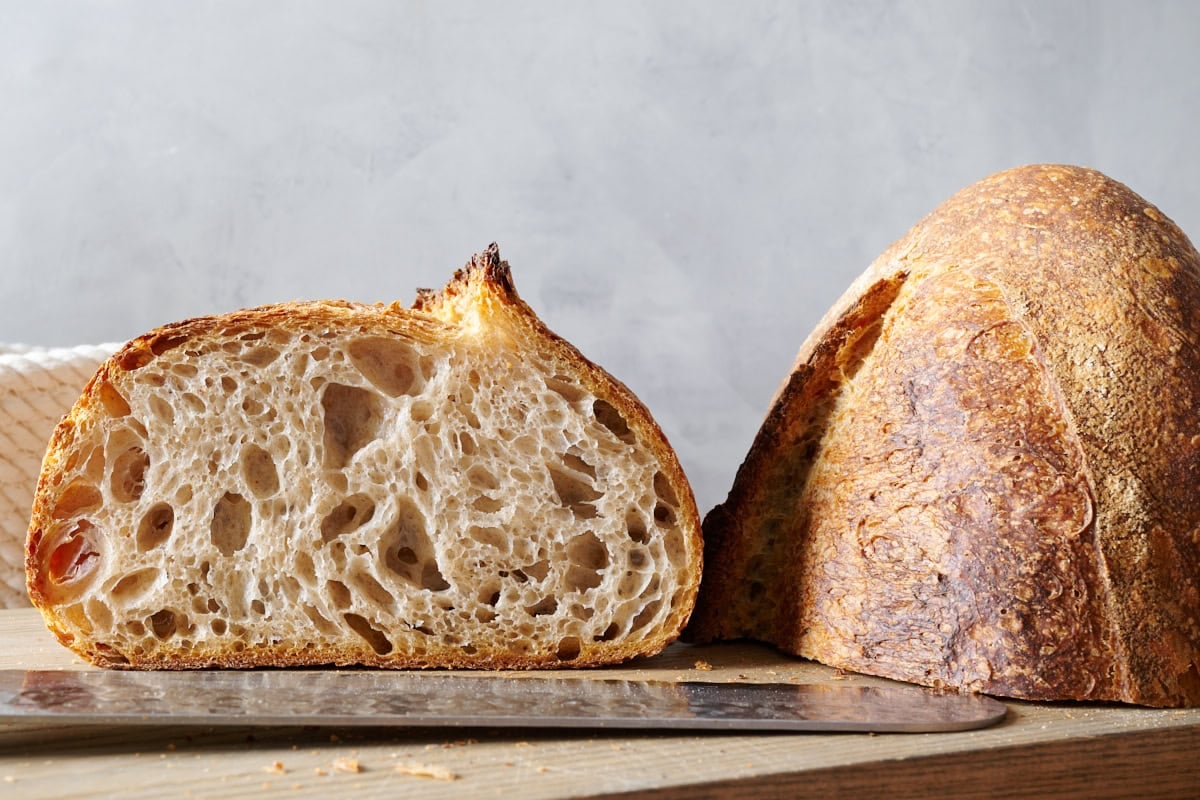
The desire for an open crumb in sourdough bread stems from a combination of aesthetic and textural preferences. An open crumb is characterized by a network of well-distributed, irregular air pockets within the bread’s interior. This structure is a direct result of the gluten network within the flour, which, when properly developed, acts as a scaffold to trap the carbon dioxide produced by the yeast and bacteria during fermentation. As this gas expands in the oven, it creates the signature airy pockets that give the bread its light and tender texture.
However, the pursuit of an open crumb can sometimes lead aspiring bakers down a path of misunderstanding. It’s crucial to distinguish a truly open crumb from underproofed bread, which can exhibit large, irregular holes but often lacks the cohesive structure and evenness that defines a desirable open crumb. Underproofed bread may also present with denser, gummy areas alongside the overly large voids, a sign that the fermentation process was incomplete.
Beyond the Visual: The True Significance of an Open Crumb
While the visual appeal of an open crumb is striking, its importance extends beyond mere aesthetics. A well-developed open crumb is a reflection of several critical baking processes:

- Vigorous Fermentation: A healthy and active sourdough starter, coupled with sufficient fermentation time, produces ample carbon dioxide to inflate the dough.
- Proper Dough Development: A strong gluten network, achieved through careful mixing and strengthening techniques, is essential to contain the expanding gases.
- Gentle Handling: Preserving the delicate air pockets created during fermentation is paramount. Rough handling can rupture these pockets, leading to a tighter crumb.
Ultimately, an open crumb, when achieved in conjunction with excellent flavor and a pleasant texture, contributes to a truly enjoyable bread-eating experience. It enhances the sensory perception of lightness and airiness, making the bread a pleasure to consume, whether served simply with butter or as the foundation for a gourmet sandwich.
Deconstructing the Open Crumb: Key Factors for Success
Achieving a consistently open crumb requires a nuanced understanding of several interconnected variables in the sourdough baking process. From the very foundation of the dough to the final moments of baking, each decision plays a role.
1. Flour Selection: The Structural Backbone
The type of flour used is arguably the most critical factor in determining the potential for an open crumb. White flours, particularly those with a higher protein content, are generally favored for their superior gluten-forming capabilities.

- Protein Content is Key: Flours with a protein percentage between 11% and 13% for white flour often strike an ideal balance. Higher protein content translates to a more robust gluten network, capable of stretching and expanding to accommodate larger gas bubbles without tearing. This is akin to the difference between a flimsy balloon that pops easily and a high-quality one that can inflate to a significant size while maintaining its integrity.
- The Limits of Strength: While strong flours are beneficial, there is a point of diminishing returns. Flours with protein content exceeding 13% can sometimes result in bread that is overly chewy and has a gummy texture, even with an open crumb.
- High-Extraction Flours: Flours like Type 85, which contain a higher proportion of the whole grain than standard white flour but are still refined, can also contribute to an open crumb, especially when paired with adequate hydration and excellent flavor.
- The Whole Wheat Trade-Off: Whole wheat flour, while rich in nutrients and flavor, presents a challenge for achieving an open crumb. The bran and germ particles within whole wheat flour interfere with gluten development and can puncture the delicate gluten matrix. While a 50% whole wheat loaf will likely not achieve the same airy structure as an all-white flour loaf, the trade-off for enhanced flavor and nutritional value is often considered worthwhile.
2. Sourdough Starter: The Engine of Fermentation
A healthy and active sourdough starter is the indispensable powerhouse behind sourdough bread’s leavening and flavor. Its consistent vitality directly impacts the dough’s ability to develop an open crumb.
- Maintaining a Vibrant Starter: Regular feeding schedules and maintaining an optimal temperature (around 74-78°F or 23-25°C) are crucial for ensuring the starter’s robustness. While daily double-feedings are employed by some bakers for peak vitality, the frequency can be adjusted based on individual needs and environmental conditions.
- The Ripeness Factor: Using sourdough starter at its peak ripeness is critical. A ripe starter will exhibit a bubbly, airy texture and a pleasant, tangy aroma. Using starter that is overly acidic or has begun to collapse can introduce an excess of protease enzymes into the dough, which can degrade the gluten network prematurely during fermentation, leading to a tighter crumb. Signs of ripeness typically include doubling in volume, a domed top, and a frothy texture.
3. Hydration Levels: The Extensibility Enabler
The amount of water in a sourdough dough significantly influences its extensibility and its capacity to create an open crumb.
- Higher Hydration, Greater Potential: Generally, a higher dough hydration (the ratio of water to flour) makes it easier to achieve an open crumb. More water results in a more extensible dough, allowing it to stretch and expand more readily without tearing. During baking, the increased moisture also contributes to steam production, which helps to further expand the crumb.
- The Handling Challenge: It is important to note that higher hydration doughs are more challenging to handle and require greater skill in developing adequate dough strength. Pushing hydration too high for the flour’s capacity can lead to a weak, soupy dough that is difficult to manage and unlikely to yield an open crumb.
- Finding the Sweet Spot: For many bakers, a hydration level between 70% and 80% for predominantly white flour doughs strikes a favorable balance. The ideal hydration is relative to the flour used; a high-protein white flour can often handle 85% hydration, while a softer all-purpose flour might struggle beyond 75%. The goal is a dough that feels alive, responsive, and supple, not overly slack.
4. Dough Development: Building a Strong Foundation
The process of developing the gluten network within the dough is fundamental to its ability to trap gases and form an open crumb.

- The Importance of Sufficient Strength: Adequate gluten development creates an elastic network that can expand under pressure without rupturing. Insufficient dough strengthening can lead to a weak structure that collapses, resulting in a dense crumb.
- Avoiding Over-Elasticity: Conversely, over-mixing can create a dough that is too elastic, making it resistant to expansion. The gluten becomes overly tight, hindering the very stretch needed for an open interior.
- The Windowpane Test: Bakers often aim for a dough that can pass a windowpane test, where a small piece of dough can be stretched thin enough to see light through without tearing. This indicates a well-developed gluten structure. For many home bakers, it’s often advisable to err on the side of slightly more mixing than less.
5. Gentle Handling: Preserving the Delicate Structure
The physical manipulation of the dough throughout the baking process plays a crucial role in preserving the air pockets that contribute to an open crumb.
- Respecting the Air Pockets: During preshaping and final shaping, gentle handling is paramount. The dough contains thousands of gas pockets, each surrounded by gluten walls. Rough handling, such as pressing too firmly or slapping the dough against the counter, can rupture these delicate structures, leading to a tighter, more uniform crumb.
- The Batard Advantage: Oval-shaped loaves, or batards, often exhibit a more open crumb than round boules. This is attributed to two factors: the shaping technique for a batard is generally more linear and less compressive than for a boule, thus preserving more of the developed air structure. Additionally, the elongated shape of a batard allows for more even and rapid heat penetration during baking, which can promote a more open crumb.
6. Proofing: The Final Ascent
The final proofing stage is where the dough reaches its optimal state before baking. It’s a delicate balance between allowing sufficient fermentation to develop flavor and structure, while avoiding over-fermentation, which can degrade the gluten network.
- The Golden Ratio: The ideal proof results in a dough that has risen by approximately 75-80% of its potential height. This leaves enough reserve strength for the dough to expand further in the oven during the critical phase of oven spring.
- Recognizing Under- and Over-Proofing: Underproofed dough will appear tight and spring back quickly when poked. Overproofed dough will feel soft and weak, and may exhibit large bubbles pushing up from beneath. The "poke test" is a valuable tool here: an adequately proofed dough will slowly spring back, leaving a slight indentation.
The Autolyse Technique: An Optional Enhancement
The autolyse, a simple technique involving mixing flour and water and allowing it to rest before adding salt and the sourdough starter or levain, can significantly enhance dough extensibility. This rest period allows enzymes naturally present in the flour to begin breaking down protein bonds, making the dough more pliable and less prone to tearing. For bakers working with high-protein white flours, an autolyse can help tame the dough’s natural elasticity, allowing it to expand more freely and accommodate larger air pockets. Even a short autolyse of 30 minutes to an hour can make a discernible difference in dough handling and crumb structure.

Conclusion: The Art of the Bake, Tailored to Taste
The pursuit of an open crumb in sourdough bread is not about adhering to a rigid set of rules, but rather about understanding the interplay of various factors and making informed choices. It is a journey of experimentation and observation, where each bake offers an opportunity to learn and refine one’s technique.
While an open crumb can certainly enhance the sensory experience of sourdough, it is not the sole determinant of a delicious loaf. Dense, hearty whole grain breads can be equally satisfying and, in some contexts, even more appropriate. The ultimate goal is not to achieve a perfect, Instagram-worthy crumb, but to bake bread that brings joy and satisfaction to the baker and the eater. As seasoned bakers often attest, the bread itself is the greatest teacher, guiding us toward our own definition of the perfect loaf.
Frequently Asked Questions (FAQs)
Q1: How can I avoid an overly open crumb?
To achieve a less open crumb, focus on gentle degassing of the dough during shaping. Before final shaping, use a flat hand to gently pat the dough down from top to bottom. This redistributes the gases more evenly, resulting in fewer large holes and a more consistent interior.

Q2: My bread has a nice open crumb, but why is it gummy or tough?
This often indicates the use of flour that is too strong, meaning it has a very high protein percentage. While beneficial for structure, overly strong flours can sometimes lead to a tough, rubbery mouthfeel even with an open crumb. Experimenting with a slightly lower protein flour or a different blend might resolve this issue.
Q3: What is the ideal proofing time for an open crumb?
The ideal proofing time is not fixed and depends on various factors like ambient temperature and starter activity. The key is to look for visual cues. The dough should appear visibly increased in volume, feel light and airy to the touch, and pass the poke test by slowly springing back. Over-proofing can lead to a denser crumb, while under-proofing will result in large, irregular holes.
Q4: Can I achieve an open crumb with whole wheat flour?
While more challenging, it is possible to achieve a moderately open crumb with whole wheat flour. However, expect a denser structure compared to an all-white flour loaf. Incorporating a higher percentage of white flour or focusing on techniques that maximize gluten development and gas retention will be crucial.
Q5: What is the role of hydration in achieving an open crumb?
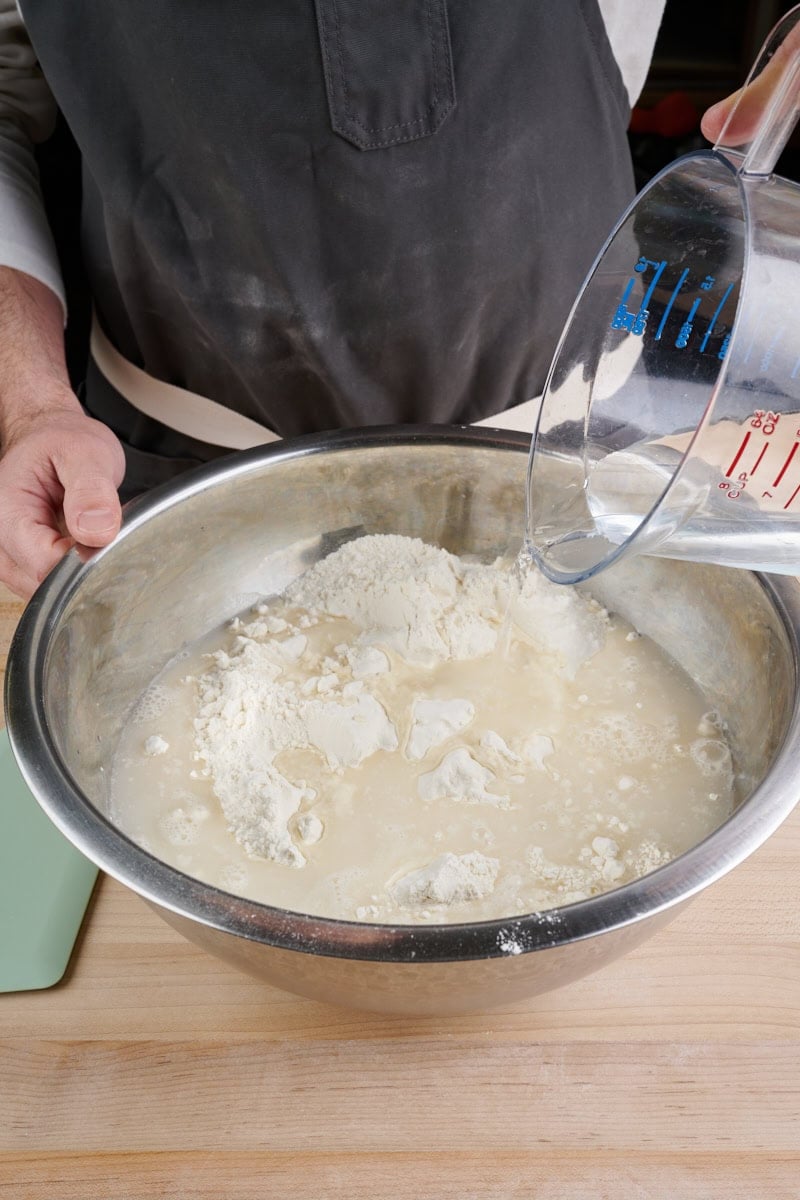
Higher hydration levels generally make it easier to achieve an open crumb by increasing dough extensibility. A more hydrated dough can stretch and expand more readily without tearing, allowing for larger air pockets to form. However, it also requires more skill in handling to maintain dough structure.