
Dough hydration, a seemingly simple metric in sourdough bread baking, unfolds into one of the most intricate and crucial aspects of achieving artisanal loaves. This fundamental concept, often reduced to a percentage in recipes, is in reality a dynamic interplay between the baker, the flour, and the environment. Mastering hydration is not merely about following instructions; it’s about developing an intuitive understanding of how water interacts with flour to create a dough that can transform into a beautiful, flavorful bread. This comprehensive guide explores the nuances of dough hydration, drawing on years of hands-on experience to demystify its impact on the final product.
At its core, dough hydration is a calculation that quantifies the amount of water present in a bread recipe relative to the total weight of flour. The formula is straightforward: (Weight of Water / Total Weight of Flour) * 100%. For instance, a recipe calling for 1,000 grams of flour and 700 grams of water yields a hydration level of 70%. This percentage serves as an initial indicator for bakers, offering a preview of the dough’s expected consistency and behavior before the mixing process even begins.
However, the true complexity of hydration lies in its variability. A hydration percentage is a guideline, not an immutable rule. Flour, the primary ingredient, is inherently inconsistent. Its absorption properties can differ significantly based on its type, the mill it came from, and even the specific batch within a single bag. This inherent variability means that a 70% hydration dough one day might feel entirely different the next, even with the same recipe.
The environment also plays a role, albeit often a secondary one compared to flour. While dramatic shifts in weather, such as a transition from arid conditions to heavy rainfall, can influence dough consistency, the subtle daily fluctuations in humidity can also necessitate adjustments. A dough that mixes smoothly and develops elasticity under dry conditions might require a slightly different approach on a humid day, as the flour may have already absorbed ambient moisture.
The Crucial Role of Hydration in Bread Characteristics
The significance of dough hydration cannot be overstated, as it profoundly impacts the final loaf’s texture, crust, and crumb structure. Water is the transformative agent that converts dry flour into a pliable dough, capable of capturing and expanding with the gases produced during fermentation.
- Under-hydration (Too Little Water): Leads to a dough that is stiff, resistant, and difficult to work with. The resulting bread often exhibits a dense, tight crumb and a thick, chewy crust.
- Over-hydration (Too Much Water): Results in a dough that is excessively wet, slack, and challenging to shape. This can lead to a loaf with a gummy crumb, a tendency to collapse, and a shorter shelf life.
The spectrum between these extremes allows for a vast array of bread styles. Lower hydration levels, typically ranging from 60% to 68%, produce loaves with a more substantial crust and a satisfyingly chewy interior. These are often ideal for breads like bagels, pretzels, and some pan loaves, where a firmer structure is desired.
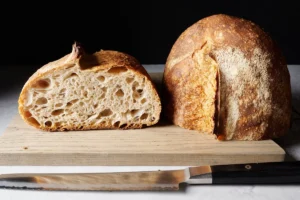
Conversely, higher hydration levels, often found in the 75% to 85% range and beyond, contribute to breads with a more open, airy crumb and a delicate, sometimes brittle crust. Recipes like ciabatta and focaccia, or artisanal country loaves, often benefit from these higher hydration percentages. The author’s personal preference leans towards higher hydration, seeking a thin crust, a tender crumb, and a melt-in-your-mouth quality, a characteristic that arises from a well-hydrated and fully fermented dough.
However, it is important to acknowledge that there is a limit to how much water can be beneficial. Pushing hydration too high can lead to a loaf with an excessively soft texture, a diminished ability to retain its shape post-baking, and a faster staling rate, particularly if not stored correctly. The goal, therefore, is to find a hydration level that achieves the desired characteristics without compromising volume, texture, or overall eating quality.
Understanding Hydration Levels: A Visual Guide
Developing the skill to "read" the dough, rather than blindly adhering to a recipe’s numbers, is paramount. What feels like a wet, soupy dough at 70% hydration with one type of flour might feel remarkably different with another. Observing the dough’s visual cues and tactile sensations is key.
- Under-Hydrated Dough (~62% or less): This dough will appear dry, crumbly, and may show signs of cracking or tearing easily when stretched. It will feel stiff and resistant, making it difficult to achieve a smooth, elastic texture.
- "Just Right" Hydrated Dough (~68-75%): This dough strikes a balance. It will be pliable and somewhat extensible, feeling smooth and elastic. While it may be slightly sticky, it should be manageable, holding its shape reasonably well during shaping.
- Over-Hydrated Dough (~75%+): This dough will appear very wet, slack, and sticky. It will spread out considerably and be difficult to contain, often clinging excessively to hands and surfaces. Shaping this dough requires significant skill and often benefits from techniques like gentle folding and minimal handling.
The Technique of Bassinage: Mastering High Hydration
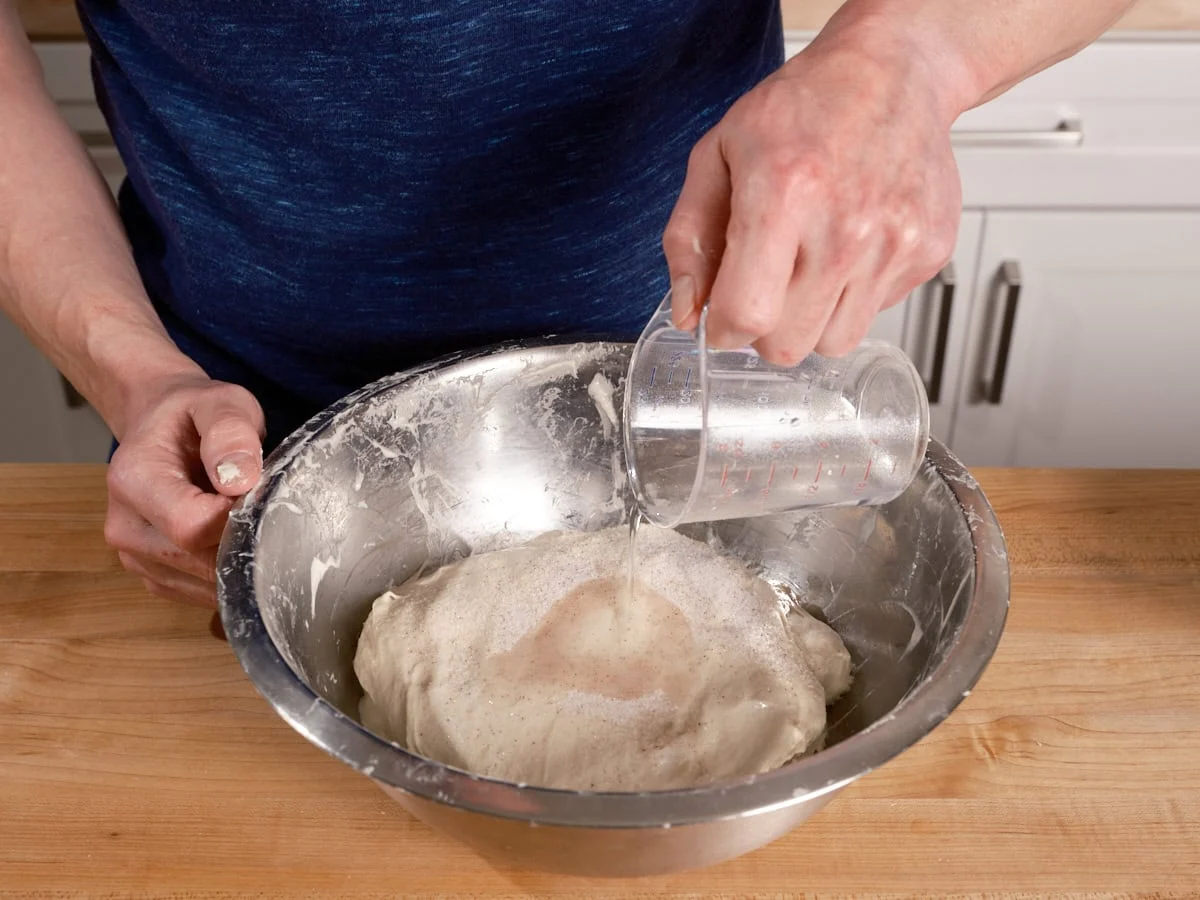
A transformative technique for managing high-hydration doughs is bassinage, often referred to as "double hydration." This method involves adding the total water in stages, reserving a portion to be incorporated during the later stages of mixing.
The benefits of bassinage are twofold:
- Facilitated Gluten Development: By adding most of the water initially (around 80-90%), allowing starches to absorb moisture and the gluten network to begin forming, bakers can then gradually incorporate the remaining water. This staged approach prevents the dough from becoming too wet and unmanageable early on, making it easier to build gluten strength efficiently.
- Assessing Dough Strength: Holding back a portion of the water provides an opportunity to evaluate the dough’s developing strength. Near the end of mixing, the baker can decide whether to incorporate the reserved water based on the dough’s consistency. If the dough feels sufficiently strong and capable of accepting more hydration, the reserved water is added slowly. If it already feels too wet, the remaining water can be omitted. This provides a critical point of control for achieving optimal dough consistency.
Many advanced sourdough recipes incorporate this technique by listing "Water 1" and "Water 2," where Water 2 is the reserved amount for bassinage. A practical application of this is to observe the dough’s state after Water 1 is incorporated. If it’s already exceptionally wet, omitting Water 2 is a wise decision. If it feels robust and can handle more, then slowly add Water 2 while mixing.
Factors Influencing Water Absorption
Several factors influence how much water a dough can and should absorb:
- Flour Type and Protein Content: Flours with higher protein content (typically 12-14% in bread flours) have a greater capacity to absorb water. The protein forms gluten, a stronger network that can hold more moisture, contributing to a tender crumb. In contrast, lower-protein or "softer" flours may require reduced hydration to prevent the dough from becoming too sticky and unmanageable.
- Whole Grain Content: Whole wheat, rye, and other whole-grain flours contain bran and germ, which are highly absorbent. Recipes with a significant proportion of whole grains will typically require higher hydration levels to achieve a desirable dough consistency and a moist crumb. For instance, a 50% whole wheat sourdough might necessitate 82% hydration, a level that would be challenging with 100% white flour.
- Freshly Milled Flour: Flour milled at home, even if sifted, often requires more water than commercially aged flour due to the presence of more active enzymes and finer particle sizes that absorb moisture readily.
- Climate and Environment: Bakers in arid, high-altitude regions may need to increase hydration levels compared to those in more humid, lower-altitude areas. Conversely, on particularly humid days, the flour may have already absorbed ambient moisture, necessitating a slight reduction in added water.
Addressing Sticky Dough Issues
A persistently sticky dough is a common point of frustration for many bakers, often stemming from issues with hydration, dough strength, or both. The primary reasons for a dough being too sticky include:
- Excessive Hydration: Simply adding too much water for the flour’s absorption capacity.
- Insufficient Gluten Development: The gluten network is not yet strong enough to encapsulate the water, leading to a slack and sticky dough.
- Flour Type: Some flours, particularly those with lower protein content or certain whole grains, inherently absorb less water, making them prone to stickiness at higher hydration levels.
- Environmental Factors: High humidity can make the flour more receptive to water, increasing perceived stickiness.
Tips for Handling High-Hydration Doughs
As hydration levels increase, dough stability naturally decreases. Pushing the gluten matrix to its limits requires specific strategies:
- Use Wet Hands or a Dough Scraper: For shaping and handling, lightly wetting hands or using a bench scraper can prevent dough from sticking.
- Gentle Folding Techniques: Employing gentle stretch-and-folds or coil folds during bulk fermentation helps build dough strength without degassing it excessively.
- Adequate Bulk Fermentation: Allowing sufficient time for fermentation is crucial, as it strengthens the gluten network and makes the dough more manageable.
- Proper Shaping: A well-executed shaping technique is vital for creating surface tension and providing structure to a high-hydration dough.
- Utilize Proofing Baskets (Bannetons): These baskets provide support during the final proof, helping the dough maintain its shape before baking.
Hydration Quick Reference Chart
| Hydration Level | Characteristics | Best For |
|---|---|---|
| 60-65% | Stiff, easy to handle, potentially thicker crust | Bagels, pretzels, pizza, some pan loaves |
| 65-70% | Balanced, manageable, good structure | Classic breads, beginner-friendly sourdough |
| 70-75% | Moderately open crumb, thin crust | Classic country loaves, baguettes |
| 75-80% | Requires longer mixing, tender crumb, skill needed | Ciabatta, focaccia, open-crumb loaves, sandwich loaves |
| 80%+ | Requires longer mixing, open/custard-like crumb, challenging to shape | High-hydration loaves |
Frequently Asked Questions About Dough Hydration
Why can’t I just add more flour if my dough is too wet?
Adjusting the flour weight in a recipe disrupts the fundamental baker’s percentages, which are based on the total flour weight. All other ingredients (salt, starter, etc.) are calculated as a percentage of this flour. Changing the flour amount requires recalculating all other ingredients to maintain the intended ratios. Modifying water, however, isolates the change to hydration and doesn’t affect the proportions of other components. If a dough is completely unmanageable due to excessive water, adding a small amount of flour as a last resort is acceptable, but this deviation should be noted for future adjustments.
Does higher hydration automatically mean a more open crumb?
Not necessarily. While hydration is a significant factor, crumb structure is a complex interplay of multiple elements. Proper fermentation, effective shaping techniques, and precise baking are equally critical. It’s possible to achieve an open crumb with moderate hydration and a tight crumb with high hydration if other factors are not optimized. The focus should be on mastering all aspects of baking rather than solely on increasing water content.
What hydration should a beginner start with?
For beginners, a hydration level of 68-70% using a quality bread flour is highly recommended. This range offers a dough that is forgiving and manageable, while still yielding excellent results. As bakers gain experience and develop an understanding of dough behavior at different stages, they can gradually experiment with higher hydration levels.
What is the ideal hydration for bread dough?
There is no single "ideal" hydration. The optimal level is contingent upon the specific flour used and the desired characteristics of the final bread. Generally, most bread doughs fall within the 60%-80% hydration range, though variations outside this spectrum are also possible.
Cultivating Baker’s Intuition
Ultimately, understanding dough hydration transcends mere calculation; it involves developing sensitivity and what seasoned bakers refer to as "baker’s intuition." This involves learning to interpret the dough’s signals—how it looks, feels, and behaves—rather than rigidly adhering to numerical guidelines. Every bag of flour, every kitchen environment, and every baking day presents unique variables. The most accomplished bakers treat recipes as starting points for a dialogue with their ingredients.
The practice of keeping detailed baking notes is invaluable. Recording the hydration percentage used, the dough’s consistency, ambient weather conditions, and the final loaf’s outcome allows bakers to track their progress and refine their understanding over time. Through consistent practice and mindful observation, an intuitive grasp of hydration will emerge, a skill that no written guide can fully replicate.