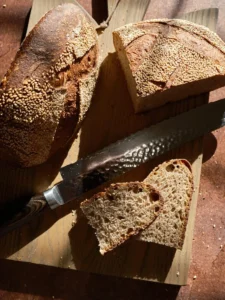
This spice-forward, hearty sourdough is precisely the kind of bread that beckons one to the warmth of the kitchen, a comforting bulwark against the lingering chill that has gripped the month far longer than is customary. The frigid weather, while a formidable adversary, does possess a certain power to motivate, compelling the baker to ignite the oven and entrust a well-proofed dough to its embrace. Yet, the early onset of darkness and the biting, dry air do little to ease the overall endeavor. The good news, however, is that at every stage of this bread’s creation – from the pungent, anise-infused aroma released as the spice is ground, to the sweet and rich notes of malt, the visually appealing buckwheat-speckled dough, and the silken texture derived from the flour scald – the baker finds themselves increasingly unfazed by the encroaching cold.
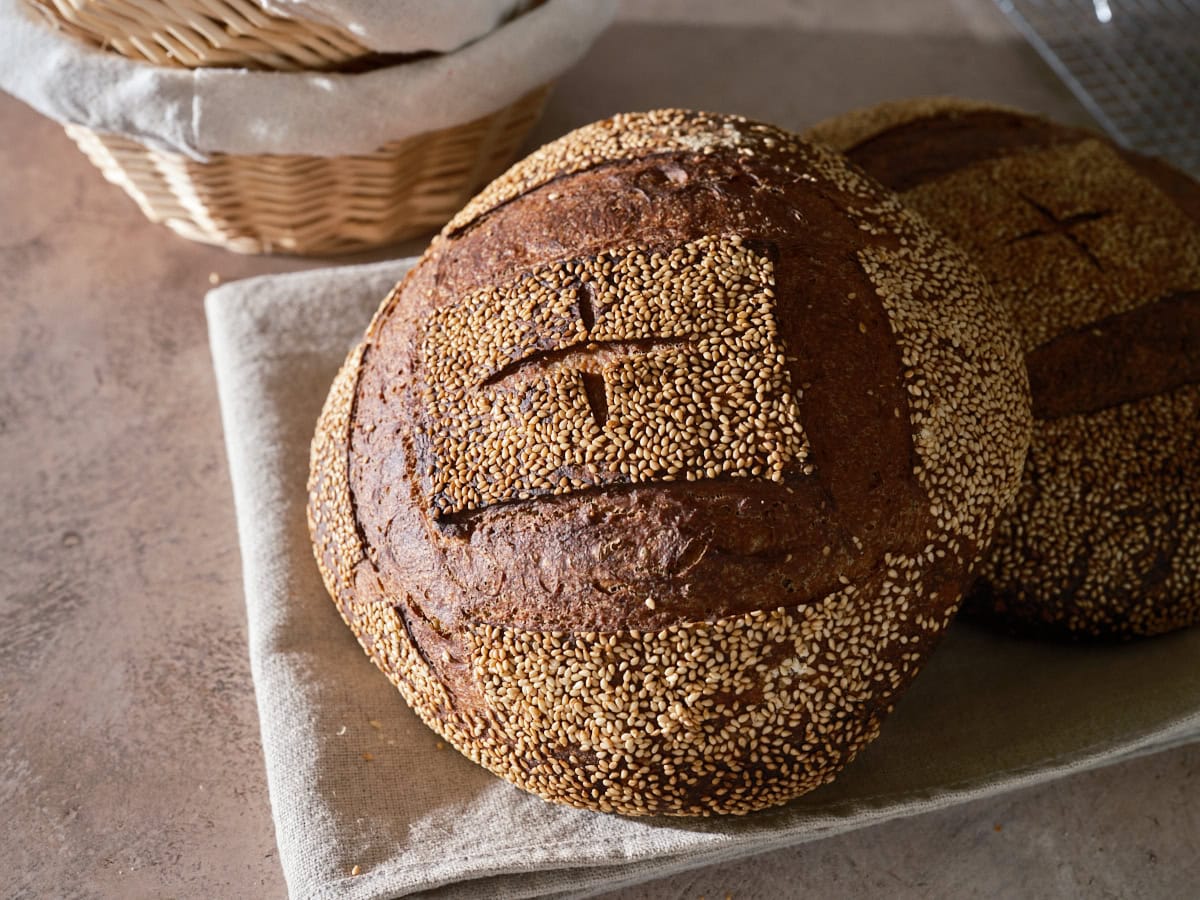
Anise, with its potent, licorice-like sweetness, is a beloved spice for many in the culinary world, particularly in the realm of baking. Whether employed whole, as often seen in certain sourdough discard biscotti recipes, or ground and incorporated into a myriad of cookies, its distinctive flavor profile is undeniable. It is noteworthy, however, that its inclusion in a large, artisanal loaf of bread is a less common, yet highly rewarding, application. Anise does not merely suggest its presence; it announces it with an assertive, captivating fragrance. When paired with the nutty, mineral, and subtly tannic characteristics of buckwheat, the result is a sourdough bread that achieves a remarkable balance and an almost irresistible appeal. To crown this masterpiece, the addition of striking white sesame seeds provides a delightful textural contrast and a complementary flavor that harmonizes beautifully with the bread’s inherent spice and sweetness, creating a visual and gustatory symphony on the palate.
The Science and Art of the Flour Scald
The inclusion of buckwheat in this particular recipe was a deliberate choice, inspired by the desire to impart a unique depth of flavor and texture to the final loaf. The technique of scalding flour, a process of simply covering it with boiling water, transforms it into a gelatinous paste. This paste, when incorporated into the final dough, offers a dual benefit: it significantly enhances the flour’s inherent flavor while also contributing a desirable textural element to the bread. This method bears a strong resemblance to the Yudane technique and is closely related to the Tangzhong method, both popular in Asian baking for their ability to create exceptionally soft and moist bread. The scalded flour paste is not only highly aromatic and flavorful but also plays a crucial role in retaining moisture within the loaf, thereby delaying the staling process and extending the bread’s freshness. It is a straightforward yet remarkably effective technique that elevates the quality of the finished product.
Strategic Flour Selection for Hearty Character
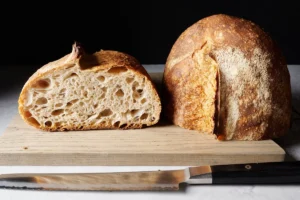
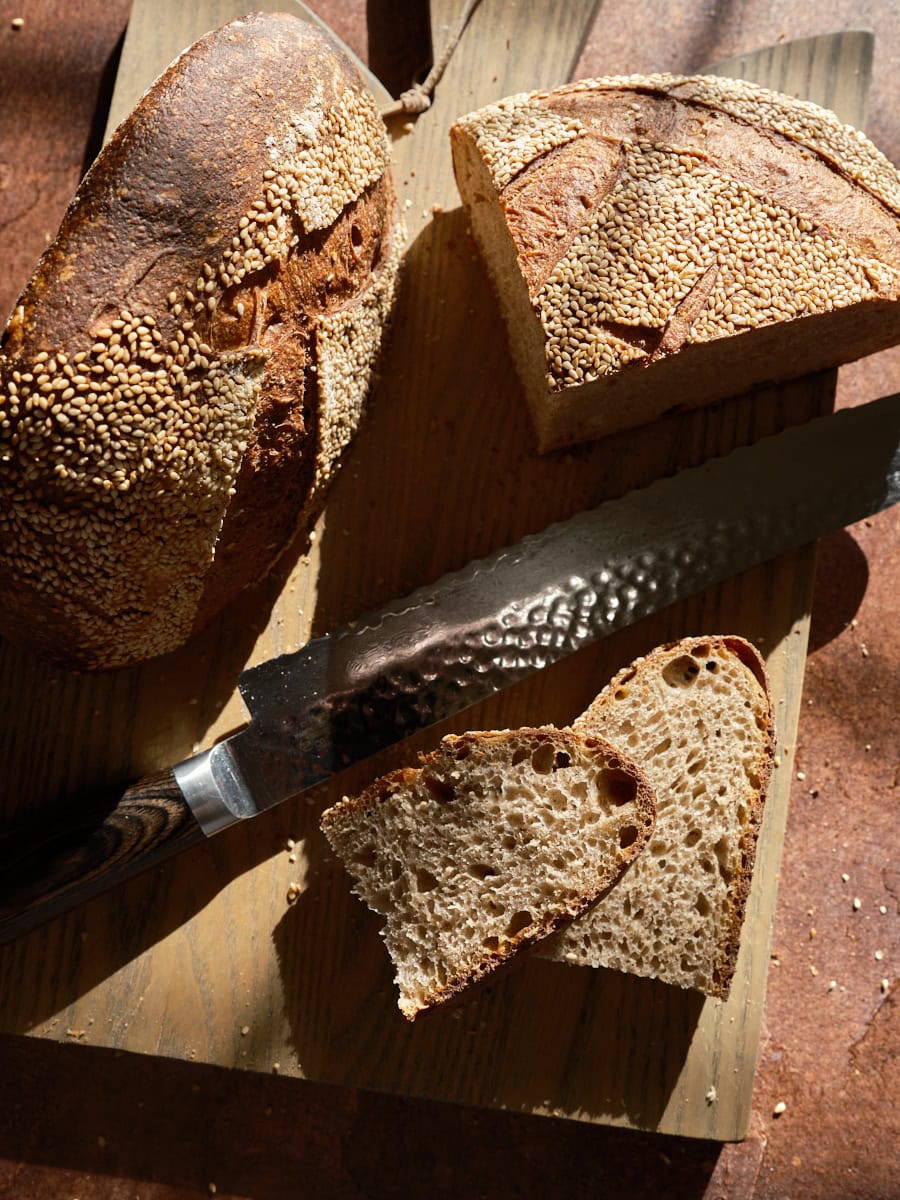
In crafting this loaf with the intention of creating a hearty, spicy, and sandwich-ready bread, the choice of flour was paramount. High-extraction (Type 85) flour was selected as the base, specifically Cairnspring’s Trailblazer, a flour renowned for its versatility and robust performance in baking. This type of flour, which retains a greater proportion of the bran and germ compared to refined white flours, imparts a richer flavor and enhanced nutritional profile to the bread. Buckwheat flour, while not possessing the same gluten-forming properties as wheat, contributes an intense earthiness and a beautiful, deep color to the final loaf, even when used in smaller percentages. Previous experience with buckwheat has shown that, due to its lack of gluten structure, it can sometimes lead to a denser crumb. However, this trade-off is readily accepted for the distinctive flavor and visual appeal it offers.
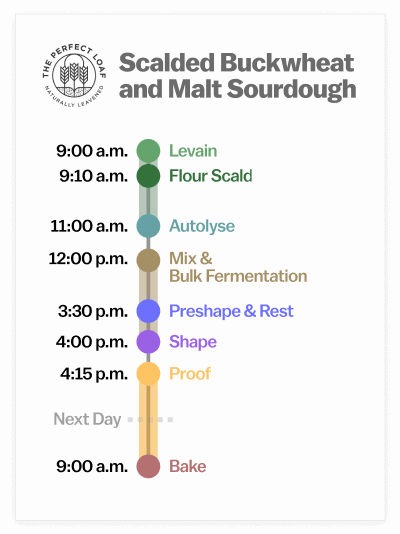
A Deliberate Baking Schedule for Optimal Development
This sourdough bread recipe is meticulously designed to unfold over a two-day period, requiring minimal active intervention from the baker. The primary focus is on allowing the dough to develop naturally during bulk fermentation, with periodic checks and gentle folds. Following shaping, the dough undergoes a crucial cold proof in the refrigerator overnight, a process that not only aids in flavor development but also makes the dough easier to score and handle before baking. The following day, the loaves can be baked in the morning for immediate enjoyment or retarded further in the fridge until the evening, ensuring a freshly baked loaf is ready for dinner. This controlled fermentation process is key to achieving the desired texture and complex flavor profile characteristic of artisanal sourdough.
Technical Specifications of the Scalded Buckwheat and Malt Sourdough
The following vitals provide a concise overview of the recipe’s parameters, designed to yield two approximately 900-gram loaves. For bakers seeking to adjust quantities, an editable spreadsheet is available to facilitate scaling the recipe up or down with ease.
- Total Dough Weight: 1,800 grams
- Prefermented Flour: 5.8%
- Levain in Final Dough: 18.5%
- Hydration: 75.0% (calculated at 83% when including the water from the flour scald)
- Yield: Two 900g loaves
The objective for the final dough temperature in this recipe is typically around 78°F (26°C). Achieving this precise temperature is facilitated by utilizing a water temperature calculator, which allows bakers to adjust the water temperature accordingly. This attention to dough temperature is critical for ensuring optimal yeast and bacteria activity during fermentation, leading to a well-structured and flavorful loaf.
The Comprehensive Formula for Two Loaves
The detailed formula below outlines the precise measurements for each ingredient, allowing for meticulous replication of the recipe.
| Weight (g) | Ingredient | Baker’s Percentage (%) | Notes |
|---|---|---|---|
| 46 | Scald: Buckwheat flour | 5.0% | Anthony’s Organic Buckwheat Flour recommended |
| 73 | Scald: Water | 8.0% | Boiling |
| 687 | High-extraction wheat flour (Type 85) | 75.0% | Cairnspring Trailblazer recommended |
| 183 | Whole wheat flour | 20.0% | Camas Country Hard Red Wheat recommended |
| 46 | Barley malt syrup | 5.0% | |
| 6 | Aniseed, ground | 0.6% | |
| 596 | Water 1 (levain and autolyse) | 65.0% | |
| 92 | Water 2 (mix) | 10.0% | Held back for bassinage |
| 18 | Fine sea salt | 2.0% | |
| 53 | Ripe sourdough starter (100% hydration) | 5.8% |
Method: A Step-by-Step Guide to Scalded Buckwheat and Malt Sourdough
1. Prepare the Levain (9:00 a.m.)
The levain, the heart of any sourdough, is prepared first. For this recipe, the following proportions are used:
| Weight (g) | Ingredient | Baker’s Percentage (%) |
|---|---|---|
| 53 | High-extraction wheat flour | 100.0% |
| 53 | Water 1 (levain) | 100.0% |
| 53 | Ripe sourdough starter (100% hydration) | 100.0% |
Combine these ingredients in a clean jar and allow them to ripen at a temperature of 74-76°F (23-24°C) for approximately 3 hours. This stage is crucial for developing the microbial activity necessary for leavening and flavor. For bakers wishing to adjust the levain quantity, a sourdough starter and levain calculator is available to ensure precise ratios.
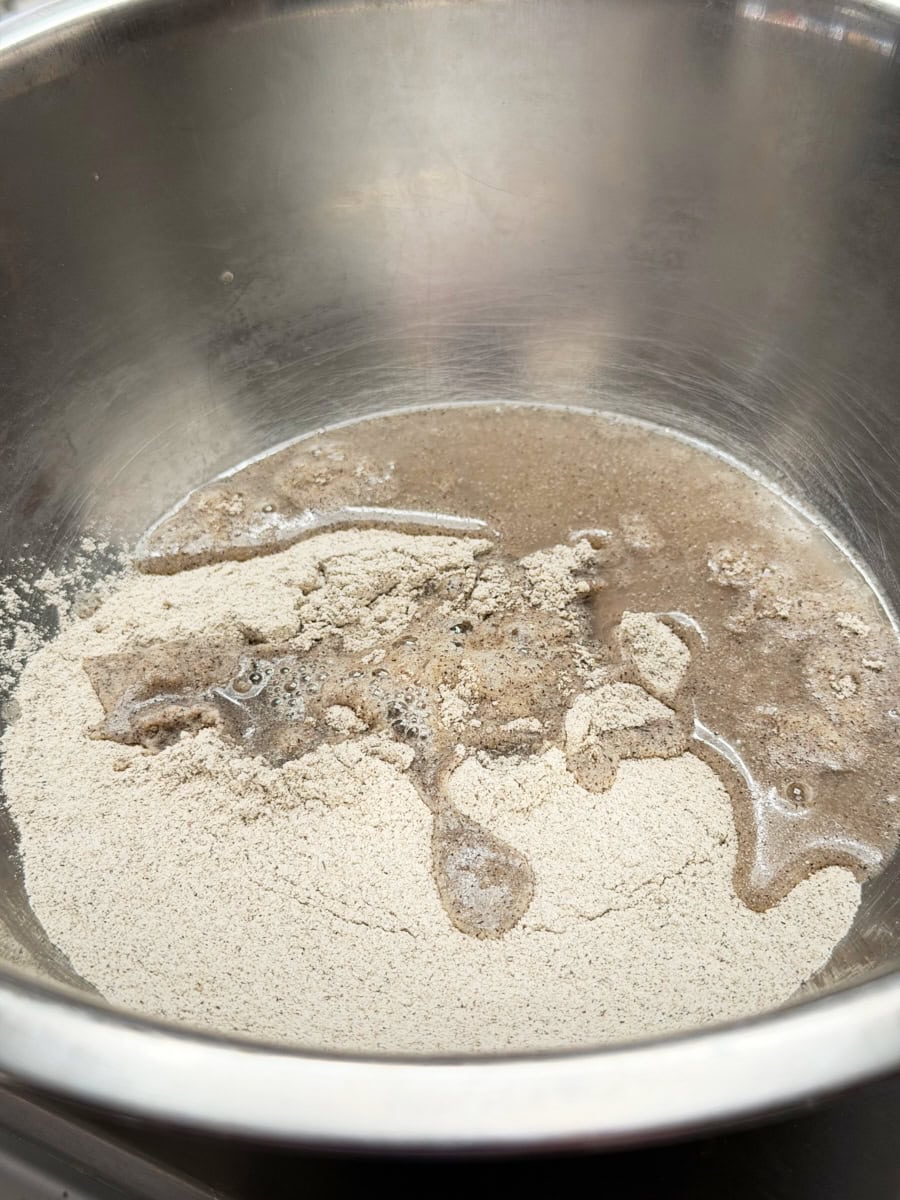
2. Prepare the Flour Scald (9:10 a.m.)
This step imbues the bread with its unique texture and moisture-retaining properties.
| Weight (g) | Ingredient |
|---|---|
| 46 | Buckwheat flour |
| 73 | Water, boiling |
In a small bowl, combine the buckwheat flour and pour the boiling water over it. Stir vigorously until a thick paste forms. If the mixture appears too dry, a small additional splash of boiling water can be added. The resulting paste should be aromatic and dense. This scald is then set aside to cool slightly before incorporation into the dough.

3. Autolyse (11:00 a.m.)
The autolyse period allows the flour to fully hydrate and begin gluten development, simplifying the mixing process.
| Weight (g) | Ingredient |
|---|---|
| 634 | High-extraction wheat flour |
| 183 | Whole wheat flour |
| 543 | Water 1 (autolyse) |
| All | Flour scald (from Step 2) |
Using a water temperature calculator to achieve a final dough temperature of 78°F (25°C), combine the flours, autolyse water, and the prepared flour scald in a large bowl. Mix with wet hands until no dry flour remains, creating a shaggy, hydrated mass. Cover the bowl and let it rest for 1 hour. During this time, the dough will begin to strengthen and become more cohesive.
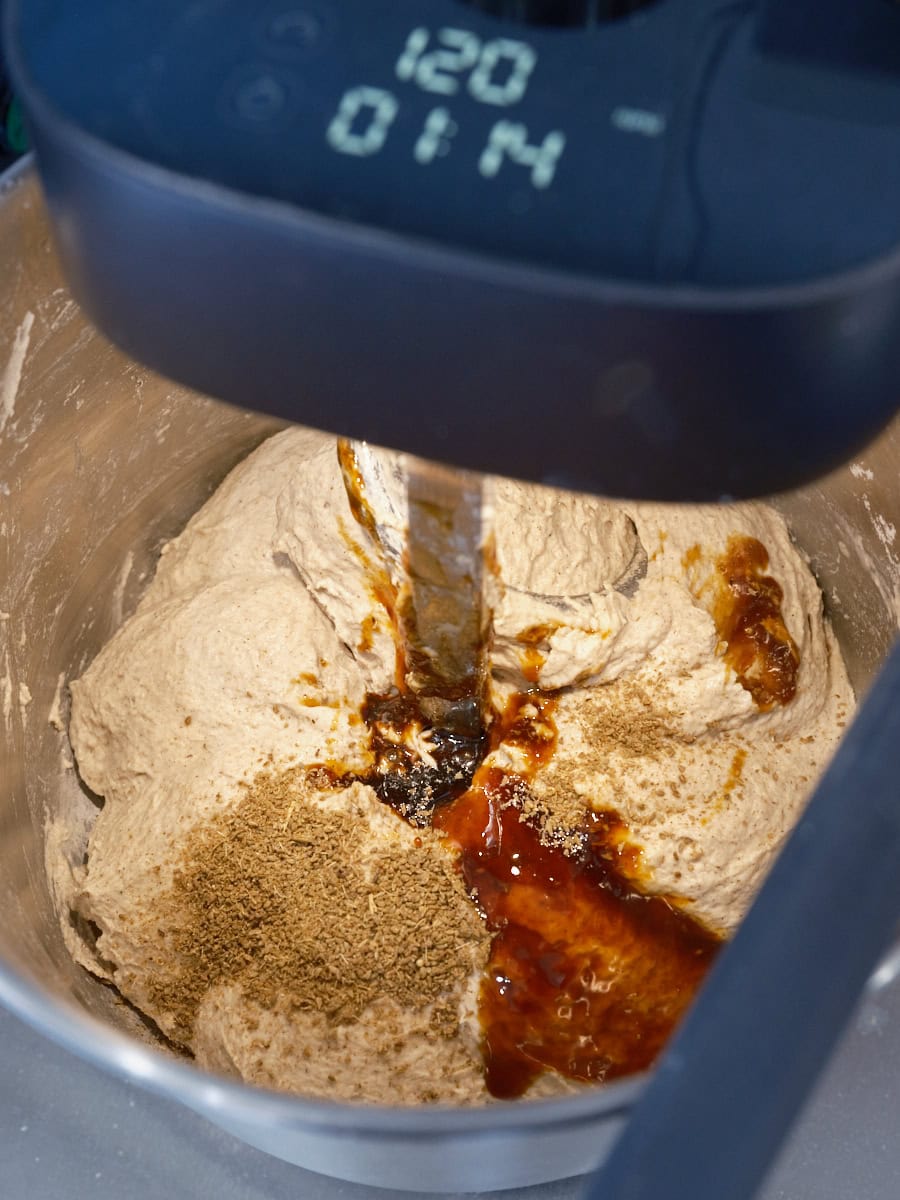
4. Mix the Dough (12:00 p.m.)
This stage incorporates the remaining ingredients, including the levain, salt, and the carefully controlled addition of the remaining water.
| Weight (g) | Ingredient |
|---|---|
| 92 | Water 2 (mix) |
| 18 | Fine sea salt |
| 159 | Ripe levain (from Step 1) |
It is important to note that this recipe features a high hydration level, which will result in a slack and sticky dough. The "bassinage" technique, where Water 2 is added gradually, is employed here to ensure the dough does not become overly hydrated. This meticulous approach helps achieve the desired dough consistency.
For mechanical mixing, the dough can be processed in a spiral mixer, incorporating ingredients in phases. When mixing by hand, the salt and levain are added to the autolysed dough. A small amount of Water 2 is used to moisten the mixture, and then the dough is kneaded using either the slap-and-fold technique or a series of folds within the bowl until it becomes smooth and cohesive. This process typically takes about 5-7 minutes.
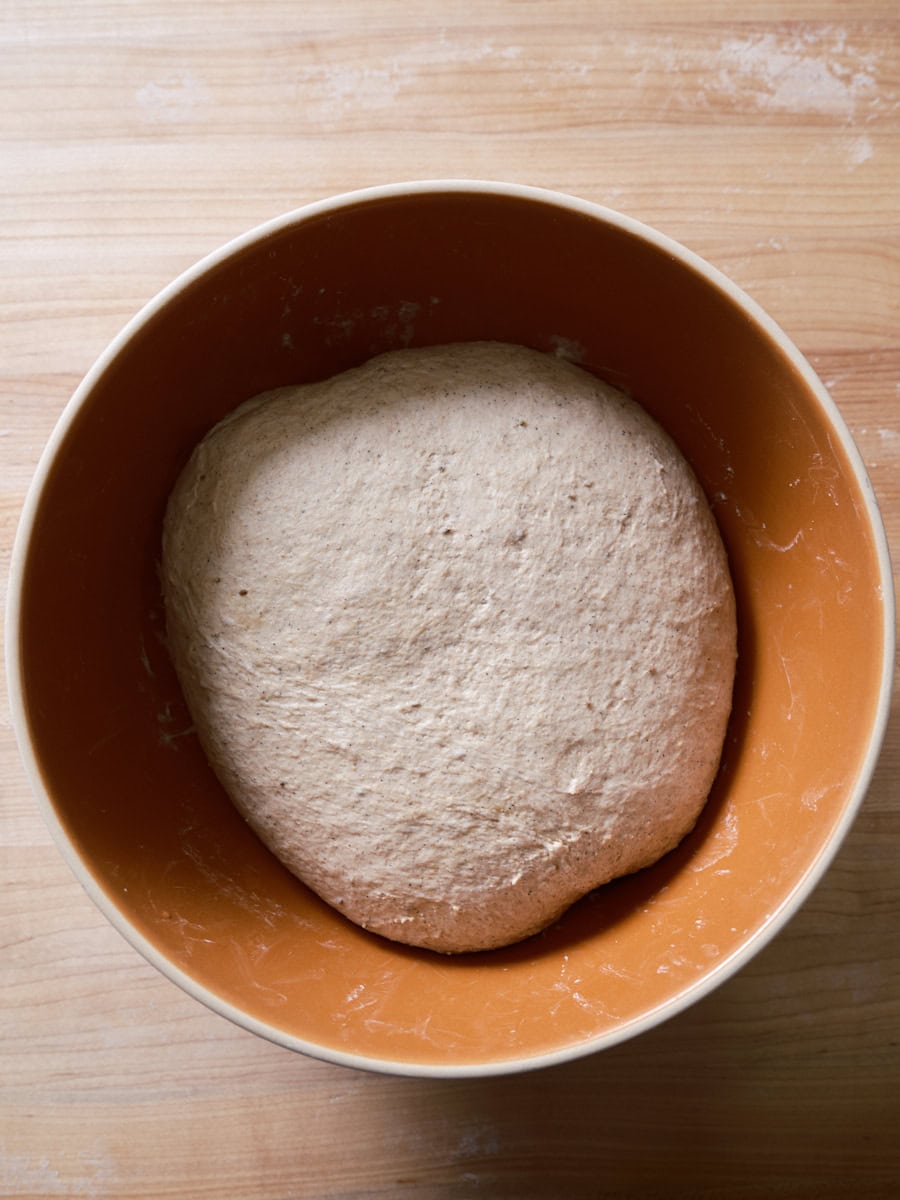
5. Bulk Fermentation (12:30 p.m. to 3:30 p.m. – 3 hours)
This extended period of fermentation is crucial for flavor development and dough strength.
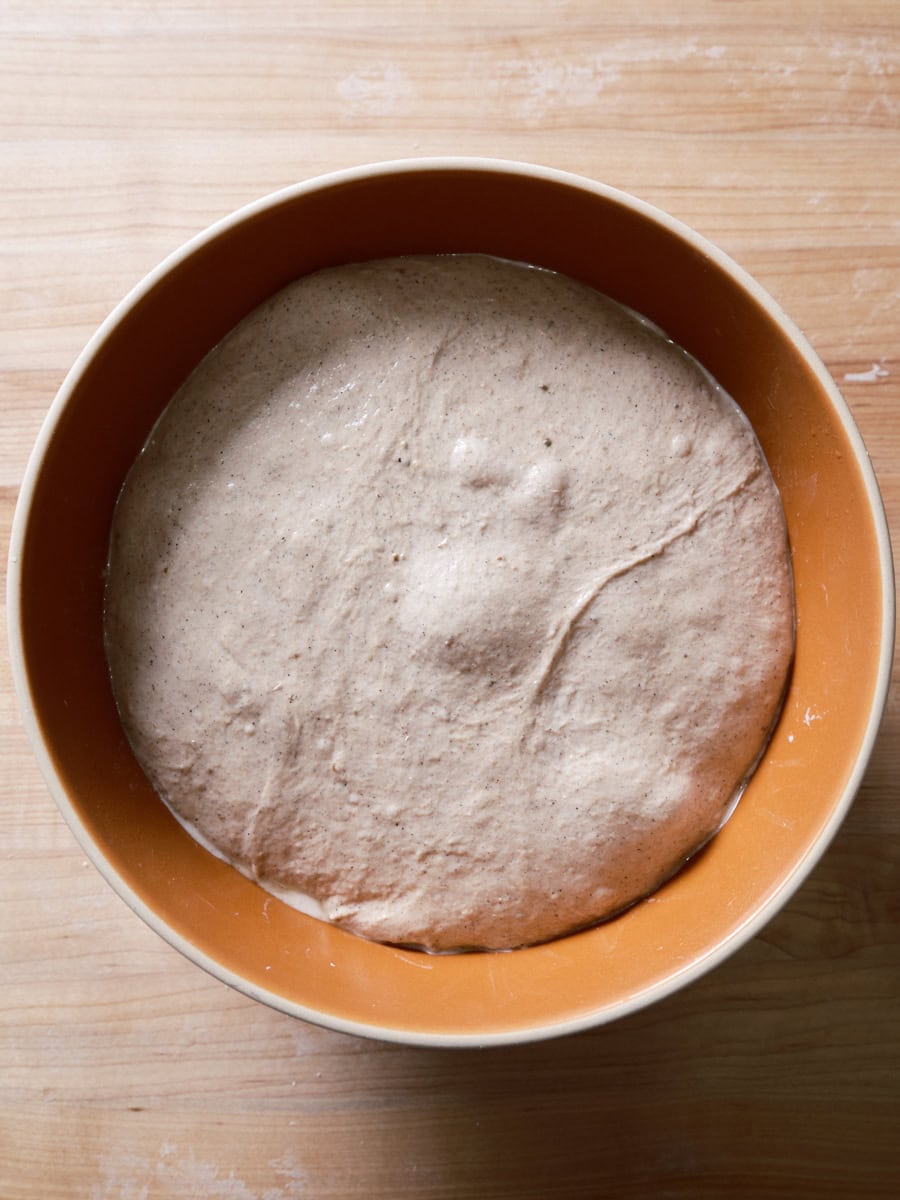
Under warm room conditions (74-76°F or 23-24°C), bulk fermentation should last approximately 3 hours. This phase includes two sets of stretch and folds, performed at 30-minute intervals. The stretch and fold technique involves gently stretching one side of the dough and folding it over the rest of the mass. This is repeated on all sides of the dough, rotating the bowl each time. After the second set of folds, the dough is allowed to rest undisturbed for the remainder of the bulk fermentation. By the end of this stage, the dough should appear visibly puffy and have increased in volume by about 30%.
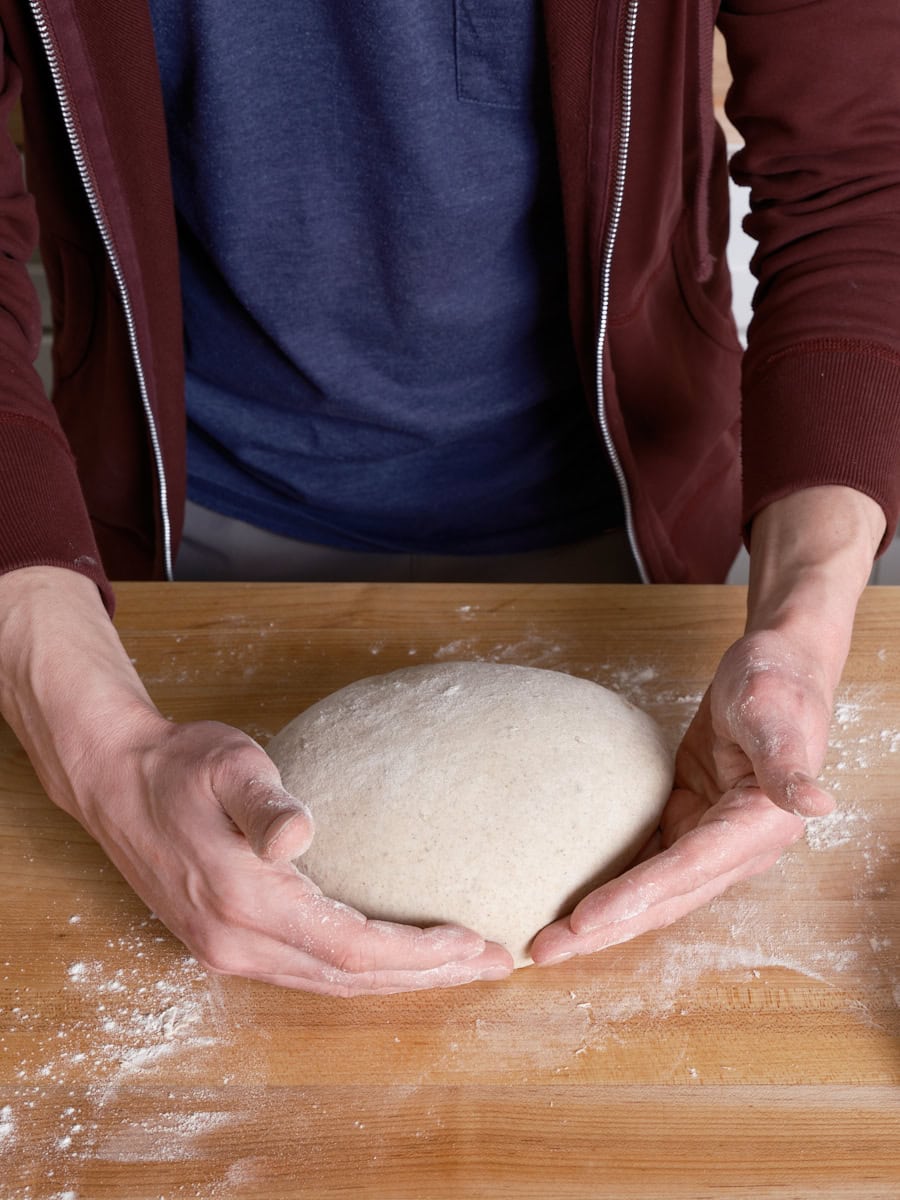
6. Pre-shape (3:30 p.m.)
Following bulk fermentation, the dough is gently turned out onto a lightly floured surface. It is then divided in half, and each portion is pre-shaped into a loose round. This step begins to build surface tension and prepare the dough for its final form. The pre-shaped rounds are allowed to rest, uncovered, for 30 minutes.
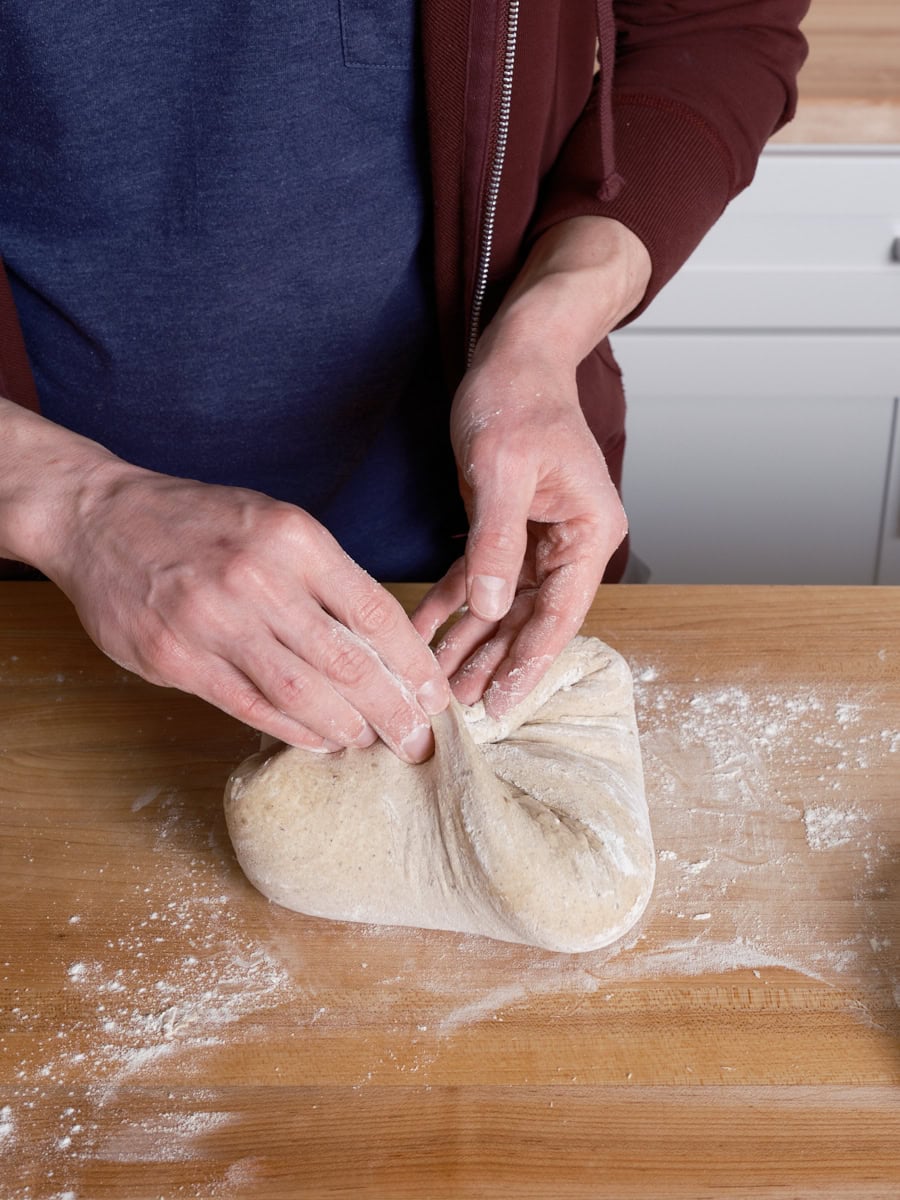
7. Shape (4:00 p.m.)
The shaping process is critical for creating a well-formed loaf with good oven spring.
A generous layer of raw white sesame seeds is spread on a clean kitchen towel or a quarter sheet pan. The pre-shaped dough rounds are then gently flipped onto this seeded surface. Using a bench scraper and hands, the dough is shaped using the "gather up" method. This involves folding opposing points of the dough into the center, creating layers and building tension. The dough is then inverted and, by dragging it towards the body, a smooth, taut surface is formed. Each shaped loaf is then carefully placed, seam-side up, into a floured 10-inch proofing basket.

8. Proof (4:15 p.m. to 9:00 a.m. the following day)
The final proofing stage, typically an overnight cold proof in the refrigerator, is essential for developing complex flavors and making the dough easier to score. The proofing baskets are covered with reusable plastic bags and sealed to prevent the dough from drying out.
9. Bake (9:00 a.m.)

The baking process begins with preheating the oven to 450°F (230°C) with a Dutch oven or baking stone/steel in place. The cold-proofed dough is then carefully transferred from the proofing basket onto parchment paper. It is scored with a razor blade or lame to control the expansion of the loaf during baking.
The loaves are baked in a steamy environment for the initial 20 minutes, typically achieved by covering the Dutch oven or adding ice to a preheated pan at the bottom of the oven. After this initial steaming period, the steam is released by removing the lid of the Dutch oven or the steaming pans. The loaves continue to bake for another 30 minutes, or until they achieve a deep, rich brown crust and an internal temperature of approximately 204°F (95°C). The process is repeated for the second loaf. Once baked, the loaves are allowed to cool completely on a wire rack for 1 to 2 hours before slicing, allowing the internal structure to set.
Frequently Asked Questions and Culinary Alternatives
What can I use instead of aniseed?
For those who prefer not to use aniseed or are looking for an alternative, caraway seeds offer a comparable aromatic profile and a similar spice note that would complement the other flavors in the bread beautifully.
What can I use instead of barley malt syrup?
Barley malt syrup contributes a unique malty sweetness and a slight bitterness. If unavailable, blackstrap molasses can be used to achieve a similar bitter-sweet flavor profile. Alternatively, honey can be substituted for a more pronounced floral sweetness that also pairs exceptionally well with anise.

Expanding the Sourdough Repertoire
For bakers who have fallen in love with the combination of buckwheat and sourdough, the Soft Honey Buckwheat Sandwich Bread offers another delightful option, providing a rich yet sweet loaf that is perfect for everyday enjoyment. The exploration of these diverse sourdough recipes allows for a continuous journey of culinary discovery, bringing warmth and flavor to the home kitchen, regardless of the season.