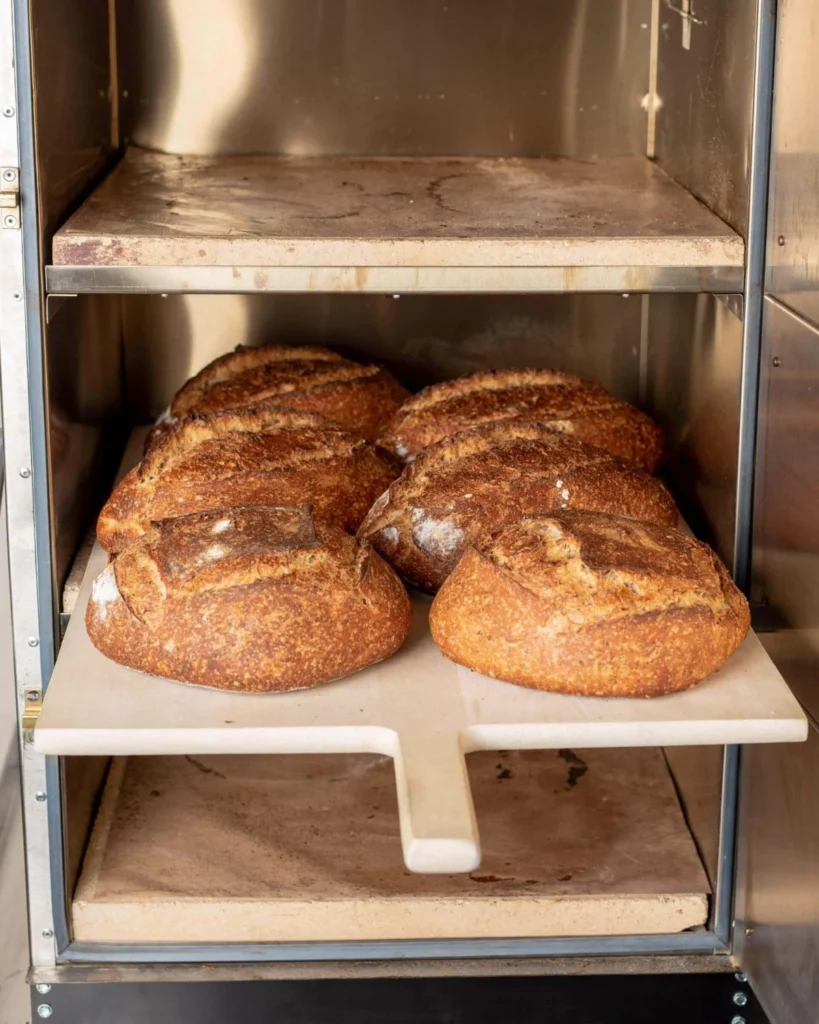
This particular sourdough creation emerges as a comforting culinary response to the persistent chill that has characterized the current month, extending its frosty grip far beyond seasonal expectations. While the biting cold undeniably serves as a potent catalyst for firing up the oven and coaxing a well-proofed dough to life, the encroaching darkness and the dry, biting air do little to ease the process. However, the journey of crafting this bread offers a welcome respite. From the initial, pungent aroma of freshly ground anise to the rich, sweet undertones of malt, the visually appealing buckwheat-speckled dough, and the silken texture imparted by the flour scald, each step provides a distraction from the encroaching chill, making the effort feel less arduous and more rewarding.
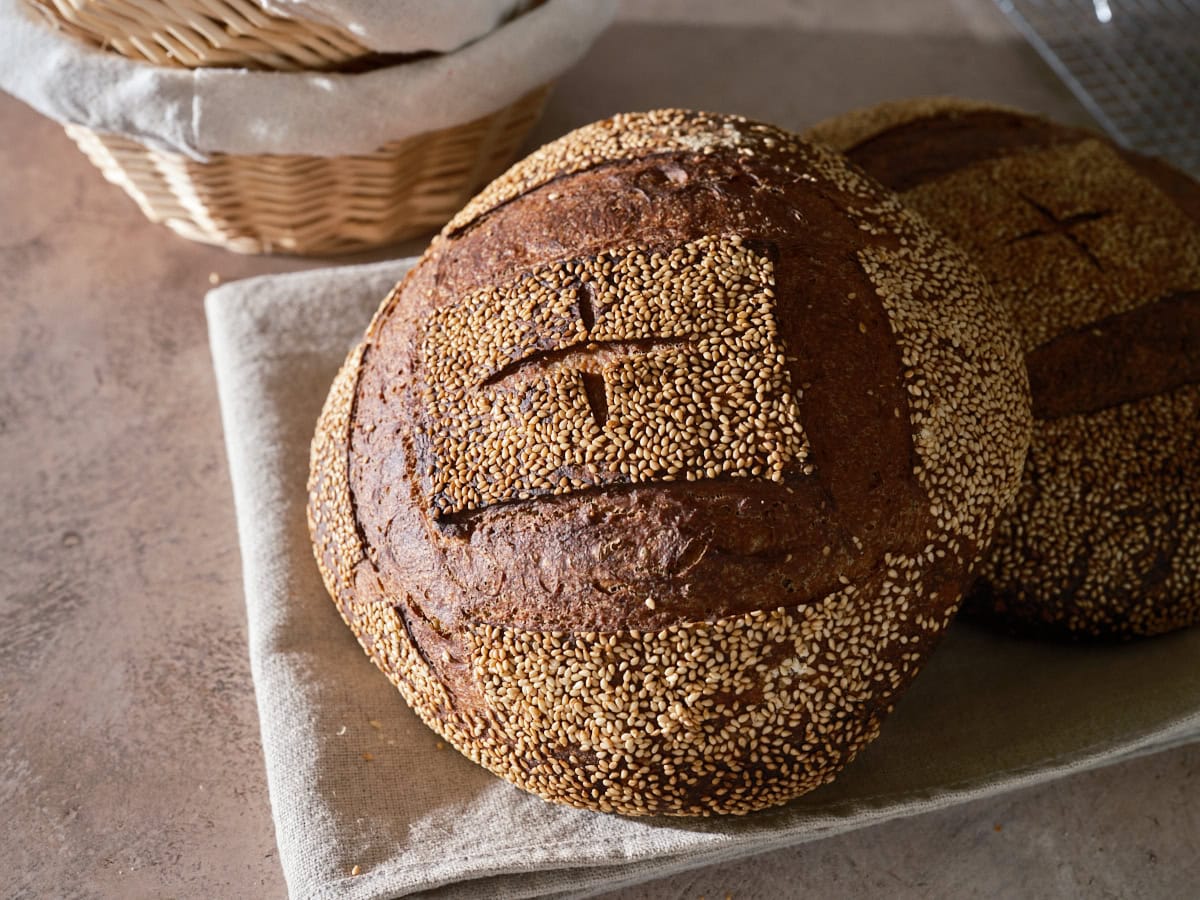
Anise, with its potent, licorice-like sweetness, holds a special place in the baker’s repertoire. While often employed whole in creations like sourdough discard biscotti, as detailed in the author’s cookbook, its ground form finds its way into numerous other baked goods. It was during this creative process that a realization dawned: anise, despite its widespread use, had yet to be featured in a substantial loaf of sourdough bread. The assertive nature of anise is undeniable; it doesn’t merely suggest its presence, it announces it. When paired with the earthy, mineral, and subtly tannic notes of buckwheat, the result is a sourdough bread that achieves a remarkable balance, rendering it utterly irresistible. To elevate the aesthetic and flavor profile further, the loaf is finished with a generous scattering of striking white sesame seeds. These seeds not only complement the spice and sweetness inherent in the bread but also provide a visually stunning contrast against the hearty, whole-grain crumb.
The Significance of the Flour Scald Technique
The inspiration to incorporate buckwheat into this recipe led to the exploration of the flour scald technique. This method is not merely about enhancing flavor; it is also a highly effective means of developing a unique texture in the final bread. A flour scald involves the simple act of covering flour with boiling water. This process gelatinizes the starches, transforming the flour into a thick, paste-like consistency. This technique shares significant similarities with the Japanese yudane method and is closely related to the tangzhong technique, both of which are known for their ability to retain moisture and extend the shelf life of baked goods. The resulting scalded paste is intensely aromatic and flavorful. Crucially, it acts as a moisture retainer within the dough, helping to keep the final loaf softer for an extended period and effectively delaying the staling process. This straightforward yet impactful technique is frequently employed to add an extra dimension of quality to each loaf.
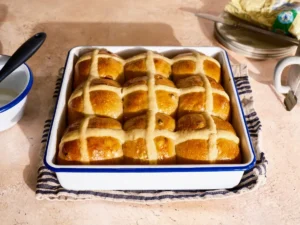
The visual appeal of the scalded buckwheat and malt sourdough bread is undeniable, with the earthy, licorice-flavored anise permeating each slice. The inclusion of a detailed baking schedule further aids bakers in replicating this complex process.
Flour Selection: A Foundation of Flavor and Nutrition
The objective for this particular loaf was to create something hearty, spicy, and exceptionally well-suited for sandwiches. To achieve this, a high-extraction (Type 85) flour was chosen as the foundational element. Cairnspring’s Trailblazer, a robust Type 85 flour, is a staple in the author’s kitchen, often substituted for white flour in various recipes. This choice introduces a greater proportion of bran and germ into the final bread, thereby enhancing both its flavor profile and nutritional content.

Buckwheat, based on prior experience, tends to tighten the crumb structure when used in even small percentages, owing to its distinct lack of the gluten-forming proteins found in wheat. However, this structural characteristic is a worthwhile trade-off for the intense earthiness and the visually striking color it imparts to the finished loaf.
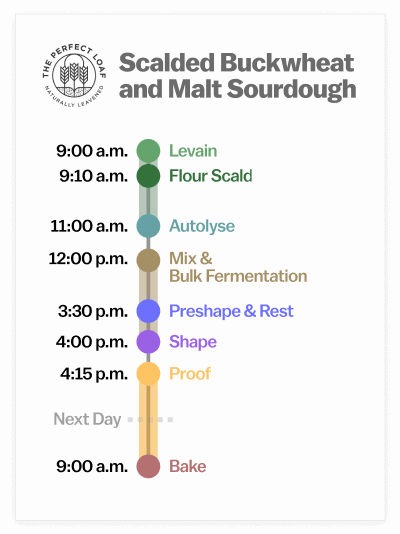
A Two-Day Baking Schedule for Optimal Results
This sourdough bread recipe is designed to be executed over a two-day period, minimizing the need for constant baker intervention. The primary engagement involves periodic checks during the bulk fermentation phase. Following the shaping of the loaves, they undergo a cold proof in the refrigerator overnight. The subsequent day offers flexibility: the loaves can be baked in the morning for immediate enjoyment, or they can remain in the fridge until the evening, ensuring freshly baked bread is ready for dinner.
Vitals of the Recipe
This recipe yields two loaves, each weighing approximately 900 grams. Bakers have the option to halve all ingredients to produce a single loaf. For those seeking to adjust the recipe’s scale, an editable spreadsheet is available to members of "The Baker’s Corner," facilitating quick and precise scaling up or down.
- Total dough weight: 1,800 grams
- Prefermented flour: 5.8%
- Levain in final dough: 18.5%
- Hydration: 75.0% (calculated at 83% when including the water from the flour scald)
- Yield: Two 900g loaves
The target final dough temperature for this recipe is 78°F (26°C). Understanding the critical role of dough temperature in baking is essential for achieving consistent results.
Total Formula Breakdown
The comprehensive formula for this Scalded Buckwheat and Malt Sourdough Bread is detailed below, outlining the precise measurements and baker’s percentages for each ingredient.
| Weight (grams) | Ingredient | Baker’s Percentage |
|---|---|---|
| 46 | Scald: Buckwheat flour (Anthony’s Organic Buckwheat Flour) | 5.0% |
| 73 | Scald: Water | 8.0% |
| 687 | High-extraction wheat flour (Type 85; Cairnspring Trailblazer) | 75.0% |
| 183 | Whole wheat flour (Camas Country Hard Red Wheat) | 20.0% |
| 46 | Barley malt syrup | 5.0% |
| 6 | Aniseed, ground | 0.6% |
| 596 | Water 1 (levain and autolyse) | 65.0% |
| 92 | Water 2 (mix) | 10.0% |
| 18 | Fine sea salt | 2.0% |
| 53 | Ripe sourdough starter, 100% hydration | 5.8% |
Method: Crafting the Scalded Buckwheat and Malt Sourdough
The meticulous process of creating this distinctive sourdough bread unfolds over several distinct stages, each contributing to the final loaf’s complex character.
1. Preparing the Levain (9:00 a.m.)
The levain, the heart of sourdough, is initiated by combining the following ingredients:
| Weight (grams) | Ingredient | Baker’s Percentage |
|---|---|---|
| 53 | High-extraction wheat flour | 100.0% |
| 53 | Water 1 (levain) | 100.0% |
| 53 | Ripe sourdough starter, 100% hydration | 100.0% |
These ingredients are thoroughly mixed in a suitable jar and left to ripen at a temperature of 74-76°F (23-24°C) for approximately three hours. For bakers who wish to adjust the levain quantities for different recipe variations or simultaneous baking projects, a dedicated sourdough starter and levain calculator is available.
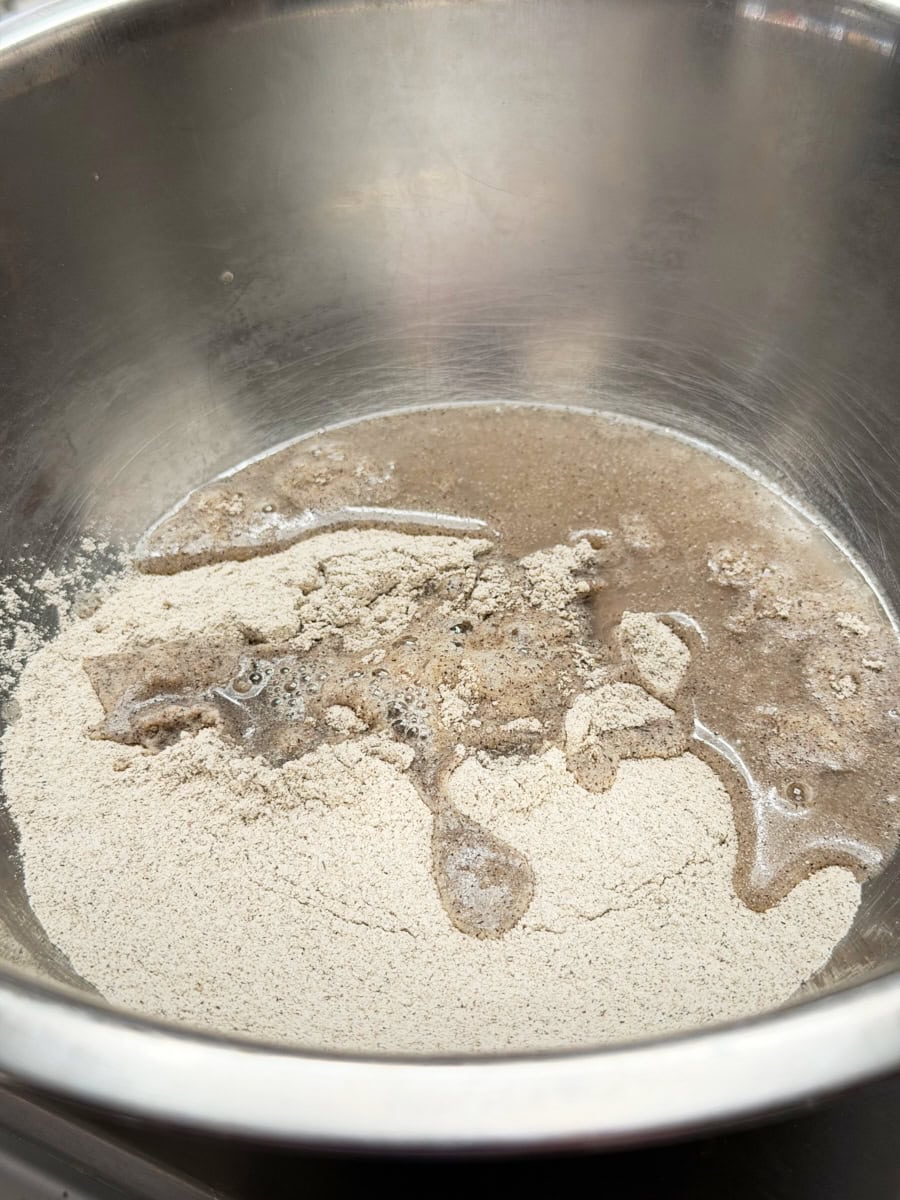
2. Preparing the Flour Scald (9:10 a.m.)
Simultaneously, the flour scald is prepared:

| Weight (grams) | Ingredient |
|---|---|
| 46 | Buckwheat flour |
| 73 | Water, boiling |
In a small bowl, the buckwheat flour is combined with the boiling water. The mixture is stirred vigorously until a uniform paste forms. If the consistency appears too dry, an additional small splash of boiling water can be incorporated. The scald is then covered and set aside until the dough mixing stage.
The flour scald, a crucial component, transforms into a thick, aromatic paste, promising enhanced flavor and texture.
3. Autolyse (11:00 a.m.)
The autolyse stage is critical for developing dough strength and hydration before the introduction of salt and levain.
| Weight (grams) | Ingredient |
|---|---|
| 634 | High-extraction wheat flour |
| 183 | Whole wheat flour |
| 543 | Water 1 (autolyse) |
| All | Flour scald (from Step 2) |
To achieve the desired final dough temperature of 78°F (25°C), the temperature of the autolyse water can be adjusted using a specialized water temperature calculator. The flours, autolyse water, and the prepared flour scald are combined in a large bowl. Using wet hands, the ingredients are mixed until no dry flour remains. At this initial stage, the dough will appear shaggy and somewhat loose. It is then scraped to the bottom of the bowl, covered, and allowed to rest for one hour. Following the autolyse, the dough will exhibit increased strength and improved hydration.
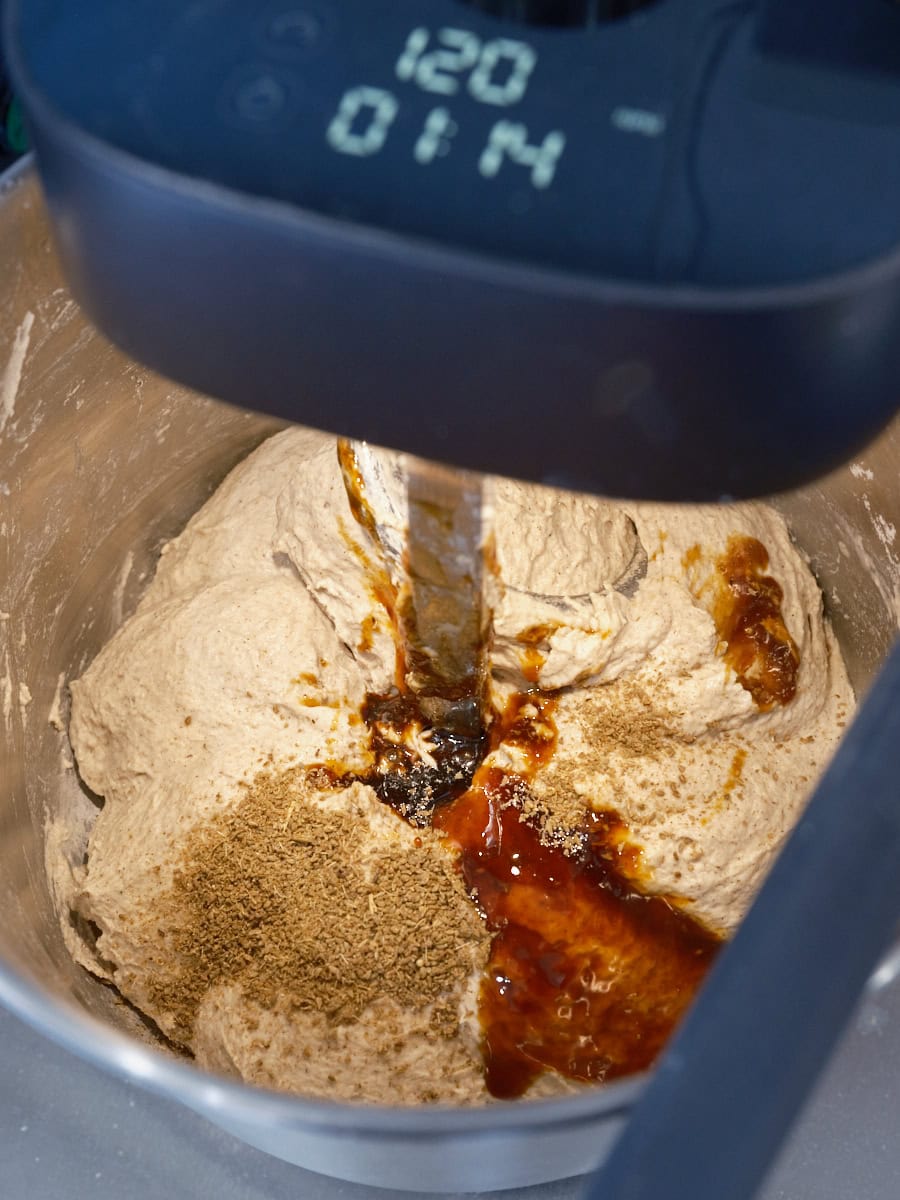
4. Mixing the Dough (12:00 p.m.)
The final mixing phase incorporates the remaining ingredients, including salt and levain.
| Weight (grams) | Ingredient |
|---|---|
| 92 | Water 2 (mix) |
| 18 | Fine sea salt |
| 159 | Ripe levain (from Step 1) |
It is important to note that this recipe features a high hydration level, resulting in a dough that will feel notably slack and sticky. Water 2 is intentionally held back and added incrementally, a technique known as bassinage, to ensure the dough does not become overly hydrated.
Mixing with a Mechanical Mixer
For those utilizing a mechanical mixer, such as the Ooni Halo Pro spiral mixer, the dough undergoes several mixing phases post-autolyse.
Mixing by Hand
When mixing by hand, the salt and levain are added to the top of the autolysed dough, along with a splash of Water 2 to facilitate incorporation. Thorough mixing is achieved using wet hands or a dough whisk. Subsequently, the dough is kneaded for approximately five minutes, employing either the slap-and-fold technique or the folds-in-the-bowl method, until it achieves a smooth, cohesive texture. If the dough remains very wet and soupy, any remaining Water 2 should be omitted. If it is cohesive but still shaggy, the remaining water is added and mixed until absorbed. The dough is then transferred to a clean work surface and kneaded for an additional 3-5 minutes using wet hands and the slap-and-fold technique, or alternative bowl-folding methods can be employed. Finally, the dough is placed into a bulk fermentation container and covered.
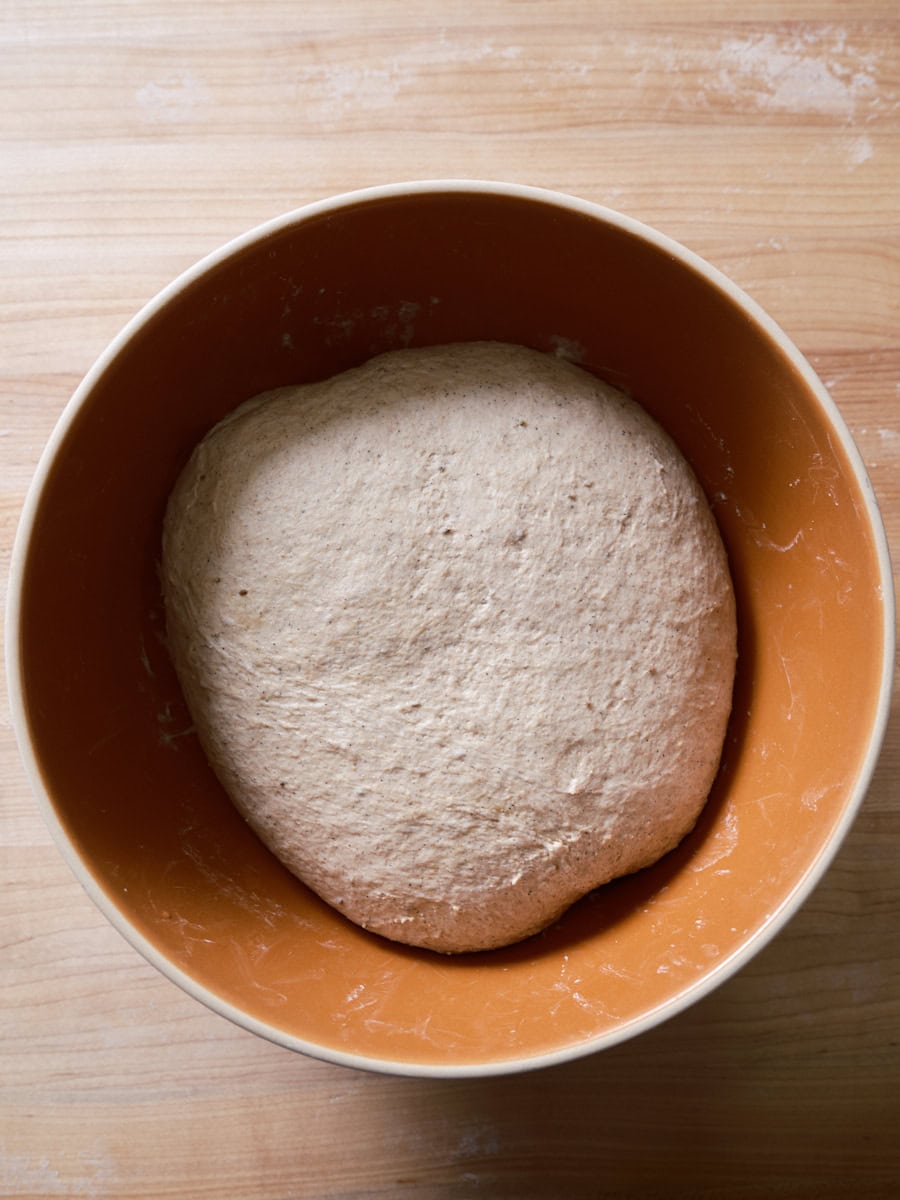
5. Bulk Fermentation (12:30 p.m. to 3:30 p.m. – 3 hours)
Under warm room conditions (74-76°F or 23-24°C), the bulk fermentation process typically spans approximately three hours. This phase requires two sets of stretches and folds, administered at 30-minute intervals. The first set of stretches and folds involves manipulating the dough by lifting and folding each side over the center, rotating the bowl and repeating the process. After the first 30 minutes, a second set of folds is performed. The dough is then allowed to rest, covered, for the remainder of the bulk fermentation period.
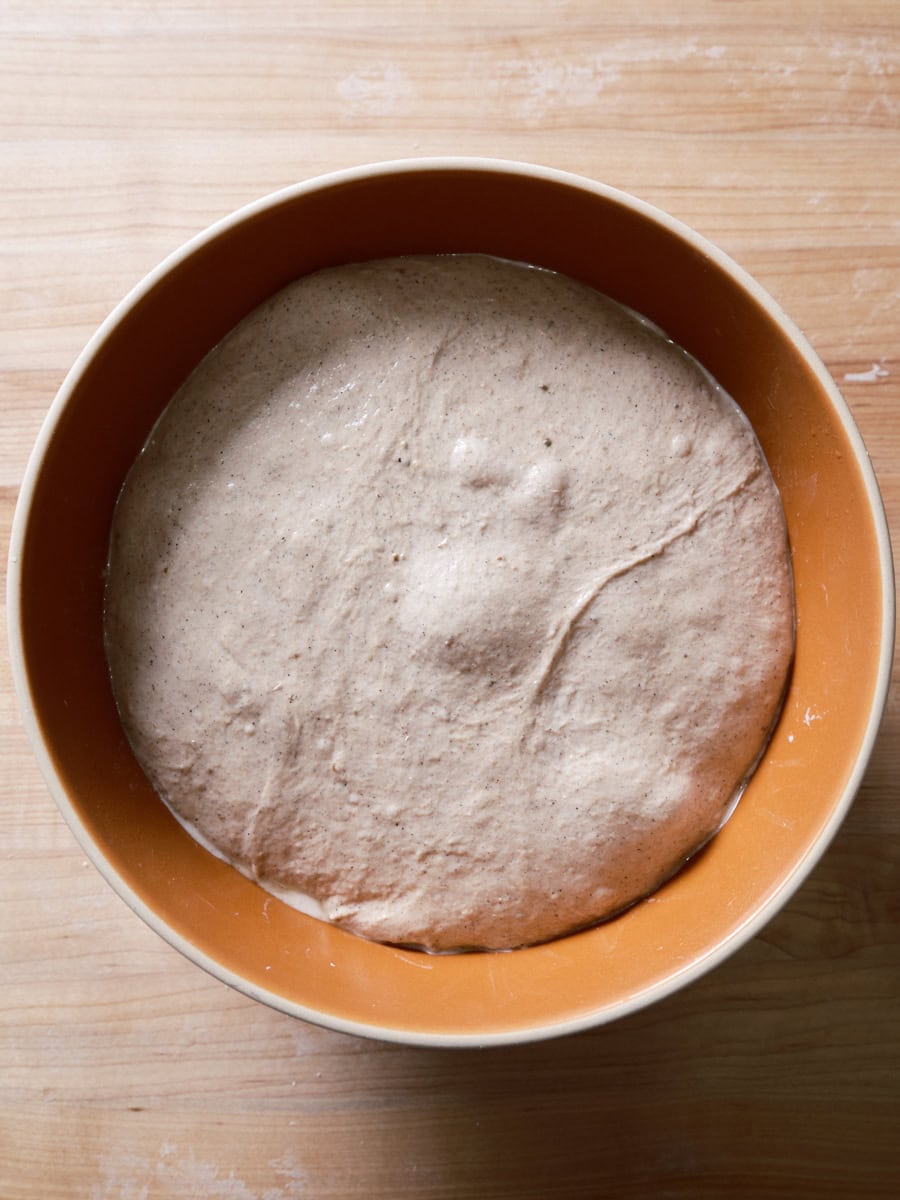
By the end of bulk fermentation, the dough should appear smooth, puffy, and have increased in volume by approximately 30%.
6. Pre-shaping (3:30 p.m.)
After the bulk fermentation, the dough is gently turned out onto a lightly floured work surface. It is then divided in half, and each portion is pre-shaped into a loose round. These rounds are left to rest, uncovered, for 30 minutes.
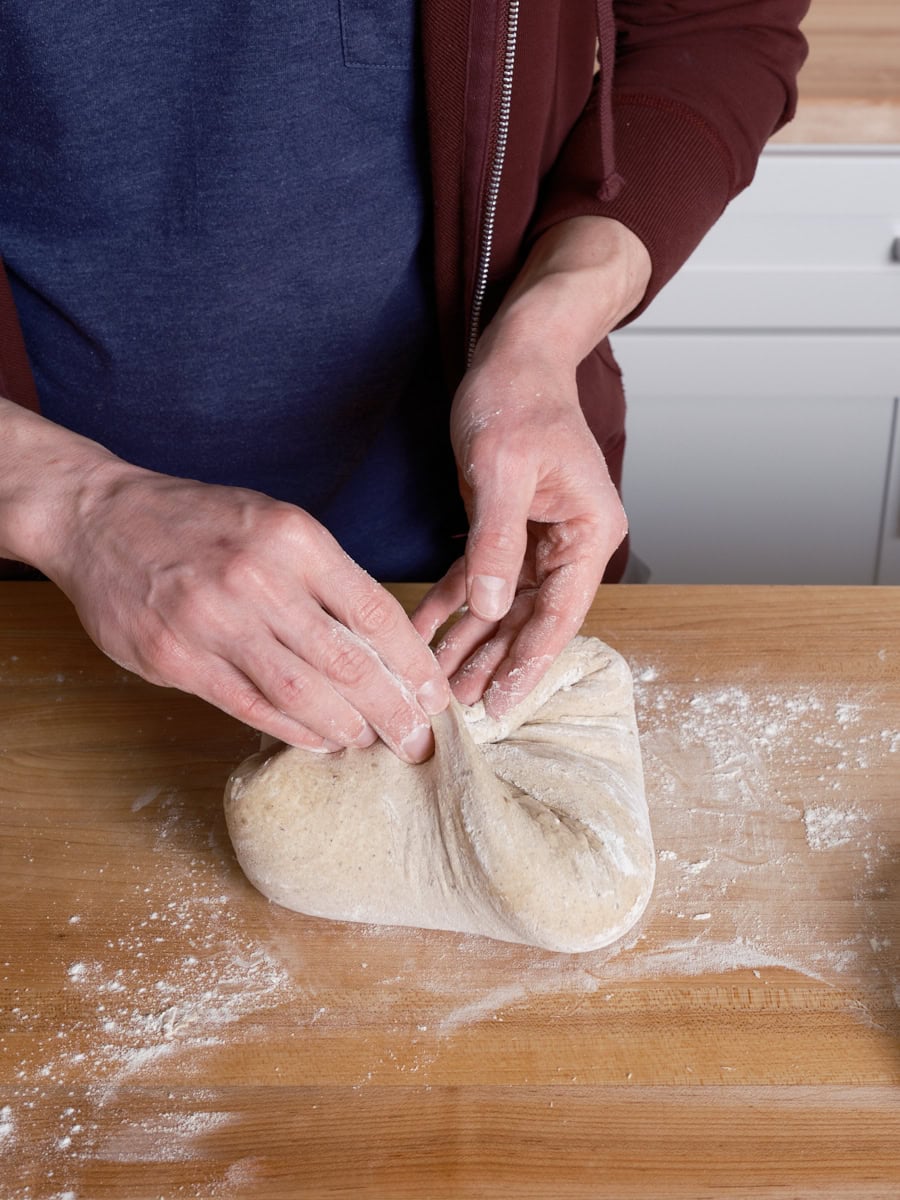
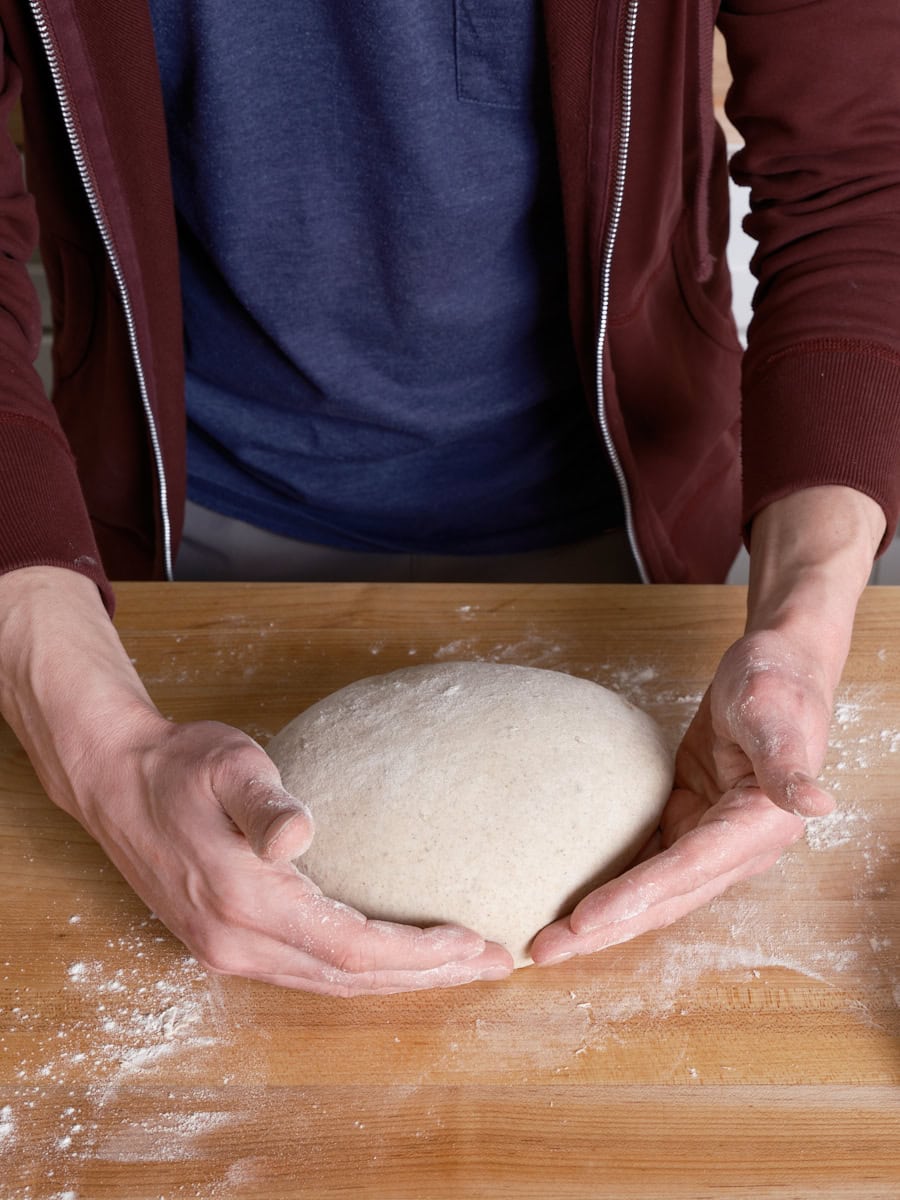
7. Shaping (4:00 p.m.)
An even layer of raw white sesame seeds is spread onto a clean kitchen towel or a quarter-sheet pan. The dough is then shaped using the "gather up" method. This involves flipping a pre-shaped round onto a lightly floured surface, folding opposing points of the dough into the center, overlapping them slightly. This process is repeated with the remaining points. The dough is then flipped, and using cupped hands, it is drawn towards the baker, creating surface tension and forming a smooth, round shape.
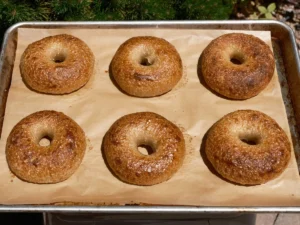
The shaped dough is then carefully inverted onto the prepared sesame seeds and transferred, seam-side up, into a round 10-inch proofing basket. This process is repeated for the second piece of dough.
The visual of the shaped dough topped with white sesame seeds highlights the appealing contrast before the final proof.
8. Proofing (4:15 p.m. to 9:00 a.m. the following day)
The proofing baskets are covered with reusable plastic bags and sealed. The dough is then placed in the refrigerator for an overnight cold proof.

9. Baking (9:00 a.m.)
For baking, an oven rack is positioned in the bottom third of the oven. A Dutch oven, combo cooker, Challenger bread pan, or a baking stone/steel is preheated in the oven to 450°F (230°C). An empty pan is placed at the bottom for steam generation.
One proofing basket is removed from the refrigerator, uncovered, and a piece of parchment paper is placed over it. A pizza peel or inverted baking sheet is used to flip the basket, allowing the dough to be gently removed. The dough is then scored.
The loaf is carefully slid into the preheated oven. Steam is introduced by covering the baking vessel or by adding ice to the bottom pan. The bread is baked for 20 minutes with steam. After this initial period, the steam is vented by removing the lid from the Dutch oven or taking out the steaming pans. The baking continues for another 30 minutes, or until the loaf achieves an internal temperature of approximately 204°F (95°C) and develops a deep, caramelized crust. The process is repeated for the second loaf.

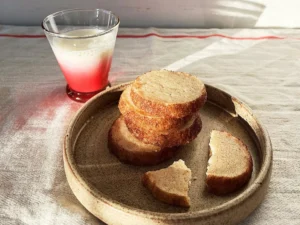
After baking, the loaves are transferred to a wire rack to cool for 1 to 2 hours before slicing.
Frequently Asked Questions
Q: What can I use as a substitute for aniseed?
A: Caraway seeds offer a similar spice profile and would be an excellent alternative to aniseed in this recipe.
Q: What are suitable alternatives to barley malt syrup?
A: For a flavor profile that balances bitterness and sweetness, blackstrap molasses is a recommended substitute. Alternatively, honey provides a more floral sweetness that also pairs harmoniously with anise.
Further Exploration
For bakers interested in further exploring the use of buckwheat in sourdough, the "Soft Honey Buckwheat Sandwich Bread" recipe offers a rich yet sweet loaf that complements this particular creation.
Happy baking!