This deeply flavorful sourdough, a testament to the baker’s art, emerges as a beacon of warmth and culinary satisfaction during the lingering chill of winter. The frigid air, while a formidable adversary, paradoxically becomes a potent motivator, coaxing the baker towards the comforting embrace of a roaring oven and the promise of a perfectly proofed dough. Yet, the shortened days and biting dryness of the season present their own unique challenges to the baking process. However, the creation of this particular loaf offers a delightful counterpoint to the season’s harshness. From the initial pungent aroma of freshly ground anise to the rich sweetness of malt, the visually striking buckwheat-speckled dough, and the silken texture imparted by the flour scald, each step of its preparation provides a welcome distraction from the encroaching cold, transforming the arduous into the enjoyable.
"Anise doesn’t politely wait for you to smell it. It arrives."
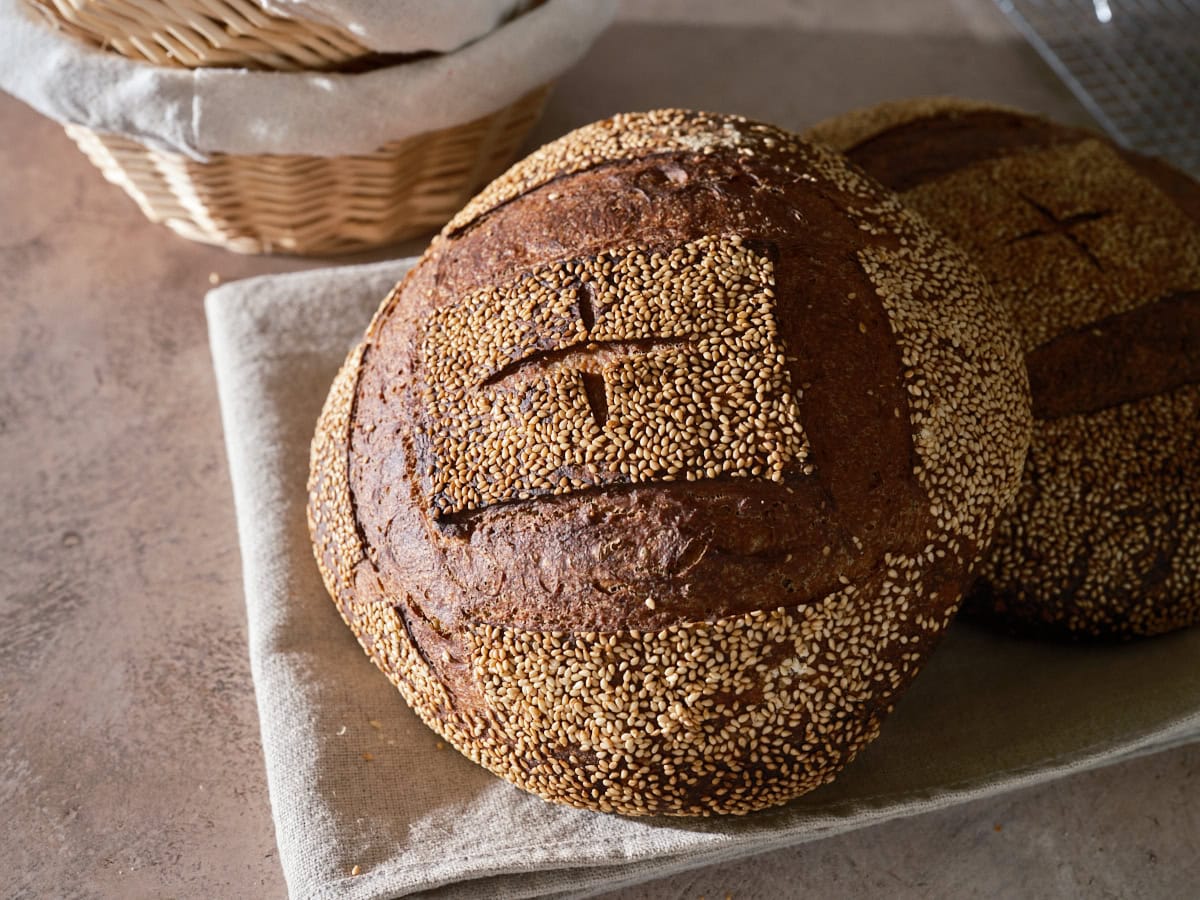
The heady, licorice-sweet perfume of anise is a celebrated spice in the baking world, a flavor that announces its presence with authority. While often featured whole in creations like sourdough discard biscotti, as found in the author’s own cookbook, or ground into a myriad of cookies, its inclusion in a substantial loaf of bread had, until now, remained an unexplored avenue for the author. This powerful spice, when paired with the nutty, mineral, and subtly tannic notes of buckwheat, creates a sourdough bread that achieves a remarkable balance and an undeniable allure. To crown this already exquisite loaf, the addition of striking white sesame seeds provides a visual flourish. Their flavor harmonizes beautifully with the bread’s inherent spice and sweetness, and their appearance is particularly stunning against the robust backdrop of whole grains.
The Significance of the Flour Scald in Baking
The inspiration for incorporating buckwheat into this bread recipe led to the exploration of the flour scald technique, a method that not only elevates flavor but also significantly enhances the texture of the final product. A flour scald, a simple process of combining flour with boiling water, results in a gelled mixture resembling a thick paste. This technique is closely related to the Japanese yudane method and the widely recognized tangzhong. The resulting paste is intensely aromatic and flavorful. Crucially, it plays a vital role in retaining moisture within the bread, thereby delaying the staling process and ensuring a softer crumb for a longer duration. This seemingly minor step is a readily achievable enhancement, adding an extra layer of sophistication to each loaf.
Flour Selection: Building a Hearty Foundation
The intention behind this loaf was to create a bread that was both hearty and spicy, ideally suited for substantial sandwiches. To achieve this, the baker opted for a high-extraction (Type 85) flour as the primary base. Cairnspring’s Trailblazer, a Type 85 flour, was chosen for its exceptional performance in the baker’s kitchen. This flour, often substituted for standard white flours, contributes a richer flavor and increased nutritional value due to its higher concentration of bran and germ.
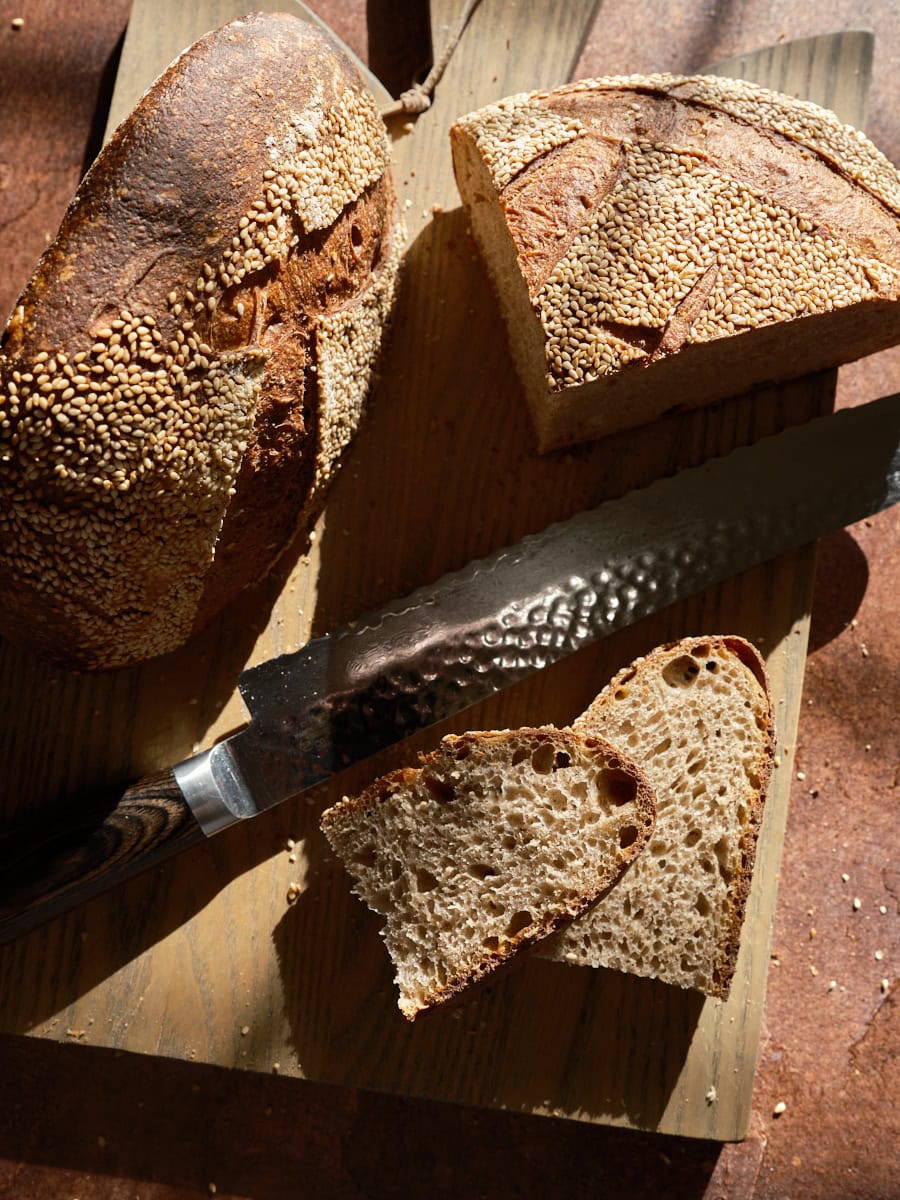
Buckwheat, while prized for its unique flavor profile, presents a slight challenge in bread-making. Based on previous experience, even small percentages of buckwheat can lead to a tighter crumb due to its lack of the same gluten-forming structure as wheat. However, this trade-off is readily accepted for the intense earthiness and the visually appealing color it imparts to the finished loaf.
The Baking Schedule: A Symphony of Time and Patience
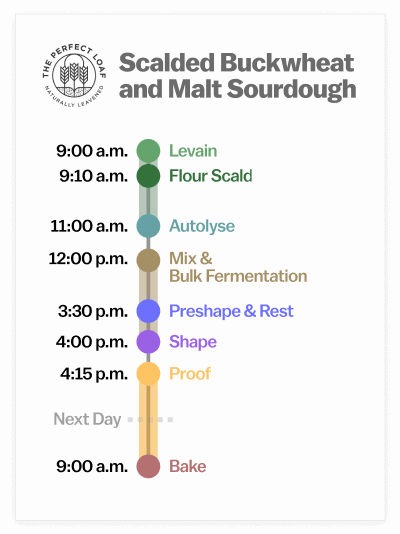
This sourdough bread recipe is designed to unfold over a two-day period, requiring minimal direct intervention from the baker. The process involves periodic checks during the bulk fermentation stage, followed by shaping and a prolonged cold proof in the refrigerator overnight. The following day, the loaves can be baked in the morning for immediate enjoyment or kept chilled until the evening, ensuring freshly baked bread is ready before dinner.
Vitals of the Recipe
This recipe yields two loaves, each weighing approximately 900 grams. For bakers wishing to make a single loaf, all ingredients can be halved. A comprehensive editable spreadsheet is available to members of "The Baker’s Corner," enabling easy scaling of the recipe up or down.
- Total Dough Weight: 1,800 grams
- Prefermented Flour: 5.8%
- Levain in Final Dough: 18.5%
- Hydration: 75.0% (83% including the water in the flour scald)
- Yield: Two 900g loaves
The target final dough temperature for this recipe is 78°F (26°C). A thorough discussion on the importance of dough temperature and related factors can be found in the author’s dedicated post on the subject.
Total Formula Breakdown
| Weight (g) | Ingredient | Baker’s Percentage (%) |
|---|---|---|
| 46 | Scald: Buckwheat flour (Anthony’s Organic Buckwheat Flour) | 5.0% |
| 73 | Scald: Water | 8.0% |
| 687 | High-extraction wheat flour (Type 85; Cairnspring Trailblazer) | 75.0% |
| 183 | Whole wheat flour (Camas Country Hard Red Wheat) | 20.0% |
| 46 | Barley malt syrup | 5.0% |
| 6 | Aniseed, ground | 0.6% |
| 596 | Water 1 (levain and autolyse) | 65.0% |
| 92 | Water 2 (mix) | 10.0% |
| 18 | Fine sea salt | 2.0% |
| 53 | Ripe sourdough starter, 100% hydration | 5.8% |
The Method: Crafting the Scalded Buckwheat and Malt Sourdough
1. Prepare the Levain – 9:00 a.m.
| Weight (g) | Ingredient | Baker’s Percentage (%) |
|---|---|---|
| 53 | High-extraction wheat flour | 100.0% |
| 53 | Water 1 (levain) | 100.0% |
| 53 | Ripe sourdough starter, 100% hydration | 100.0% |
Combine the ingredients listed for the levain in a clean jar. Cover and allow to ripen at a temperature of 74-76°F (23-24°C) for approximately 3 hours. For those wishing to adjust the levain quantity, a sourdough starter and levain calculator is available.
2. Prepare the Flour Scald – 9:10 a.m.
| Weight (g) | Ingredient |
|---|---|
| 46 | Scald: Buckwheat flour |
| 73 | Scald: Water, boiling |
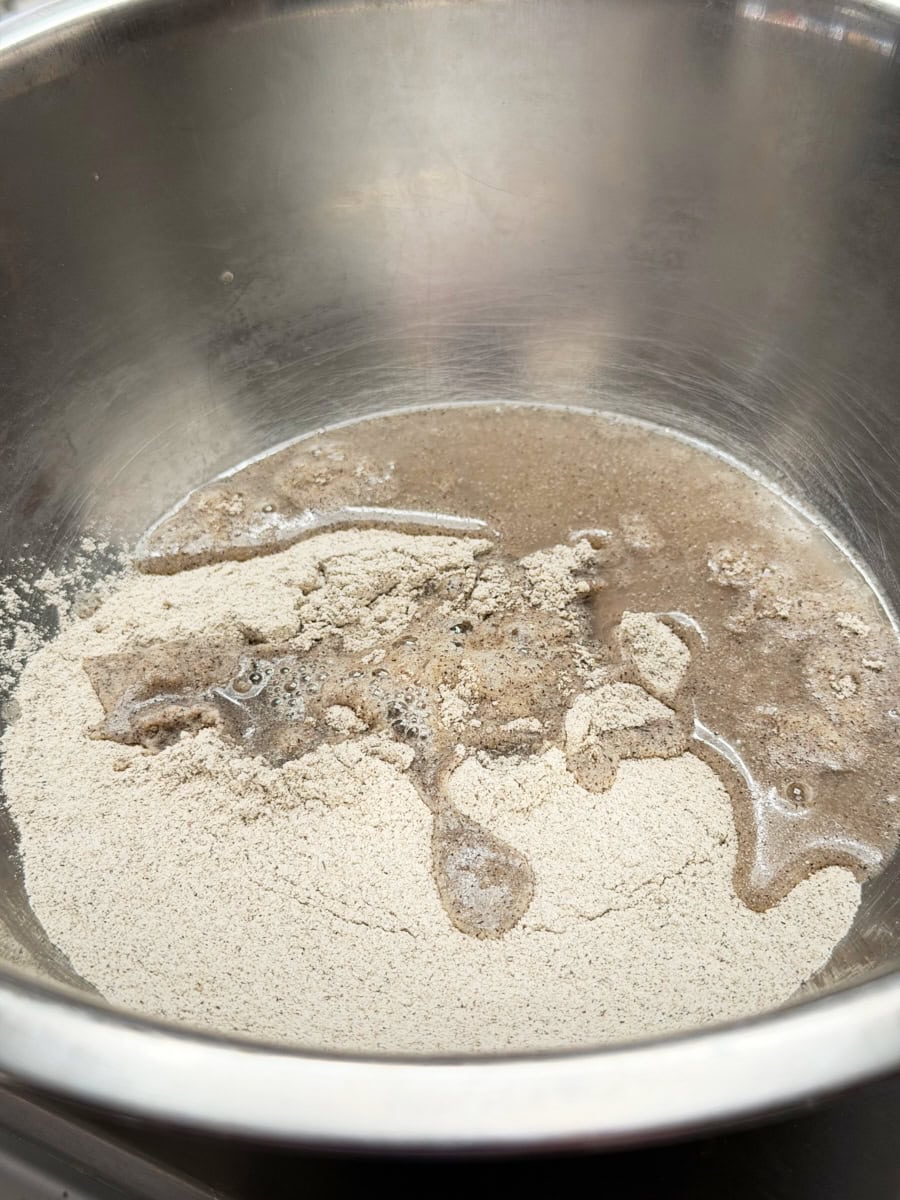
In a small bowl, pour the boiling water over the buckwheat flour. Stir vigorously until a smooth paste forms. If the mixture appears too dry, add a small additional splash of boiling water. Cover the bowl and set aside until ready for mixing. The resulting scald is intensely aromatic and flavorful.
3. Autolyse – 11:00 a.m.
| Weight (g) | Ingredient |
|---|---|
| 634 | High-extraction wheat flour |
| 183 | Whole wheat flour |
| 543 | Water 1 (autolyse) |
| All | Flour scald (from Step 2) |
Utilize a water temperature calculator to ensure the autolyse water is at the precise temperature needed to achieve a final dough temperature (FDT) of 78°F (25°C). In a large bowl, combine the flours, Water 1 for the autolyse, and the prepared flour scald. Mix with wet hands until no dry flour remains, or use a mixer on low speed until a shaggy, cohesive mass forms. The dough will appear loose and unrefined at this stage. Use a bowl scraper to gather all the dough to the bottom of the bowl. Cover the bowl and place it near the ripening levain for 1 hour. Following the autolyse period, the dough will exhibit increased strength and hydration.
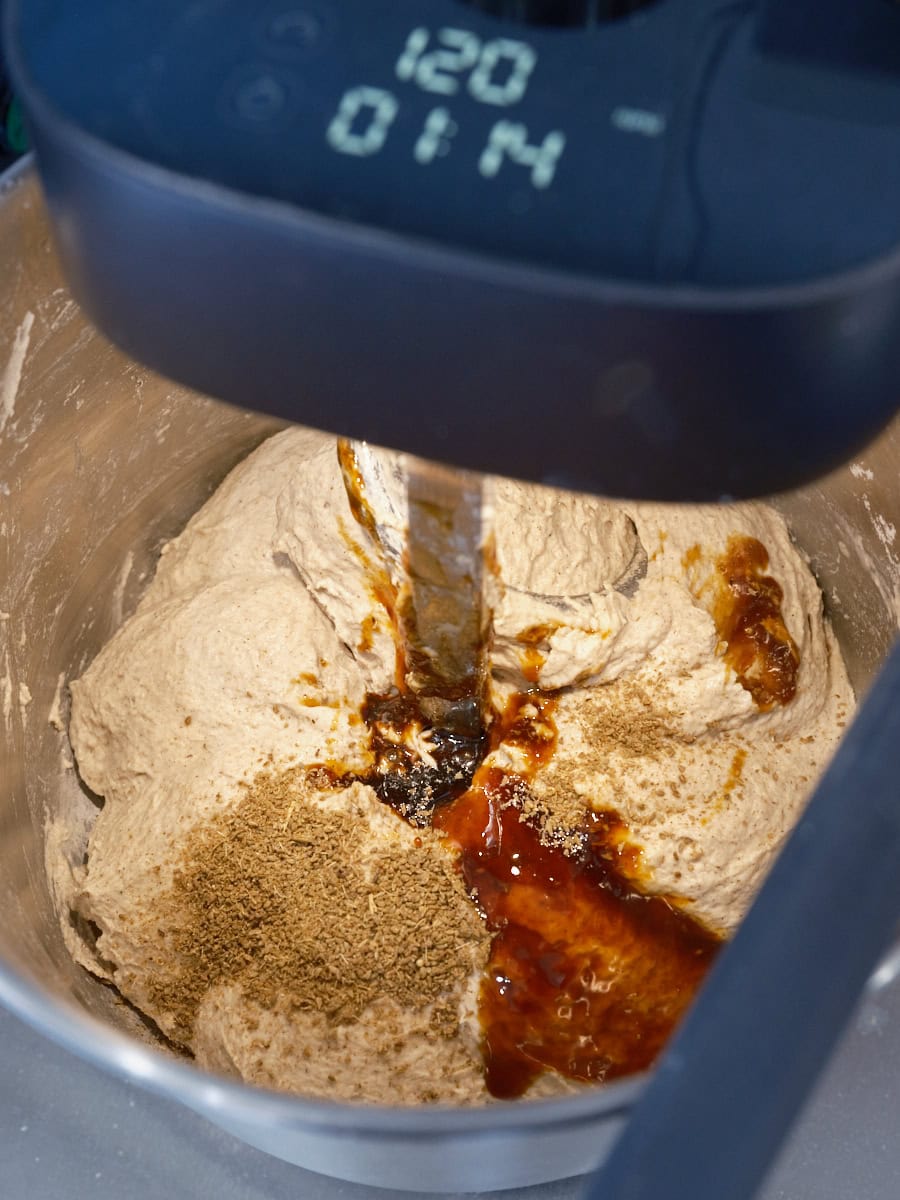
4. Mix – 12:00 p.m.
| Weight (g) | Ingredient |
|---|---|
| 92 | Water 2 (mix) |
| 18 | Fine sea salt |
| 159 | Ripe levain (from Step 1) |
It is important to note that this recipe is characterized by a high hydration level, which will result in a slack and sticky dough. Water 2 should be reserved and added incrementally only if the dough can accommodate it. This bassinage technique helps prevent over-hydration.
Mixing with a Mechanical Mixer
The dough was mixed using an Ooni Halo Pro spiral mixer in several stages post-autolyse.

Mixing by Hand
For hand-mixing, add the salt and levain to the top of the autolysed dough. Incorporate a splash of Water 2 to moisten. Thoroughly mix with wet hands or a dough whisk. Subsequently, knead the dough for approximately 5 minutes using either the slap-and-fold technique or the folds-in-the-bowl method until smooth and less shaggy. Transfer the dough back into the bowl, cover, and allow it to rest for 10 minutes.
If the dough feels excessively wet and soupy, refrain from adding any remaining Water 2. If it appears cohesive yet still shaggy, incorporate the remaining Water 2 and mix until fully absorbed. Transfer the dough to a clean work surface and continue to slap and fold for 3-5 minutes, or employ a series of folds within the bowl to achieve a smoother, more cohesive texture. Place the dough into a bulk fermentation container and cover.
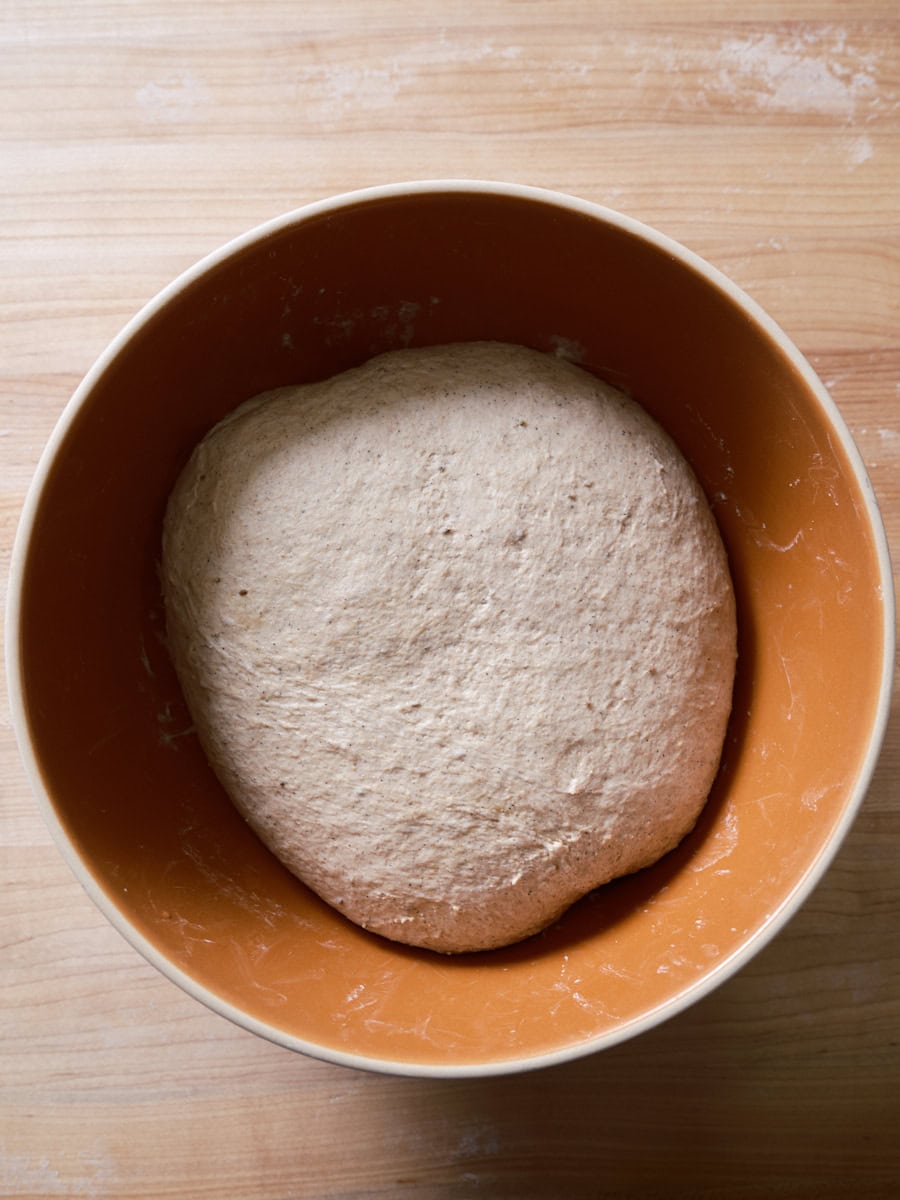
5. Bulk Fermentation – 12:30 p.m. to 3:30 p.m. (3 hours)
At a warm ambient temperature of 74-76°F (23-24°C), bulk fermentation should ideally last for approximately 3 hours, incorporating two sets of stretch-and-folds at 30-minute intervals.
After the initial 30 minutes of bulk fermentation, perform the first set of stretch-and-folds. Gently lift one side of the dough and stretch it up and over to the opposite side. Rotate the bowl 180 degrees and repeat the stretch and fold. Then, rotate the bowl 90 degrees and perform another stretch and fold. Finally, rotate the bowl 180 degrees for a final stretch and fold. Cover the dough.
A second set of stretch-and-folds should be performed after another 30 minutes. Following this, allow the dough to rest, covered, for the remainder of the bulk fermentation period.
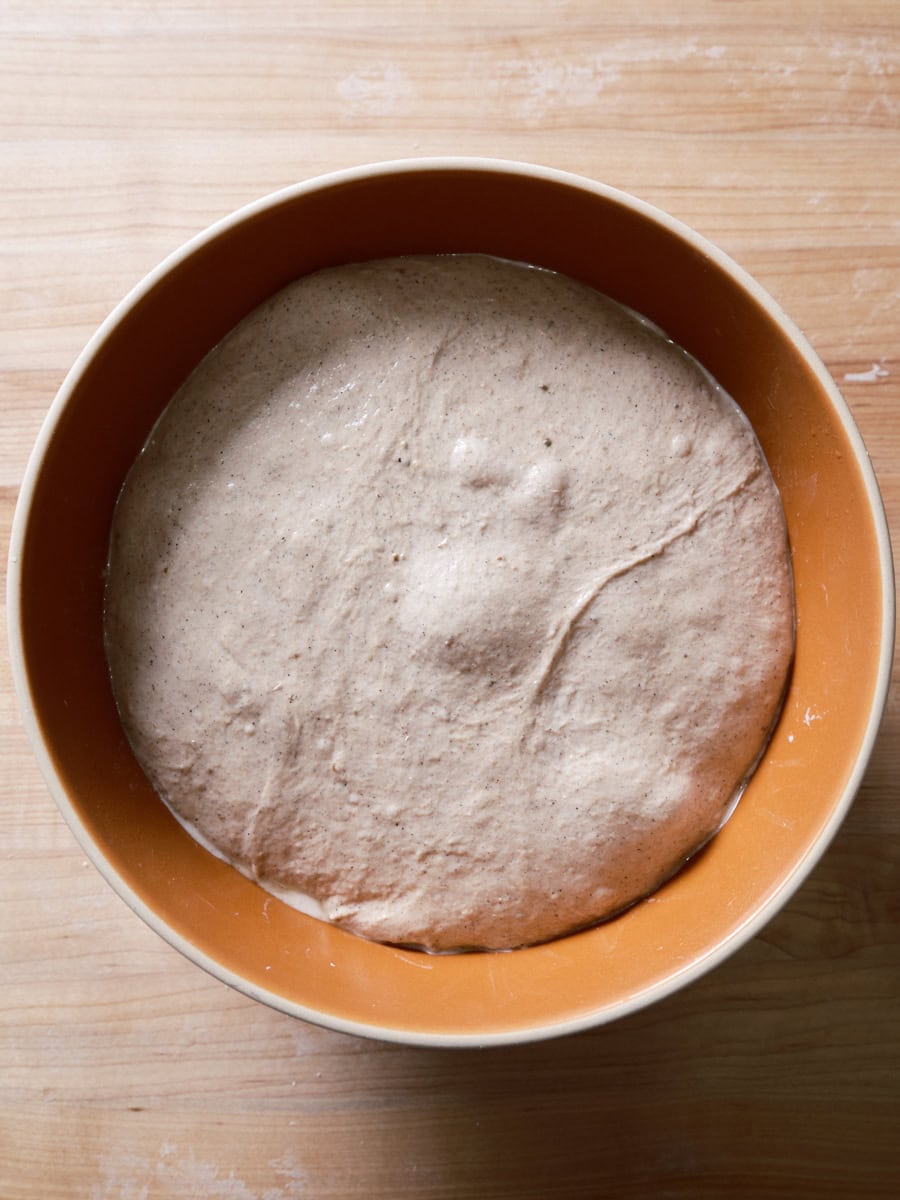
6. Pre-shape – 3:30 p.m.
After 3 hours, the dough should appear smooth, puffy, and have visibly increased in volume, ideally by about 30%. Gently turn the dough out onto a lightly floured work surface. Divide the dough in half and pre-shape each portion into a loose round. Allow the rounds to rest, uncovered, for 30 minutes.
7. Shape – 4:00 p.m.
Spread an even layer of raw white sesame seeds on a kitchen towel or a quarter-sheet pan. The baker recommends specific sesame seeds for baking.
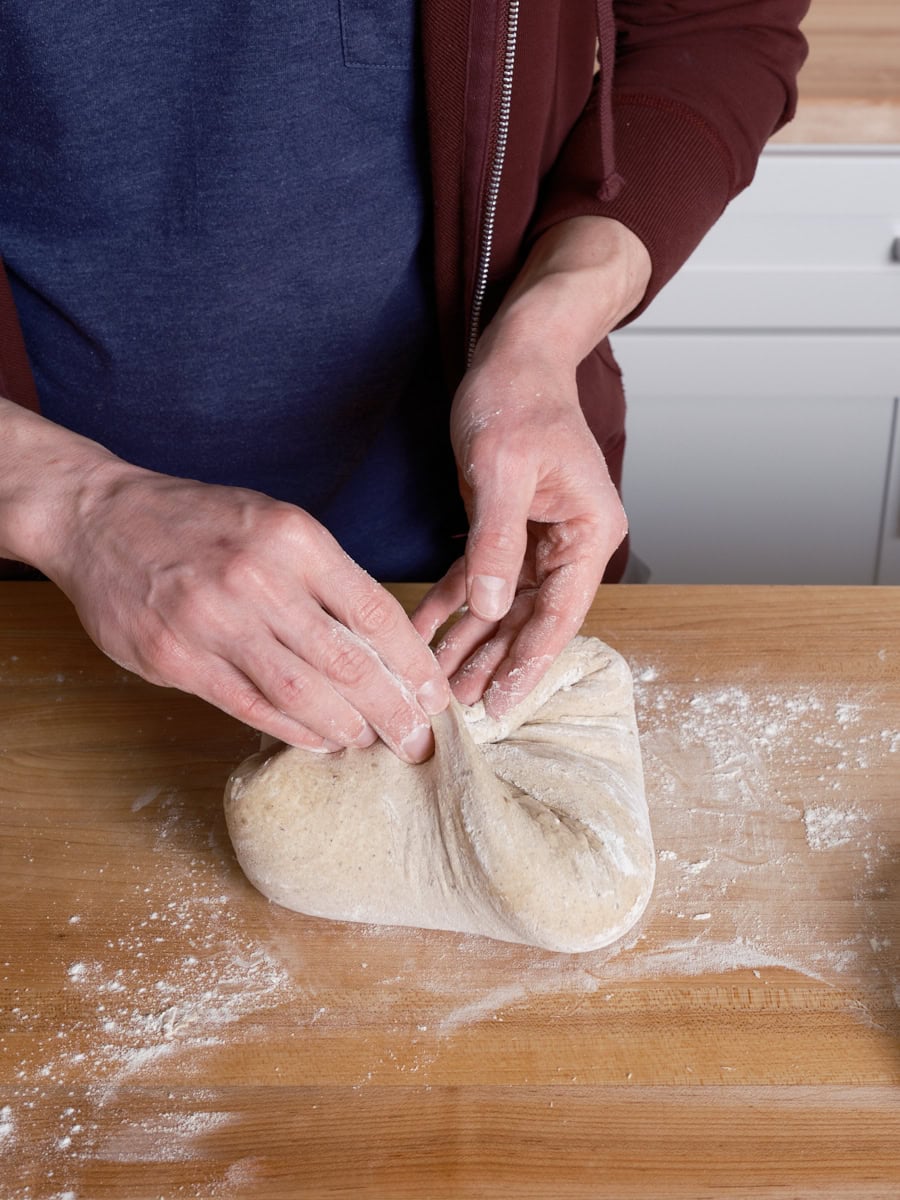
The shaping technique employed is the "gather up" method:
Flour the tops of the rested rounds. Using a bench scraper, invert one round onto a lightly floured surface. Fold two opposing points of the dough into the center, allowing them to slightly overlap. Repeat this process with the remaining two opposing points. Invert the dough and use your hands to drag the dough towards your body, creating surface tension. The result should be a smooth, unformed, round shape.
Gently scoop the shaped dough with both hands and invert it onto the prepared sesame seeds. Carefully transfer the dough, seam-side up, into a round 10-inch proofing basket. Repeat this process for the second piece of dough.
8. Proof – 4:15 p.m. to 9:00 a.m. (Overnight)
Cover the proofing baskets with reusable plastic bags and seal them securely. Place the baskets in the refrigerator for an overnight cold proof.
9. Bake – 9:00 a.m.
Position an oven rack in the bottom third of the oven. Place a Dutch oven, combo cooker, Challenger bread pan, or a baking stone/steel on the rack. Include an empty pan at the bottom for steam generation using ice. Alternatively, a bread steel can be used with a Baking Shell. Preheat the oven to 450°F (230°C).
Remove one proofing basket from the refrigerator. Uncover it, place a piece of parchment paper over the basket, and then place a pizza peel or an inverted baking sheet on top of the parchment. With both hands, flip the entire assembly over. Carefully remove the basket and score the dough.
Slide the dough into the preheated oven. Generate steam by covering the Baking Shell, Dutch oven, or by adding ice to the bottom pan. Bake for 20 minutes. Then, vent the oven of steam by removing the lid from the Dutch oven or by removing the steaming pans. Continue baking for an additional 30 minutes. The finished loaf should register an internal temperature of approximately 204°F (95°C), with a deeply colored crust. Repeat the baking process for the second loaf.
Allow the baked loaves to cool on a wire rack for 1 to 2 hours before slicing.

Frequently Asked Questions
What can I use instead of aniseed?
Caraway seeds offer a similar aromatic and spicy profile that would complement this bread well.
What can I use instead of barley malt syrup?
For a flavor profile that balances bitterness and sweetness, blackstrap molasses is an excellent alternative. Alternatively, honey can be used to introduce a more floral sweetness that pairs beautifully with anise.
Further Exploration
For those seeking additional sourdough recipes that incorporate buckwheat, the author recommends the "Soft Honey Buckwheat Sandwich Bread," a recipe that yields a rich yet sweet loaf. This Scalded Buckwheat and Malt Sourdough is more than just a bread; it is an experience, a comforting ritual that transforms the challenges of winter into an opportunity for delicious discovery.