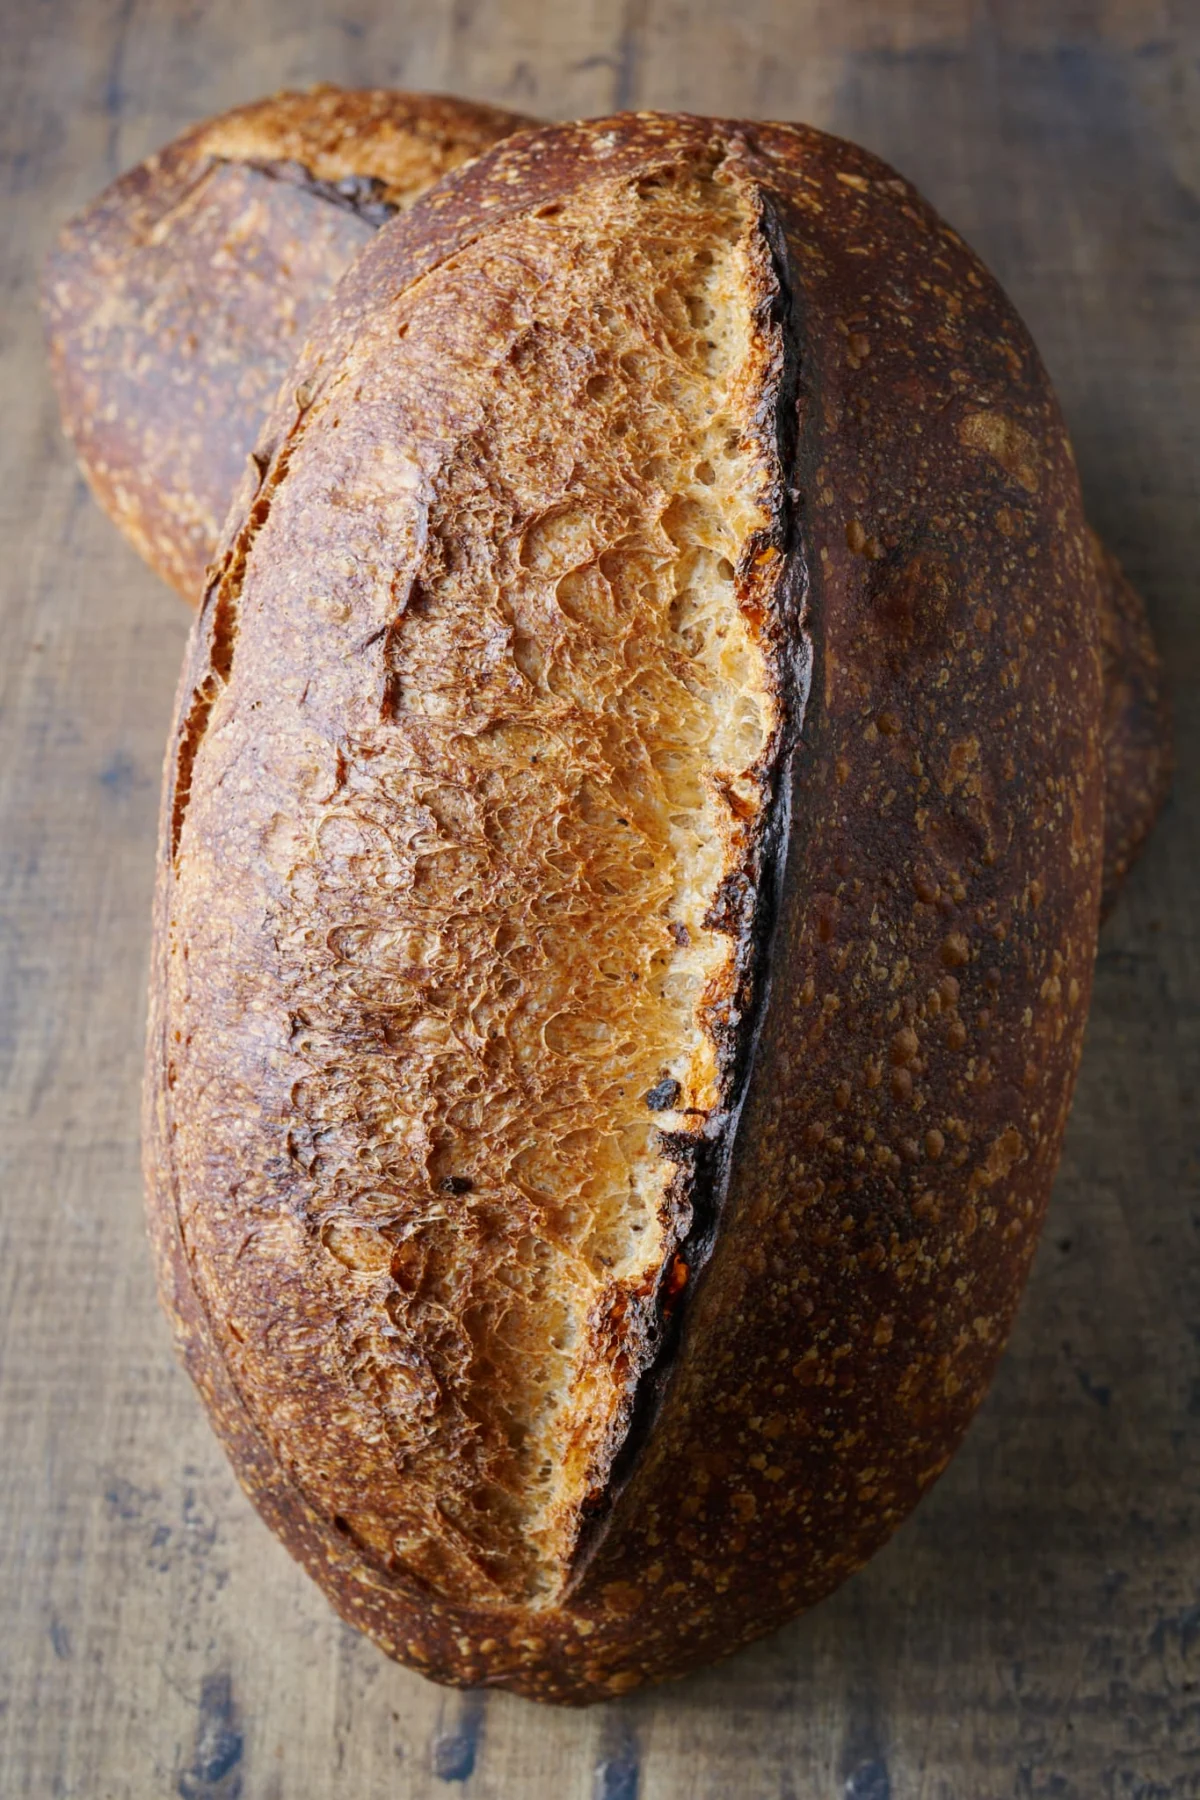
The quest for the perfect loaf of sourdough bread is a journey marked by a pursuit of flavor, texture, and visual appeal. While many bakers, particularly those new to the craft, are drawn to the allure of an open crumb – the intricate web of air pockets that characterizes a truly exceptional loaf – its importance is often secondary to the fundamental flavor derived from the grain and the transformative magic of fermentation. This exploration delves into the nuanced factors that contribute to an open crumb, emphasizing that while visually striking, it is a testament to underlying techniques rather than an end in itself.
The visual cues of a masterful sourdough loaf are undeniable: a dark, burnished crust that crackles with promise, a precisely executed score that blooms beautifully in the oven, and the subtle, rounded edges that speak of skilled hands. Yet, it is the interior, the crumb, that often captures the imagination. An open crumb, characterized by well-distributed, light, and airy holes, is a coveted trait. However, as seasoned bakers understand, flavor reigns supreme. An open crumb, while desirable, is an indicator of proper fermentation, robust dough development, and careful handling throughout the baking process. It signifies a light, even texture free from dense pockets and gaping, uneven caverns. When coupled with superior flavor, this texture elevates the eating experience, making each bite a delight.
This guide aims to demystify the elements that contribute to an open crumb, not as a pursuit of unattainable perfection, but as a means to cultivate a deeper understanding of dough and achieve the desired bread.
Understanding the Open Crumb: More Than Just Holes
An open crumb, when sliced, reveals an interior structure dotted with numerous well-distributed air pockets. These pockets are the result of the gluten network within wheat flour, properly developed, trapping the carbon dioxide produced by the symbiotic relationship of yeast and bacteria in sourdough. As this trapped gas expands during baking, it creates the characteristic lightness and airiness of the crumb.
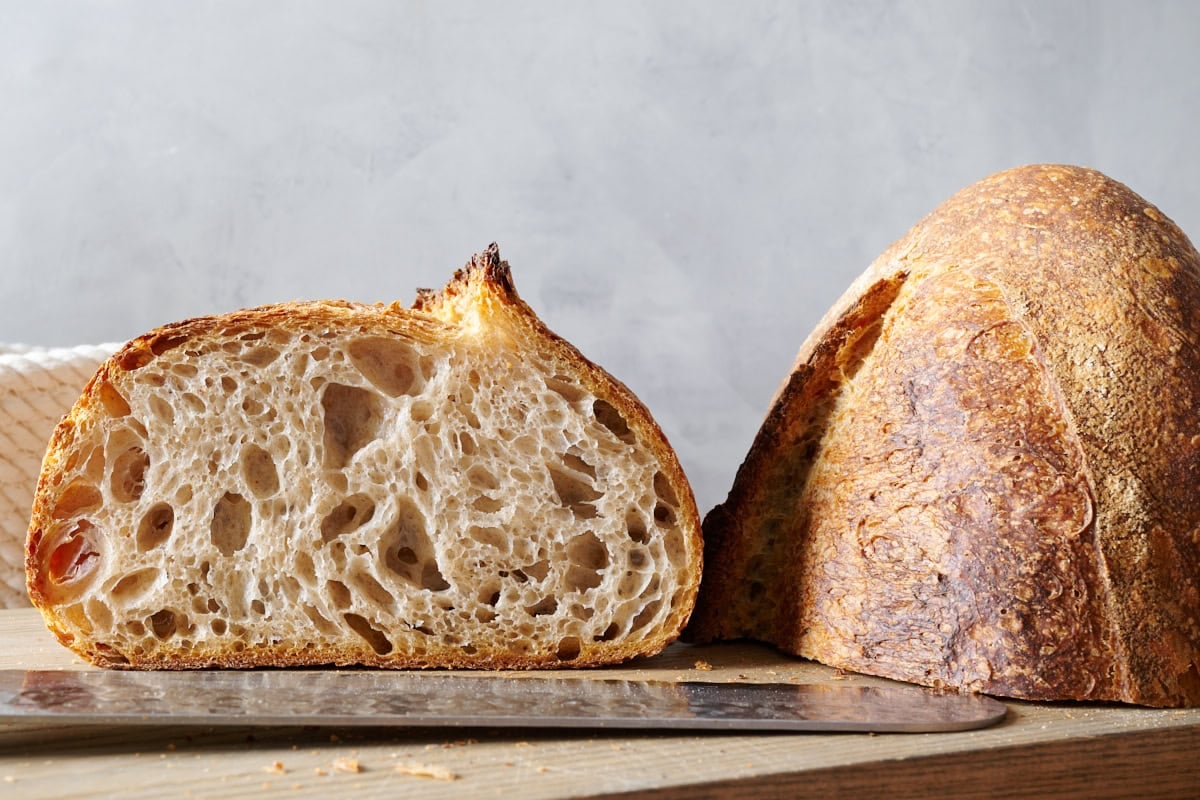
However, it is crucial to distinguish a desirable open crumb from a loaf that is merely underproofed. An underproofed loaf might exhibit large, irregular holes and dense, gummy patches, a sign that fermentation was incomplete. The score might break open erratically, and the overall rise in the oven, known as oven spring, can be uneven. Achieving the correct proofing point is an art honed through experience, a "baker’s intuition" that guides decisions during bulk fermentation and the final proof.
Key indicators of an underproofed loaf masquerading as open-crumb:
- Irregularly sized holes: Large, gaping voids juxtaposed with dense, tight areas.
- Uneven oven spring: The loaf might rise dramatically in some areas and barely at all in others, often with the score splitting aggressively.
- A gummy or dense interior: Despite the presence of some large holes, the overall texture can feel heavy and underdeveloped.
- A tendency to collapse: The structure may not be robust enough to support itself fully.
The solution to underproofing is straightforward: allow the dough more time to ferment. Extending both the bulk fermentation and the final proof stages helps to equalize the gas distribution, eliminate dense spots, and promote a more controlled oven spring.
The Foundation: Flour Selection for Optimal Crumb Structure
The choice of flour is arguably the most critical factor in achieving an open crumb. While vigorous fermentation and precise proofing are essential, the flour must possess the inherent capacity to support the formation of large, stable bubbles.
Strong white flour, often characterized by a higher protein content, is the preferred choice. This increased protein translates to a more robust gluten network. As the dough ferments, this elastic structure can expand significantly without tearing, accommodating the gases produced by the leavening agents. Think of it as the difference between a thin, easily popped balloon and a high-quality one that can inflate to a much larger size and remain intact. A higher protein content offers a greater margin for error and a superior capacity for creating open pockets.

However, there is a delicate balance. Flour with an excessively high protein content (generally above 13%) can lead to a crumb that is not only open but also unpleasantly chewy and gummy. The sweet spot for many bakers lies between 11% and 13% protein for white flour. High-extraction flours, such as Type 85, when properly hydrated, can also contribute to an open crumb while enhancing flavor complexity.
The impact of whole wheat flour: While whole wheat flour is rich in protein, its bran and germ components can interfere with gluten development. Consequently, as the proportion of whole wheat flour increases, achieving a very open crumb becomes more challenging. However, this trade-off is often embraced for the enhanced flavor and nutritional value that whole grains provide. A 50% whole wheat loaf, for instance, will naturally have a denser crumb than an all-white flour loaf, and this is a characteristic to be appreciated rather than corrected.
In summary for flour selection: Opt for white flour over whole wheat, and prioritize flours with a higher protein content for an open crumb.
Sourdough Starter: The Engine of Fermentation
A healthy and active sourdough starter is the cornerstone of vigorous fermentation, which is essential for an open crumb. Consistent feeding, ideally twice daily, and maintaining an optimal temperature range (around 74-78°F or 23-25°C) are crucial for a starter’s vitality. While frequent feeding may not be necessary for all bakers, it ensures a robust leavening agent capable of producing ample gas.
The ripeness of the starter is paramount. For an open crumb, it’s best to use sourdough starter when it has just reached its peak ripeness, before it becomes overly acidic. Signs of a ripe liquid starter include:

- Doubling in size: The starter will have visibly increased in volume, often doubling or tripling.
- Bubbles throughout: A profusion of air bubbles will be visible on the surface and throughout the starter.
- A domed or slightly collapsed top: The surface will typically be domed, and as it peaks, it may begin to slightly collapse.
- A pleasant, tangy aroma: The smell should be yeasty and tangy, not sharply acetic or alcoholic.
Using an over-fermented starter introduces excessive protease enzymes into the dough. While these enzymes play a role in gluten development, their overactivity can lead to a weakened dough structure and a tighter crumb.
In essence for starter management: Utilize your sourdough starter when it exhibits peak ripeness to ensure optimal leavening and avoid excessive enzymatic activity that could compromise dough strength.
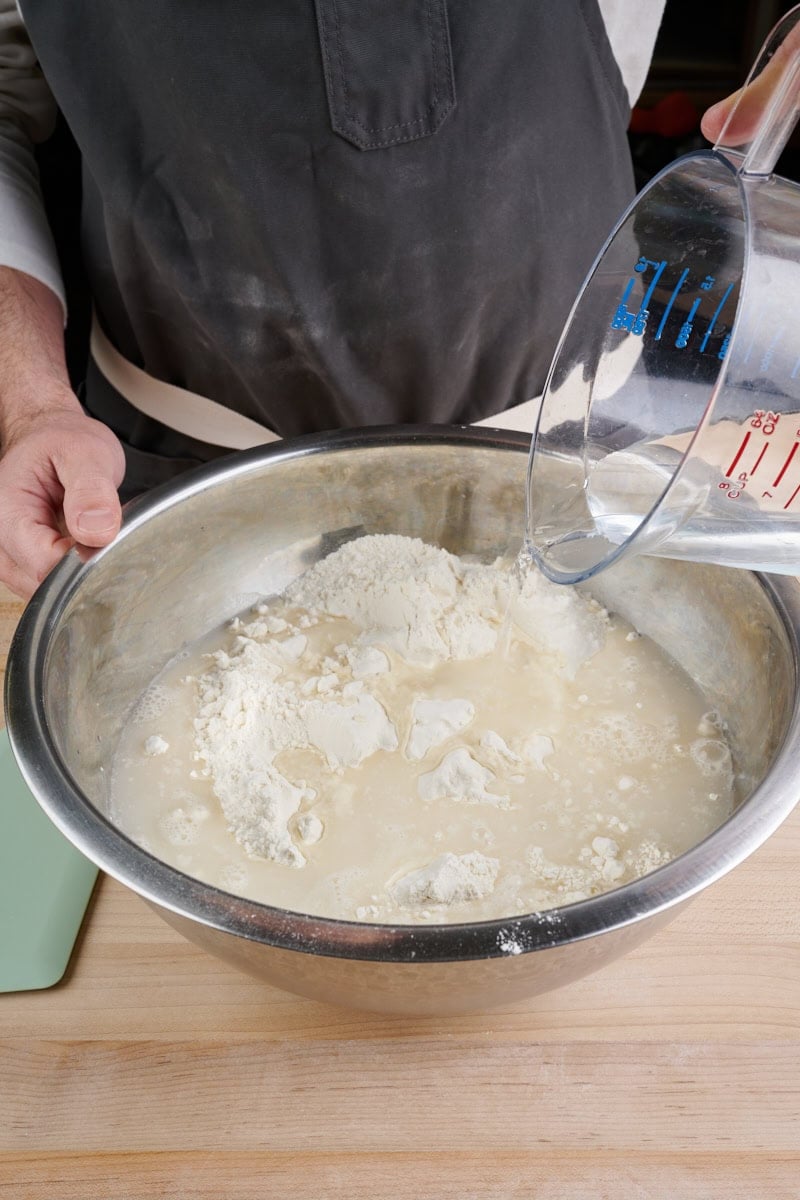
Hydration Strategy: The Role of Water
Higher dough hydration generally facilitates the creation of an open crumb. Water acts as a solvent, enabling the proteins in flour to hydrate and form a more extensible gluten network. This allows the dough to stretch and expand more readily without tearing, accommodating the gases produced during fermentation. Furthermore, the steam generated from higher water content during baking helps to push the crumb open.
However, it’s important to note that high hydration is not a prerequisite for an open crumb. Doughs with increased water content are more challenging to handle and require greater skill in developing adequate dough strength. Pushing hydration beyond the flour’s capacity can result in a weak, soupy dough that struggles to hold its structure.
The optimal hydration level is a delicate balance: enough to create a soft, extensible dough that can expand freely, but not so much that the dough becomes unmanageable. The dough should feel alive, silky, supple, and responsive, rather than slack or soupy. While a hydration level of 70% can yield an open crumb, 80% might make it easier for experienced bakers working with wetter doughs.

Key takeaway on hydration: Increased dough hydration can assist in achieving an open crumb, but it is not an absolute necessity and must be balanced with dough handling capabilities.
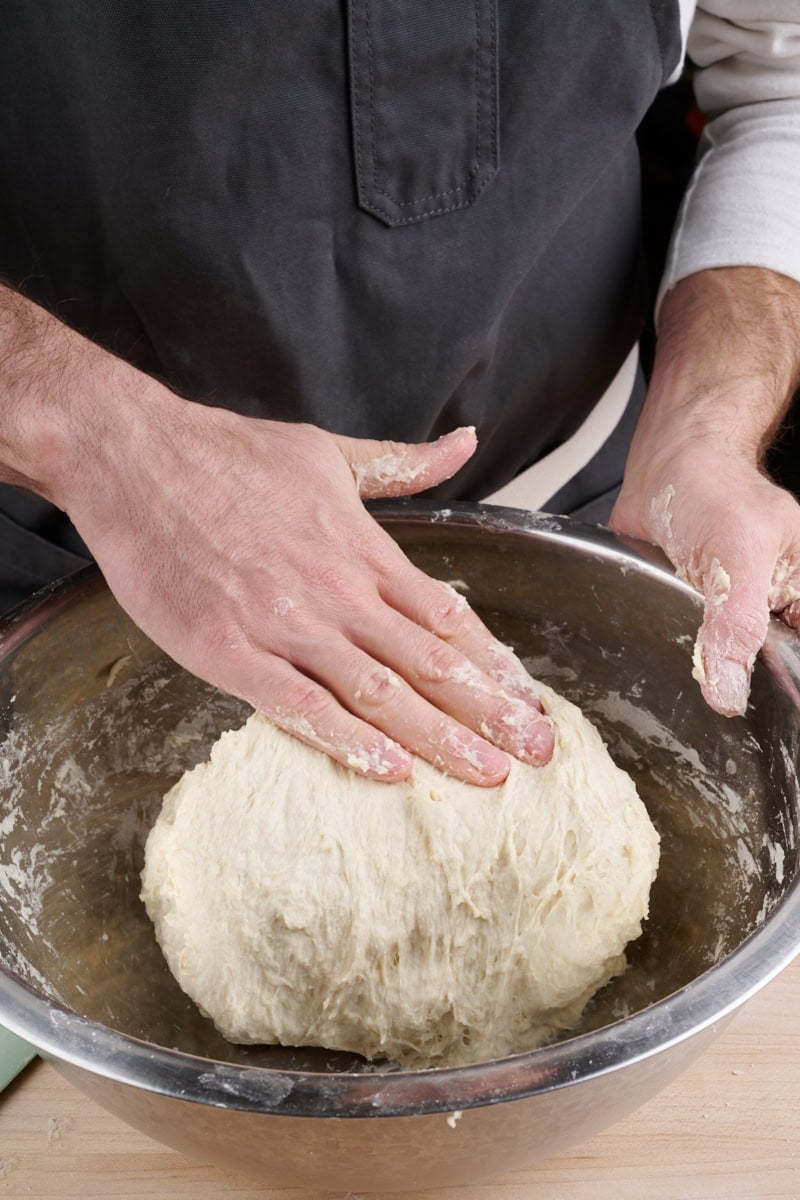
Strengthening the Dough: The Importance of Gluten Development
Dough development, encompassing mixing, strengthening, and handling, is intrinsically linked to the dough’s ability to retain its structure. Sufficient gluten development is crucial for creating a network capable of trapping gas and expanding to form the characteristic open crumb.
Underdevelopment of gluten results in weak pockets that are prone to collapse, leading to a dense, tight crumb. Conversely, over-developing the dough can create a gluten network that is too elastic, resisting the very expansion needed for an open interior. This can lead to a closed crumb, albeit for different reasons than underdevelopment.
Many home bakers, particularly those mixing by hand, tend to underdevelop their dough. The dough might feel tighter and more elastic than it should, lacking smoothness and struggling to hold its shape.
A recommended approach: Mix the dough for a few minutes longer than feels comfortable. Employ techniques such as repeated folding in the bowl, slap-and-folds, or machine mixing on a medium speed. The goal is a dough that is smooth, elastic, and can be stretched into a thin membrane without tearing – approaching the windowpane test. When in doubt, it is generally better to err on the side of slightly more mixing.

In essence for dough strengthening: Develop the gluten sufficiently to build a robust network, but avoid overworking the dough to the point of extreme elasticity.
Gentle Preshaping and Shaping: Preserving the Delicate Structure
The dough at this stage contains thousands of gas pockets, each encased by gluten walls. Rough handling during preshaping and final shaping can rupture these delicate bubbles, breaking them into smaller versions and resulting in a tighter, more uniform crumb.
Gentle handling is paramount, especially during these crucial shaping stages. The dough has spent hours building a delicate internal structure, and forceful manipulation can undo this progress. When shaping, avoid pressing down too hard or slapping the dough against the counter. Instead, aim for a fluid, controlled motion that respects the air within the dough.
In short for handling: Be gentle with the dough to preserve its carefully developed structure and its potential for an open crumb.
The Batard Advantage: Why Shape Matters
In the experience of many bakers, oval-shaped loaves, or batards, consistently yield a more open crumb than round boules. This phenomenon can be attributed to two primary factors:

- Gentler Shaping Technique: Batard shaping typically involves a more linear motion, rolling the dough into a cylinder. This process is generally less compressive than shaping a boule, which often requires tucking and creating tension all around the dough. The gentler manipulation of a batard helps to preserve the delicate gas pockets developed during bulk fermentation.
- Baking Geometry: The elongated profile of a batard allows for faster and more even heat penetration. This can lead to a more pronounced oven spring and a more open crumb structure. For an extreme comparison, consider a thin baguette versus a thick, round miche. The baguette, with its slim cross-section, is known for its irregular and open crumb, while the miche tends towards a denser, more uniform interior. The same dough, subjected to different shapes, can yield vastly different crumb structures.
While an open crumb is achievable with a boule, if a baker is struggling with a tight interior, experimenting with batard shaping is often recommended.
A tip for shaping: Consult guides on shaping an oval batard to master this technique and potentially improve crumb openness.
Proofing to Perfection: The Final Frontier
The final proof is the culmination of all previous steps, where fermentation transforms the dough, building the structure that will ultimately form the crumb. The objective is to achieve a dough that has risen by approximately 75% to 80% of its final potential height. This leaves sufficient reserve strength for the dough to continue expanding in the oven’s heat, a process known as oven spring, which is critical for opening the crumb.
Overproofing, however, leads to the breakdown of the gluten network due to excessive protease activity. The dough loses its ability to trap gas, resulting in a sluggish spread in the oven rather than a dramatic rise. While overproofed bread can develop excellent flavor, its interior will likely be tighter and denser.
Signs of sufficiently proofed dough:
- Puffy and light: The dough should feel airy and yielding.
- Responsive to the poke test: Gently pressing a finger into the dough should leave an impression that slowly springs back. An immediate spring back indicates underproofing, while a complete indentation suggests overproofing.
If the dough feels tight and springs back quickly, allow it an additional 30 minutes and re-evaluate. If it feels soft and weak, or if large bubbles are visible beneath the surface, it is time to bake immediately.
Bonus Technique: The Autolyse for Enhanced Extensibility
The autolyse technique, which involves mixing flour and water and allowing it to rest before incorporating salt and leavening agents, can significantly improve dough extensibility. During this rest period, inherent enzymes in the flour begin to break down protein bonds, making the dough more pliable and less prone to snapping back.
This technique is particularly beneficial when working with high-protein white flours that tend to be quite elastic. The autolyse period softens this elasticity, allowing the dough to expand more freely during fermentation and baking. A dough that is too elastic will resist the expansion of gas bubbles, limiting the size of air pockets. An autolyse of 30 minutes to an hour can strike a better balance, resulting in a dough that is both strong and supple.
In summary for autolyse: This optional step can enhance dough extensibility, especially with strong flours, contributing to a more open crumb.
Conclusion: The Holistic Approach to Open Crumb Sourdough
Achieving an open crumb in sourdough bread is not the result of a single trick but rather a harmonious integration of several deliberate choices. From the selection of flour and the timing of starter usage to hydration levels, gentle handling, and precise proofing, each step influences the final outcome. Understanding these interconnected elements is key to mastering sourdough baking.
Bakers are encouraged to experiment, vary hydration levels with the same flour, use their starter at different stages of ripeness, and adjust shaping techniques. Keeping detailed baking notes will facilitate comparison and aid in understanding how each variable affects the bread.
While flavor remains the paramount consideration, texture undeniably plays a vital role in the overall enjoyment of bread. An aerated crumb enhances every bite, whether it’s spread with butter, layered in a sandwich, or savored on its own. Ultimately, the desired level of openness is a personal preference. Some individuals prefer a tighter crumb, and this is entirely valid and appropriate for certain bread styles.
It is essential to remember that delicious bread comes in many forms. A dense, hearty loaf rich in whole grains can be as satisfying, if not more so, than an airy, open-crumbed batard. The goal is not perfection or an Instagram-worthy appearance, but bread that brings joy to the baker and immense pleasure to the eater. The journey of sourdough baking is one of continuous learning, with the bread itself serving as the most insightful teacher.
Open Crumb Bread FAQs
How can I avoid an open crumb bread?
For those who prefer a less open loaf, gentle degassing of the dough during shaping can help redistribute gases, leading to fewer large holes. Before final shaping, use a flat hand to gently pat down the dough from top to bottom, flattening it slightly to encourage a more uniform distribution of air.

My bread has a nice open crumb. Why is it gummy or tough?
This issue can arise from using flour that is excessively strong, meaning it has too high a protein percentage. In such cases, the strong white flour can contribute to a tough, rubbery mouthfeel in the finished bread.
What’s Next?
For a reliable and transformative recipe that consistently yields a loaf with a creamy, open crumb, explore "My Best Sourdough Recipe," a foundational recipe developed to showcase these principles and create a truly showstopping bread.